The good news is that not all signs of decay or fungus spell doom for your tree. Many issues, when caught early, can be managed with some straightforward DIY care. The key is knowing how to assess the situation correctly and understanding when a problem is beyond a simple fix and requires a professional eye.
Ignoring a potentially sick tree can lead to catastrophic failure, causing thousands of dollars in property damage. On the other hand, hiring a professional for a minor issue might be an unnecessary expense. This guide is designed to be your friendly expert, walking you through a step-by-step assessment of your tree’s health. We’ll help you diagnose the problem, tackle manageable repairs, and recognize the critical signs that mean you need to call a certified arborist right away.
What’s Causing the Rot on My Tree?
Before we grab any tools, let’s quickly understand what we’re dealing with. Tree rot is primarily caused by fungi. These organisms are experts at breaking down wood cellulose. While some fungi are harmless, others can compromise a tree's structural integrity from the inside out.
Here are the common symptoms that indicate a potential problem:
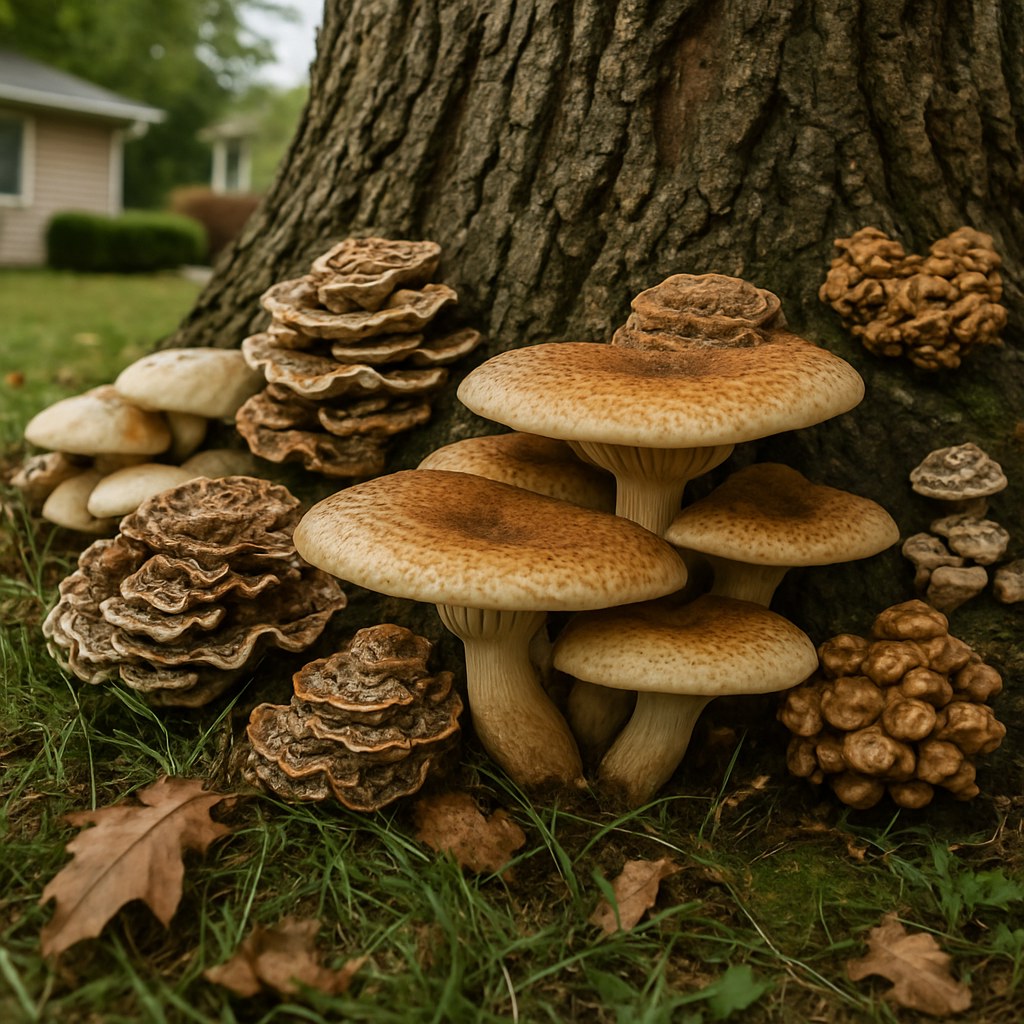
- Fungal Growth: The most obvious sign. This includes mushrooms (fruiting bodies of the fungus), shelf-like growths called conks, or fuzzy mold at the base of the trunk.
- Soft or Crumbly Wood: Healthy wood is firm. If you can easily poke into the wood with a screwdriver or if it feels spongy, decay is present.
- Loose or Peeling Bark: While some trees naturally shed bark, large sections falling off to reveal decayed wood underneath is a red flag.
- A Hollow Sound: Tapping on the trunk can reveal a lot. A solid tree sounds dense, while a decaying one may produce a dull, hollow thud.
- Leaning: A sudden or progressive lean can indicate root rot and a compromised anchor system.
- Broken or Dead Branches: An excess of dead branches in the canopy, often called dieback, can signal that the tree is struggling to transport nutrients due to root or trunk decay.
Your Step-by-Step Safety and Decay Assessment
This initial assessment is the most important part of the process. It will tell you whether you can proceed with a DIY fix or need to pick up the phone. It should only take about 20 minutes.
First, safety. Put on a pair of work gloves and safety glasses to protect yourself from splinters and debris.
-
Check the Lean from a Distance: Stand back at least 20 feet from the tree to get a full view. Is it leaning? A slight, long-standing lean might be normal for the tree, but a recent or severe lean (more than 15 degrees from vertical) is a major warning sign of instability.
-
Scan for Dangerous Branches: Walk around the entire tree. Look up into the canopy for any large branches that are broken, hanging, or completely dead. These are often called "widowmakers" for a reason and pose an immediate risk.
-
Perform the Push Test: Place your hands on the trunk at shoulder height and push firmly. A healthy, stable tree shouldn’t move. If the trunk shifts in the soil or you feel the root plate move, the tree’s anchor roots are likely compromised.
-
Do the Tap Test: Grab a rubber mallet or a similar blunt object. Tap the trunk at various spots, starting from the base and working your way up as far as you can reach. Listen carefully to the sound. A solid "thud" is good news. A dull, "hollow" sound suggests internal decay.
-
Inspect the Base Up Close: Now, get down and examine the base and root flare (where the trunk widens to meet the ground). Look for mushrooms, conks, or areas where the wood feels soft and spongy.

When You Must Call a Certified Arborist Immediately
Some situations are non-negotiable emergencies. If your assessment revealed any of the following, do not attempt a DIY fix. Call a certified arborist immediately for an inspection.
Call a professional if:
- The tree is leaning more than 15 degrees or has developed a recent, noticeable lean. This is a sign of potential root failure, and the tree could fall at any moment.
- There are large, dead, or broken branches hanging in the canopy. These can fall unexpectedly, posing a serious threat to people and property below.
- Tapping the trunk reveals a widespread hollow sound, especially high up the trunk. This indicates extensive internal decay, and the tree’s structural integrity is highly questionable.
- The fungal growth or decay covers more than 20-25% of the trunk's circumference. Widespread decay at the base makes a tree much more likely to snap.
Hiring an arborist for a consultation typically costs between $100 and $200, a small price for professional peace of mind. In contrast, emergency tree removal after a fall can cost thousands and doesn't account for the potential cost of repairing your home or car.
DIY Solutions for Minor to Moderate Tree Decay
If your tree passed the critical safety assessment—meaning it's stable, has no major hanging branches, and the decay seems localized—you may be able to take steps to manage the issue and improve its health.
How to Treat Minor Surface Decay
This approach is best when the decay is confined to a small patch at the very base (covering less than 20% of the circumference) and the trunk above it sounds solid.
Tools You'll Need: Work gloves, hand pruners, a stiff brush, copper fungicide spray, wood chip mulch.
- Clean the Area: Use hand pruners to carefully clip away any small, loose flaps of bark around the affected spot. Be gentle and don't cut into healthy wood.
- Scrub Away Debris: With a stiff brush, lightly scrub the exposed wood to remove surface dirt and visible fungal debris. The goal is to clean the surface, not excavate the wood.
- Apply Fungicide: Spray the cleaned area with a copper fungicide spray until the surface is damp. This helps to slow the fungal growth on the surface.
- Mulch Properly: Spread a 2-inch layer of wood chip mulch in a 3-foot radius around the tree. Crucially, keep the mulch at least 2 inches away from the trunk itself. Piling mulch against the trunk traps moisture and is a leading cause of decay at the base. Ensure the mulch is level with the surrounding soil.
How to Mitigate Moderate Decay and Poor Drainage
If the issue seems related to overly wet soil and the decay isn't severe, improving the environment around the tree's base can make a huge difference.
Tools You'll Need: Work gloves, hand pruners, a rake, landscape stakes, a bucket of gravel, wood chip mulch, copper fungicide spray.
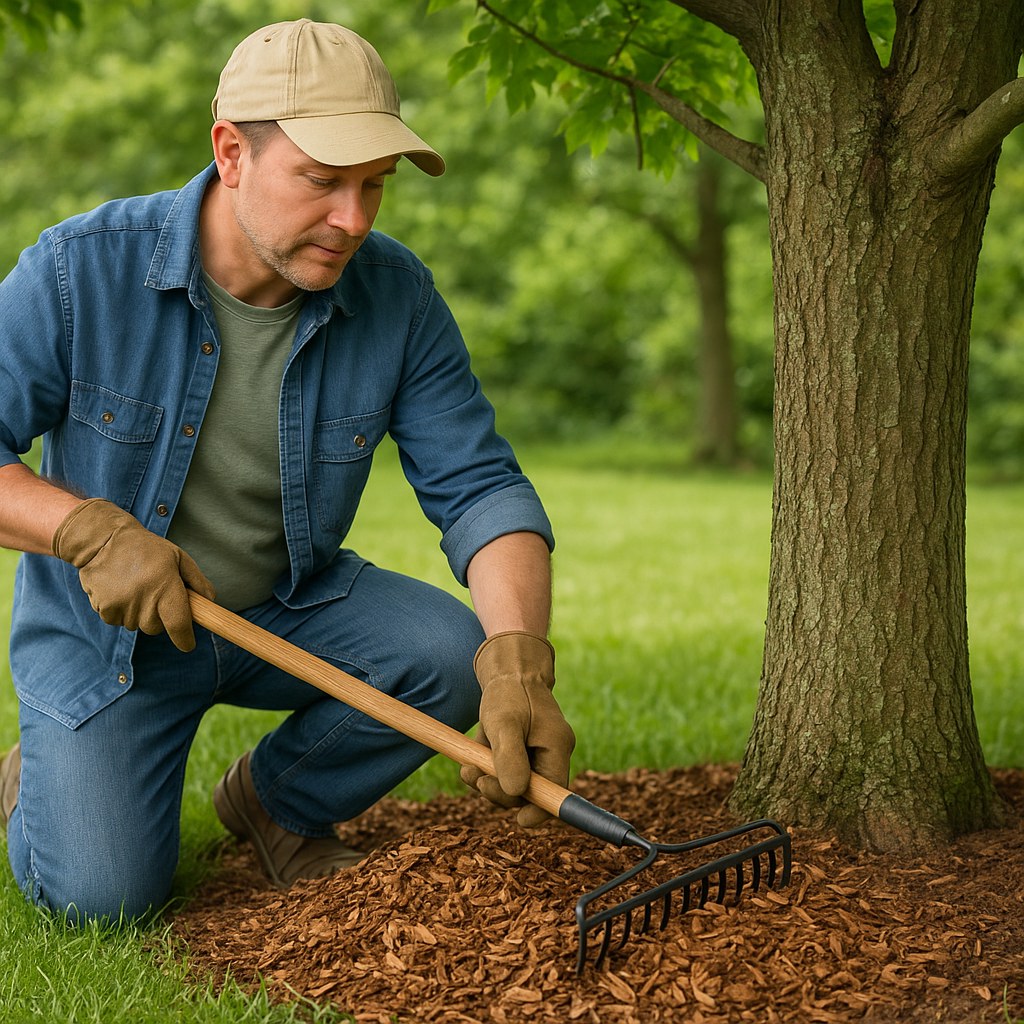
- Expose the Root Flare: Use a rake to gently clear away excess soil, turf, and debris from the base of the tree until the root flare is visible. The root flare is critical for the tree's health and should never be buried.
- Check for Poor Drainage: Push a 12-inch landscape stake into the ground about a foot away from the trunk. If it comes out muddy and wet, you likely have a drainage problem.
- Improve Drainage: In the wettest spots, mix a 5-gallon bucket of clean gravel into the top 3-4 inches of soil. This will help break up compacted soil and allow water to drain away from the trunk.
- Mulch Correctly: Just as with minor decay, apply a 2-inch layer of wood chip mulch in a wide ring, keeping it pulled back from the trunk.
- Treat Visible Fungus: Lightly spray any visible mushrooms or conks with a copper fungicide spray to reduce their spread.
Long-Term Monitoring is Key
After performing these DIY treatments, your job isn’t over. A tree with a history of decay needs regular check-ups.
- For minor surface decay, inspect the tree every six months. Look for any new fungal growth or expansion of the original spot.
- For trees where you’ve mitigated drainage, check on them quarterly. Ensure the root flare remains exposed and the soil isn't waterlogged.
If at any point you feel uncomfortable with the tree's condition or notice the problem getting worse, don't hesitate to schedule a non-emergency consultation with an arborist.
Final Thoughts
Dealing with a rotting tree can be daunting, but by following a calm, methodical approach, you can effectively assess the risk and take the right course of action. Remember to prioritize safety above all else—a tree can be replaced, but your home and family cannot.
For more expert home maintenance tips, step-by-step repair guides, and easy access to certified professionals in your area, download the Casa app today. Casa empowers you to manage every aspect of your home with confidence, from the foundation to the tallest tree in your yard.


