These sneaky air leaks are more than just a minor annoyance; they're like tiny, open windows that let your conditioned air escape and the outside elements creep in. According to the U.S. Department of Energy, air leaks can account for a significant portion of your home's heating and cooling costs—sometimes as much as 25-40% of the energy used. That means you’re literally paying to heat or cool the outdoors.
The good news is that finding and fixing these leaks is often a straightforward DIY project that can make your home significantly more comfortable and energy-efficient. Think of it as putting on a proper windbreaker for your house.
In this guide, we'll walk you through how to play detective, hunt down those pesky drafts, and seal them up for good. Let’s get your home sealed up and cozy.
Part 1: How to Find the Source of Air Leaks in Your Walls
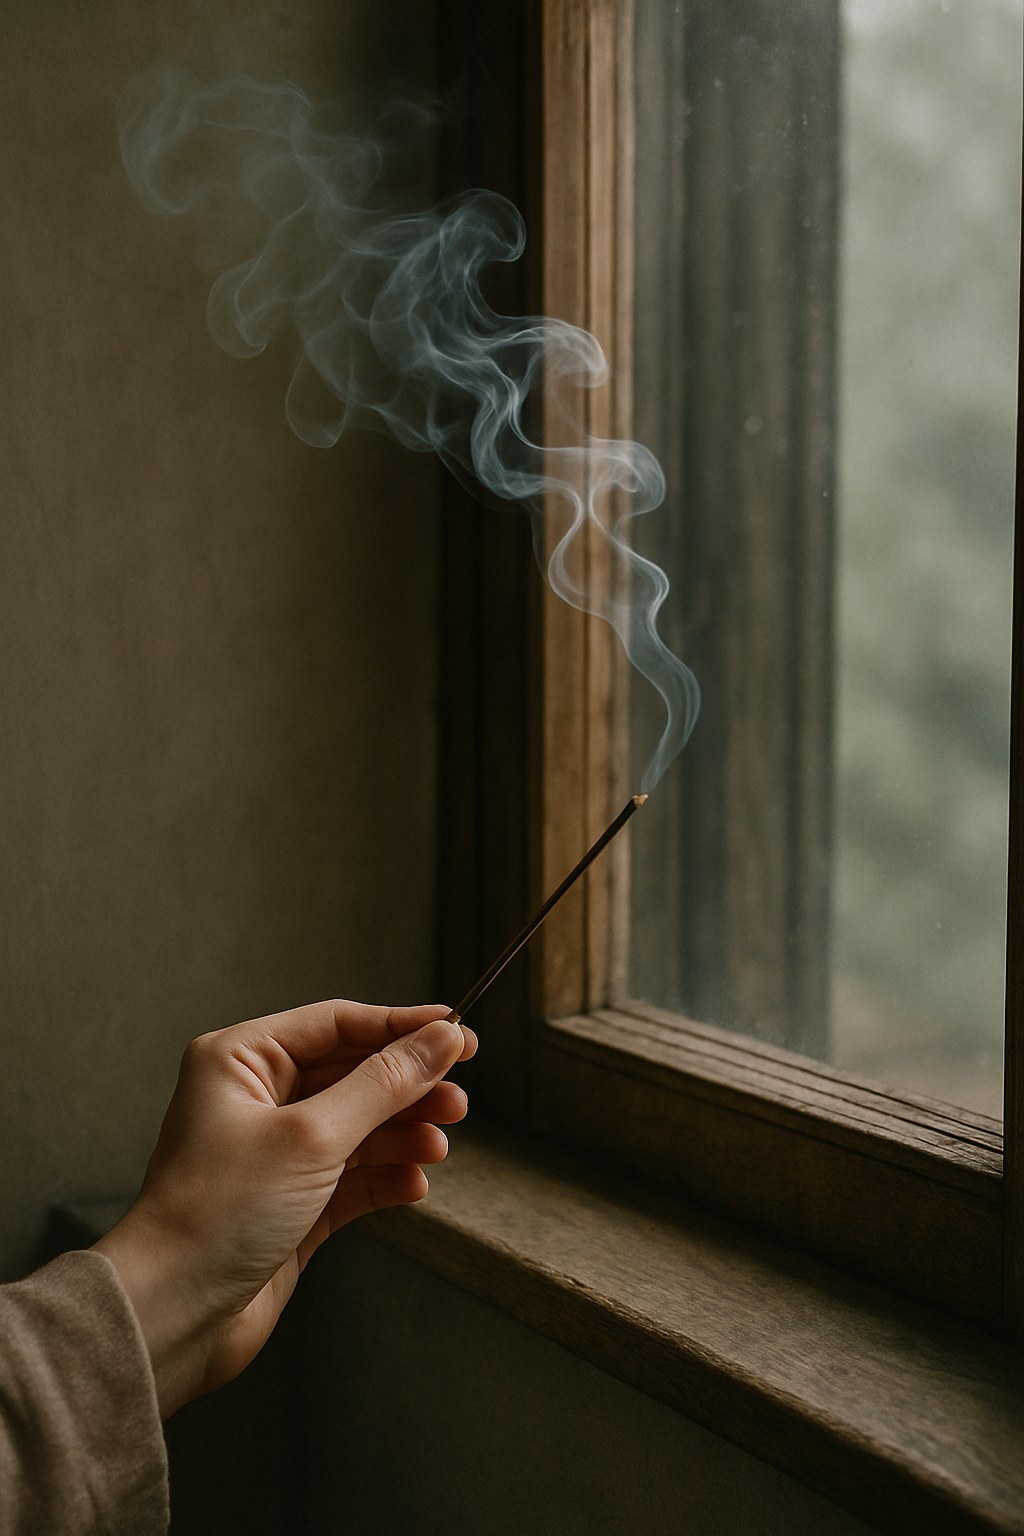
Before you can fix a leak, you have to find it. Air is invisible, so we need a way to see where it’s moving. The easiest and most effective way to do this at home is with a simple tool: an incense stick. It might sound a bit old-fashioned, but it works like a charm.
Here’s your game plan for becoming a draft detective:
-
Create a Controlled Environment: First, you want to maximize the pressure difference between inside and outside to make drafts more obvious.
- Close all exterior windows and doors tightly.
- Turn off your furnace, air conditioner, and any fans. You want the air inside to be as still as possible.
- Turn on any exhaust fans you have, like in the bathroom or kitchen. This helps pull air in through the cracks, making leaks easier to spot.
-
Light Your Tool: Light an incense stick and let it smolder so it produces a steady, visible stream of smoke.
-
Begin the Hunt: Slowly and carefully move the smoking incense stick along common leak points in your walls. Pay close attention to:
- The edges of window and door frames.
- Around electrical outlets and light switches.
- Where baseboards meet the floor.
- Anywhere pipes, vents, or wires penetrate the wall.
- Cracks in drywall or plaster.
-
Watch the Smoke: As you move the incense stick, watch the smoke trail. If it remains straight and rises vertically, there’s no draft. If the smoke wavers, gets blown sideways, or is sucked toward the wall, you’ve found an air leak!
-
Mark Your Targets: When you find a leak, mark the spot with a small piece of painter's tape. This will create a map of all the areas you need to address.
Once you’ve gone through the room or the entire house, you’ll have a clear picture of where your problem spots are. Now, it’s time to fix them.
Part 2: Sealing the Most Common Air Leak Culprits
Most air leaks happen where different materials meet or where holes have been cut into your walls. Let's tackle these easy wins first.
How to Seal Drafty Windows and Doors
The frames around windows and doors are notorious for leaks. Over time, sealant cracks and weatherstripping compresses, leaving gaps for air to pass through.
- What You’ll Need: Weatherstripping (adhesive-backed foam or V-strip), caulk, caulk gun, putty knife.
- The Fix:
- Inspect and Clean: Check the existing weatherstripping. If it’s cracked, brittle, or compressed, it’s time for a replacement. Use a putty knife to scrape off the old material and clean the surface with a cloth.
- Apply New Weatherstripping: Cut the new weatherstripping to size and apply it firmly around window sashes and door jambs. Make sure it creates a snug seal when the window or door is closed.
- Caulk the Gaps: On the exterior of your home, check the seam where the window or door trim meets the siding. If you see cracks or gaps, apply a smooth, continuous bead of high-quality exterior caulk to seal them up. A door sweep at the bottom of exterior doors can also work wonders.
How to Stop Drafts from Electrical Outlets and Switches
You might be surprised by how much cold air can blow through your outlets, especially on exterior walls. These are essentially unsealed holes leading directly into your wall cavity.
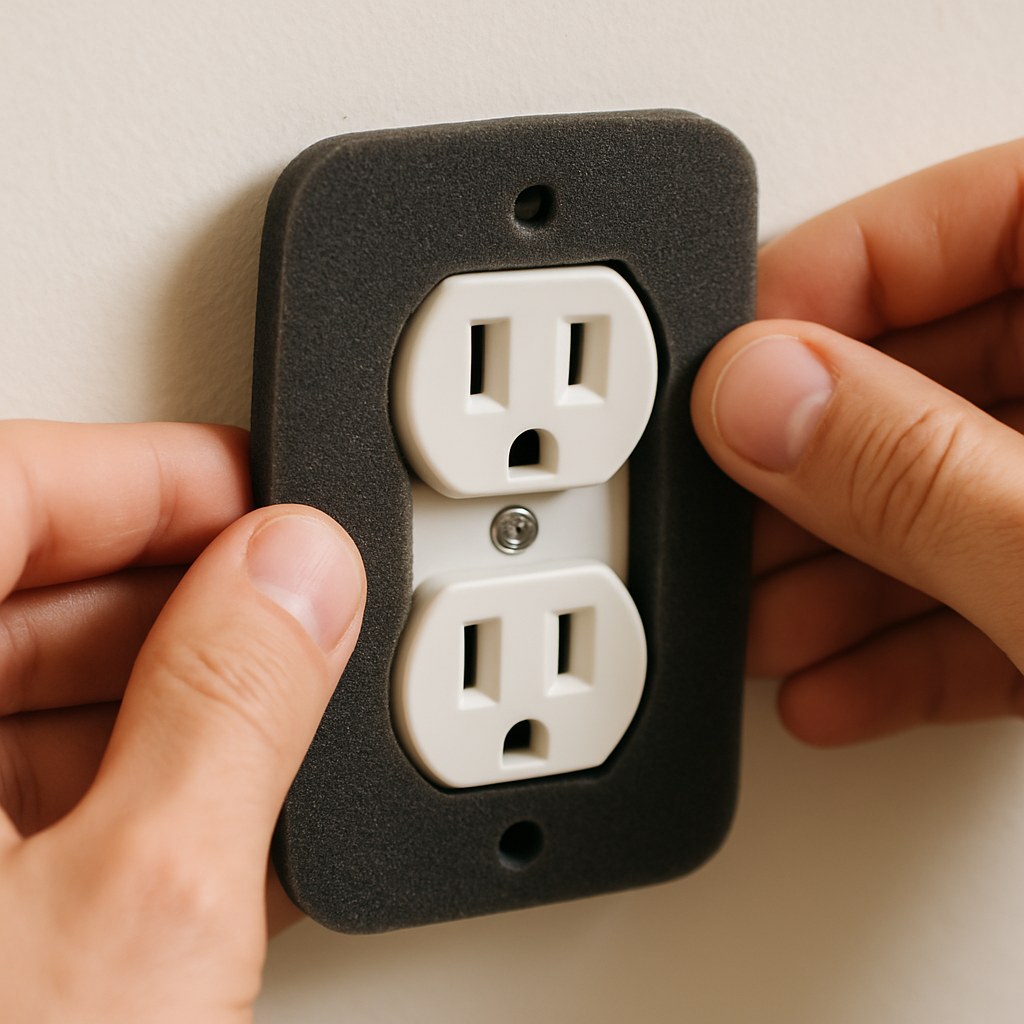
- What You’ll Need: Foam outlet gaskets, non-contact voltage tester, screwdriver.
- The Fix:
- SAFETY FIRST: Go to your electrical panel and shut off the breaker for the outlets you’ll be working on. Use a non-contact voltage tester at the outlet to confirm the power is completely off.
- Remove the Cover: Unscrew and remove the plastic outlet cover plate.
- Install the Gasket: Take a foam outlet gasket (you can find these at any hardware store for just a few dollars) and press it into place over the outlet. The pre-cut holes will fit perfectly.
- Seal the Box (Optional but Recommended): For an even better seal, you can use a small amount of low-expanding spray foam to fill any visible gaps between the electrical box and the drywall. Be very careful not to get any foam inside the box itself.
- Replace the Cover: Screw the cover plate back on, turn the breaker back on, and you’re done! This simple fix takes less than two minutes per outlet and can make a huge difference.
How to Seal Gaps Around Pipes, Vents, and Wires
Anywhere a utility has to pass through a wall is a potential air leak. This is common under sinks, behind appliances, and where your cable or internet line enters the house.
- What You’ll Need: Low-expanding spray foam sealant, utility knife.
- The Fix:
- For small to medium-sized gaps around pipes or wires, low-expanding spray foam is your best friend.
- Shake the can well and attach the straw nozzle.
- Gently spray the foam into the gap, filling it about halfway—the foam will expand to fill the rest.
- Let the foam cure according to the can’s instructions (usually 15-30 minutes).
- Once it’s hard, use a utility knife to trim any excess foam flush with the wall.
Part 3: When the Whole Wall is the Problem
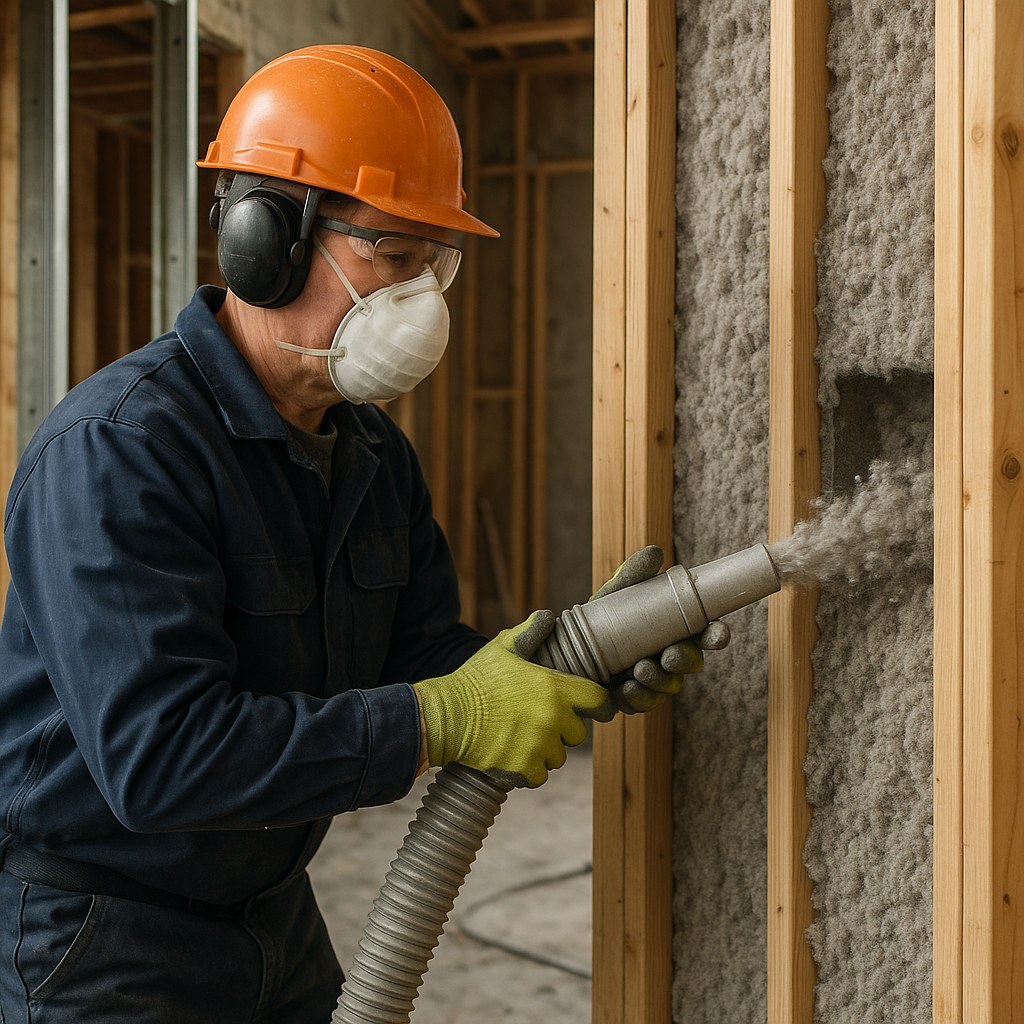
What if you’ve sealed all the obvious spots, but a wall still feels cold or drafty? In this case, the issue might not be a specific crack or gap but a lack of proper insulation inside the entire wall cavity. This is a more advanced project, but it can have the biggest impact on your home's comfort and efficiency.
Assessing your insulation can sometimes be done from an unfinished attic or basement. If you can access the top or bottom of the wall cavity, you may be able to see if the insulation is missing, compressed, or has settled over time.
For poorly insulated walls, the best solution is often adding blown-in insulation. This involves drilling small holes in the drywall and using a specialized blower to fill the stud cavities with cellulose or fiberglass insulation.
While renting a blower and doing it yourself is possible, this is often a job best left to the professionals. They can ensure the cavity is filled densely and evenly, without creating gaps or damaging your walls.
When to Call in the Professionals
While most minor air leaks are perfect for a weekend DIY project, some situations require an expert. You should consider calling a professional if:
- You've sealed all the common leaks, but your home is still drafty.
- You suspect your walls have little to no insulation.
- You see large cracks in your foundation or walls, which could indicate a structural issue.
A professional energy auditor can perform a blower door test, which is a high-tech version of the incense stick test. They will depressurize your entire house to precisely measure the overall air leakage and use an infrared camera to pinpoint every single draft source.
Hiring a contractor to air-seal your home can cost between $300 to $2,000, depending on the size of your home and the extent of the work. While it's an investment, the long-term energy savings and improved comfort often make it worthwhile.
A Warmer, More Efficient Home Awaits
Fixing air leaks in your walls is one of the highest-return home improvement projects you can tackle. With just a few simple tools and a bit of time, you can make your home more comfortable, lower your energy bills, and even reduce outside noise.
Ready to take control of your home maintenance? Download the Casa app today! Our app provides easy-to-follow, step-by-step guides for hundreds of DIY home repairs. And for those bigger jobs, Casa connects you with a network of vetted, trusted professionals in your area. Stop letting your money leak out through the walls—let’s make your house the cozy sanctuary it should be.


