The good news is that you’ve caught it, and figuring out the source is usually straightforward. Most window leaks come from one of two places: rainwater getting in from the outside or condensation forming on the inside.
This guide will help you calmly diagnose the problem, walk you through some simple repairs you can likely handle yourself, and clarify when it’s best to call a professional for help.
Finding the Source of the Water
Before you can fix the problem, you need to determine where the water is coming from. Let's start with a simple investigation.
Grab a flashlight, even during the day, as it can help highlight moisture and water stains.
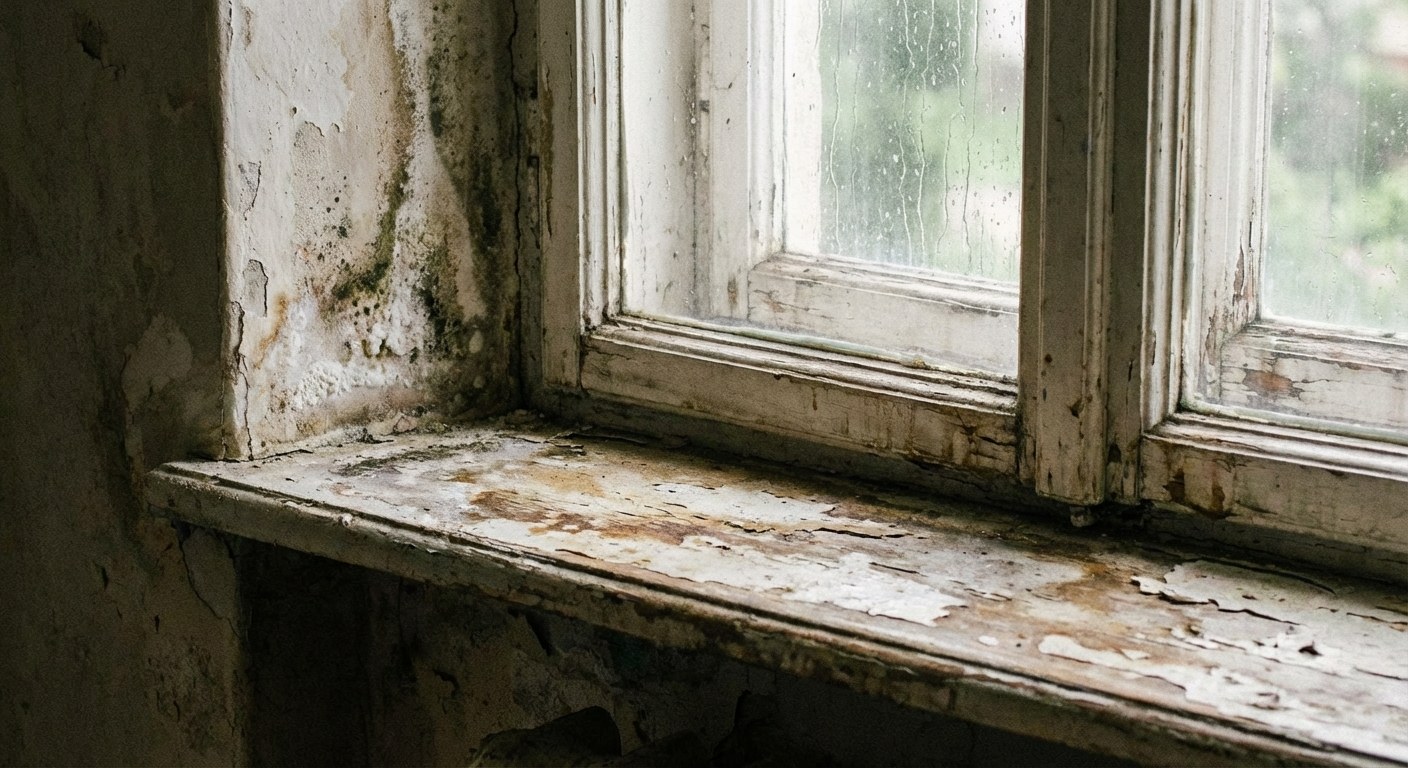
- Inspect the inside: Look closely at the window frame, the sill, and the wall below and around the window. Are there active drips, damp spots, or discolored areas?
- Check the outside: Examine the exterior of the window. Do you see peeling paint, gaps in the frame, or cracked sealant (also called caulk) where the window meets the house siding?
- Consider the timing: Does the moisture only appear during or immediately after it rains or snows? If so, the source is almost certainly an external leak. If the dampness is constant or appears on dry, cold days, it’s more likely caused by condensation from inside your home.
Once you have a better idea of the timing, you can move on to the right solution.
How to Fix Leaks from Rain or Snow
If water only shows up after precipitation, the seals protecting your home from the outdoors have likely failed. The fix depends on your window frame’s material.
For Vinyl or Metal Windows
On vinyl or metal windows, the most common failure point is the exterior caulk. Over time, caulk can dry out, crack, and pull away from the frame, creating a path for water.
When it’s safe to try yourself:
If the metal flashing (the L-shaped metal strips that direct water away from the top of the window) appears intact and the window frame feels solid, re-caulking is a simple and effective DIY repair.
How to Re-Caulk a Window:
- Remove the old caulk: Using a utility knife, carefully cut along the edges of the old caulk bead and pull it away. Scrape off any remaining bits.
- Clean the surface: Wipe the area with a damp cloth to remove any dirt or debris and let it dry completely.
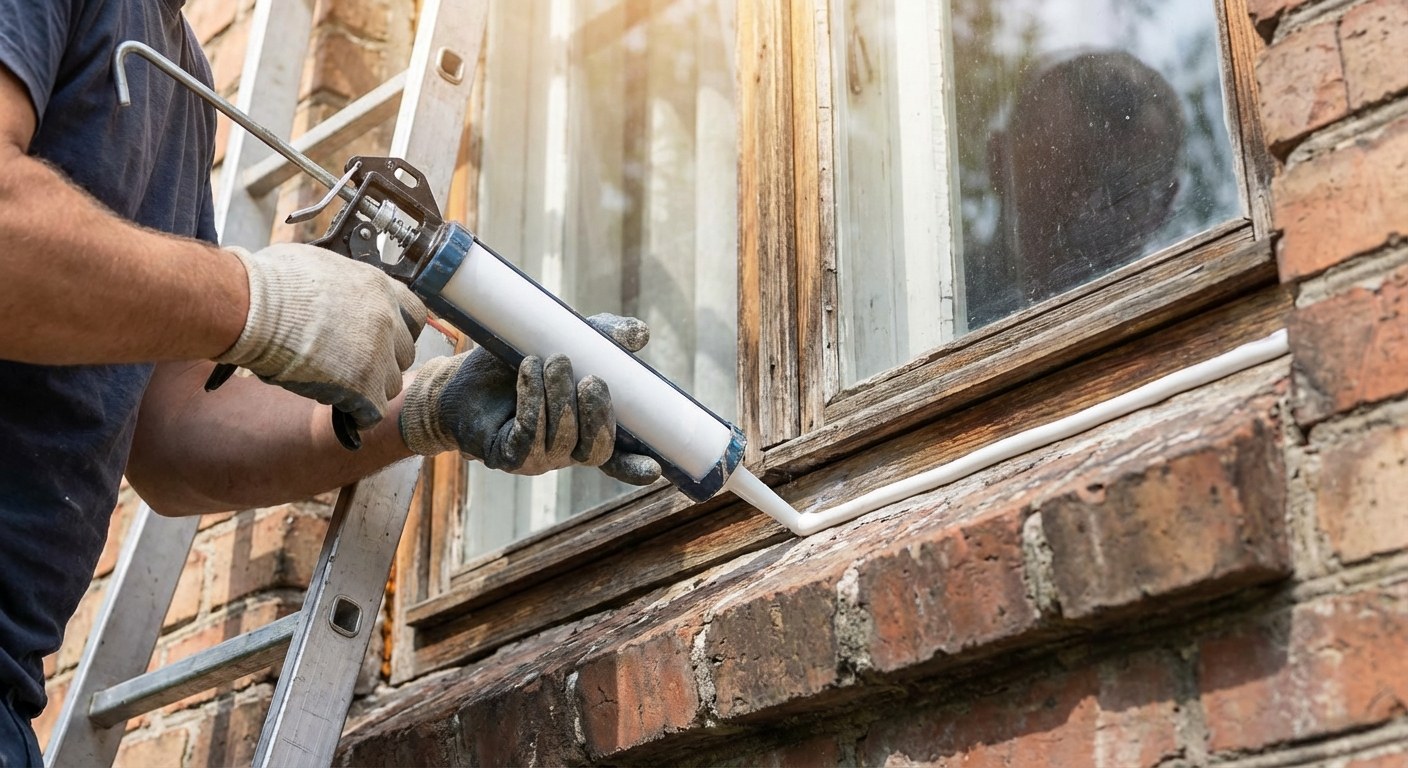
- Apply new caulk: Use a caulk gun to apply a continuous, steady bead of exterior-grade silicone caulk into the joint between the window frame and the siding.
- Smooth the bead: Use a wet finger or a caulk-smoothing tool to press the bead into the gap, creating a smooth, watertight seal.
- Let it cure: Allow the caulk to cure for the time specified by the manufacturer (usually at least 24 hours) before it’s exposed to rain.
For Wood Windows
Wood frames can be vulnerable to rot if their paint seal is compromised. A small area of soft wood can often be repaired without replacing the entire window.
How to Check for Wood Rot:
Use a screwdriver or an awl to gently poke the areas that look damaged or discolored. If the wood feels soft and spongy or crumbles easily, you’re dealing with rot.
When it’s safe to try yourself:
If the rotted section is small (less than the size of a quarter), shallow, and not in a critical structural part of the frame, you can usually repair it with epoxy wood filler.
How to Patch Minor Wood Rot:
- Remove the rot: With a wood chisel or a sturdy scraping tool, dig out all the soft, rotted wood until you reach solid material.
- Prepare the filler: Mix the two-part epoxy wood filler according to the product directions.
- Fill the cavity: Press the filler firmly into the area you cleared out, slightly overfilling it.
- Smooth and sand: Once the filler has cured (check the instructions for timing), sand it down so it’s smooth and flush with the surrounding wood.
- Prime and paint: To protect the repair from future moisture, cover it with a coat of exterior primer, followed by a top coat of paint that matches your window frame.
When to Stop and Call a Professional
While some window leak repairs are great for a homeowner to tackle, others require an expert eye and specialized tools.
It’s time to call a window repair specialist if:
- The DIY repair doesn’t work and the window still leaks during the next rainstorm. This suggests the water is getting in through a more complex path, possibly behind the siding or through the wall itself.
- The wood rot is extensive, deep, or affects a structural part of the window frame or sill.
- The metal flashing above or around the window is bent, rusted, or missing. Flashing is critical for water management and is best installed by a professional.
- You see fog, condensation, or moisture between the panes of a double-pane window. This means the seal on the insulated glass unit (IGU) has failed. The glass unit itself will need to be replaced.
How to Address Condensation Issues
If the water damage is not related to rain and you don’t see moisture trapped between the glass panes, the problem is likely excess humidity inside your home. When warm, moist indoor air hits a cold window pane, the water vapor condenses into liquid.
You can often solve this by simply reducing indoor humidity:
- Use exhaust fans: Always run the fan in your bathroom during and after a shower, and use the range hood in your kitchen when cooking.
- Improve ventilation: Briefly opening windows for 5-10 minutes a day can help exchange humid indoor air for drier outdoor air.
- Use a dehumidifier: In rooms that are consistently damp, running a dehumidifier can make a significant difference.
Typical Time and Cost
Fixing minor window water damage yourself is one of the most affordable home repairs.
- DIY Re-Caulking:
- Time: About 30-45 minutes per window, plus 24 hours of curing time.
- Cost: $15 - $30 for a tube of quality caulk and a caulk gun.
- DIY Wood Rot Repair:
- Time: About 1-2 hours of active work, plus several hours for the filler and paint to dry.
- Cost: $20 - $40 for epoxy filler, sandpaper, and a small can of primer.
- Professional Repair:
- Cost: Hiring a window specialist can range from $150 to $500 for minor repairs like flashing or complex sealing jobs. Replacing a failed insulated glass unit typically costs $250 to $700 or more, depending on the window’s size and type.
Keeping a log of your home’s condition, like noting when you last sealed your windows, can be a great help. The Casa app is an easy way to track these small but important maintenance tasks.
You Can Handle This
Finding water damage is stressful, but by working through these steps, you can identify the source and decide on the best path forward. Many window leaks are minor issues that you can resolve with a little time and effort, preventing bigger headaches down the road.
And for everything else, Casa is here to help. Download the app to manage your home maintenance, keep track of repairs, and get clear, confident advice whenever you need it.


