Your garbage disposal is a hardworking appliance, but its seals and connections can wear out over time. Whether it’s a slow drip or a steady stream, ignoring the leak can lead to water damage, mold growth, and a damaged cabinet.
In this guide, we’ll walk you through how to find the source of the leak and fix it like a pro. Let’s get that cabinet dry and your disposal back in working order.
Safety First: Turn Off the Power!
Before you even think about reaching under the sink, we need to make the area safe. Water and electricity are a dangerous combination, and your garbage disposal is a powerful electrical appliance.
- Locate Your Electrical Panel: Find your home’s main circuit breaker panel. It’s usually in the basement, garage, a utility closet, or sometimes on an exterior wall.
- Find the Right Breaker: Open the panel door. The breakers should be labeled. Look for the one that controls the "Kitchen," "Kitchen Outlets," or "Garbage Disposal."
- Flip the Switch: Flip the correct breaker to the "OFF" position. To be absolutely sure, try turning on your garbage disposal from the switch in your kitchen. If it’s silent, you’re good to go.
Now that the power is off, you can safely start your detective work.
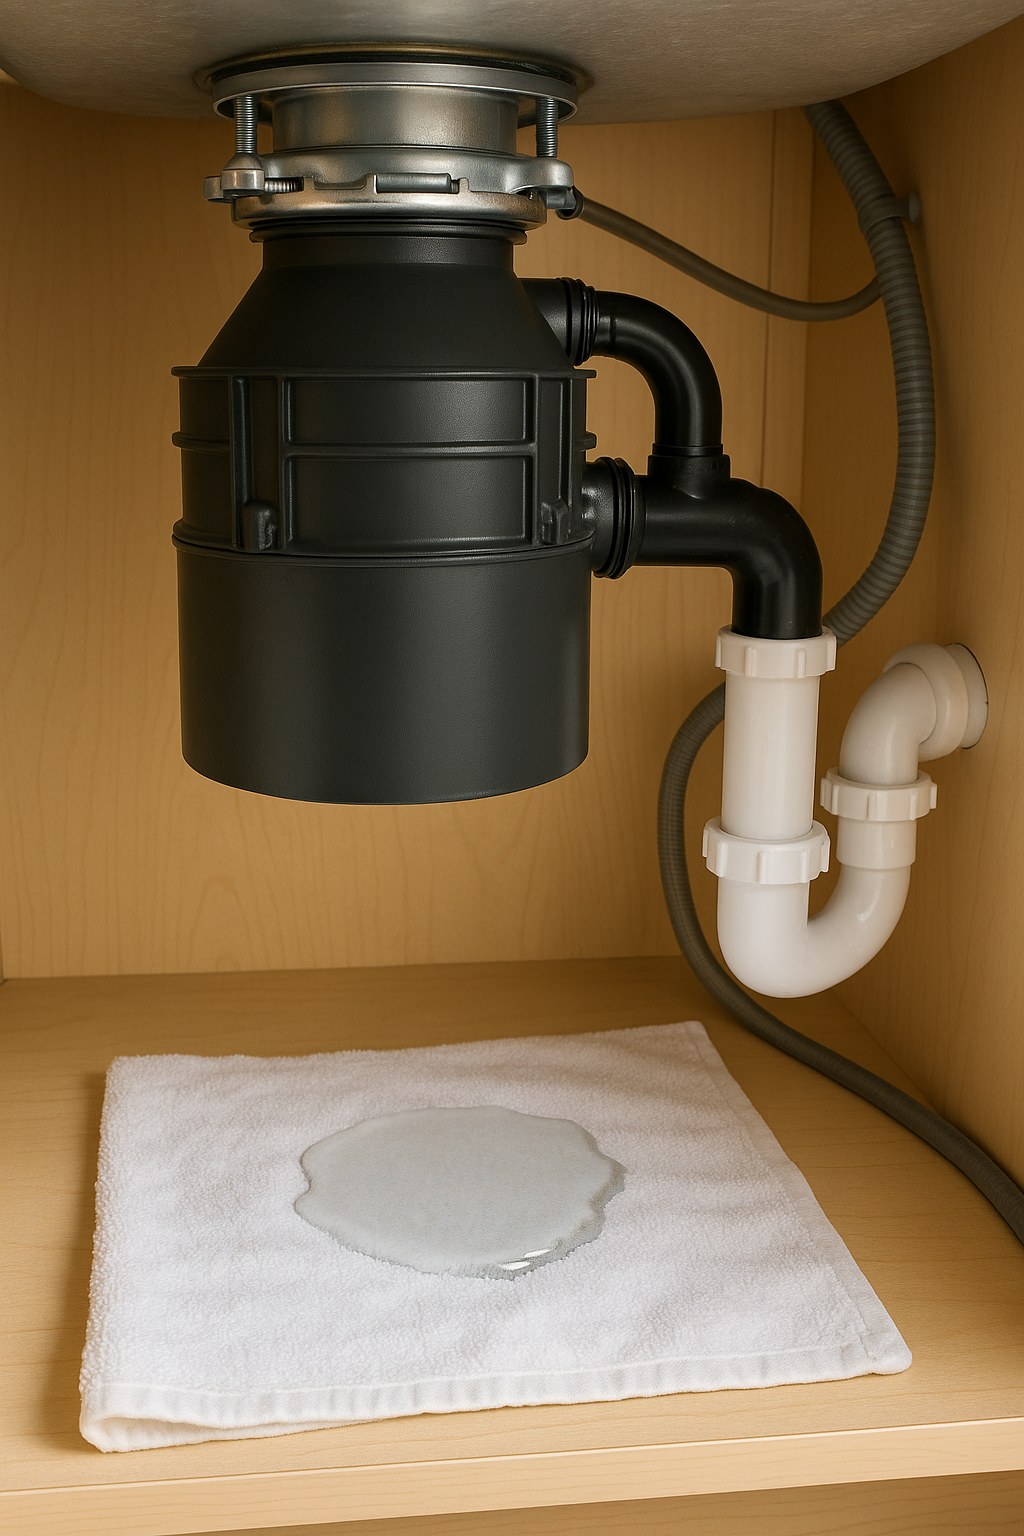
Step 1: Find the Source of the Leak
Leaks can come from several different places on the unit. Pinpointing the exact location is the key to a successful repair. To do this, we'll use a simple "fill and watch" test.
- Dry Everything: Use a towel or microfiber cloth to completely dry the outside of the garbage disposal unit, the pipes, and the hoses connected to it. A dry surface will make it easy to spot fresh drips.
- Plug the Sink: Insert the stopper into your sink drain.
- Fill the Basin: Fill the sink about halfway with water. You can add a few drops of food coloring to make any leaks more visible, but it's not required.
- Unplug and Inspect: Pull the sink stopper and let the water drain. As it flows through the disposal, use a flashlight to carefully watch all the connection points.
Leaks almost always originate from one of three areas:
- The Top: Where the garbage disposal connects to the sink itself (the sink flange).
- The Side: Where the dishwasher hose or the main drain pipe connects.
- The Bottom: From the main body or the reset button on the unit.
Let's break down how to fix each one.
Step 2: Fixing the Leak Based on Location
If the Leak is Coming from the Top (Sink Flange)
A leak from the very top of the unit, where it meets the metal drain opening of the sink, is the most common culprit. This usually means the mounting bolts have come loose or the plumber's putty that creates the seal has failed.
The Quick Fix: Tighten the Mounting Assembly
Sometimes, vibrations from the motor can loosen the mounting bolts over time.
- From under the sink, locate the "mounting ring"—the metal disc with three bolts and sloped tabs that holds the disposal in place.
- Try to tighten each of the three mounting bolts with a flathead screwdriver, turning them a half-turn at a time to ensure even pressure.
- In some cases, the entire mounting ring might be loose. You can insert a screwdriver into one of the tabs and try to turn the whole ring clockwise until it’s snug.
- Run the water test again. If the dripping has stopped, you're done!
The Real Fix: Reseal the Flange
If tightening didn't work, the seal is likely broken and needs to be replaced. This sounds intimidating, but it's a straightforward job.
- Support the Disposal: Place a bucket or a stack of wooden blocks under the disposal to support its weight when you disconnect it.
- Disconnect the Pipes: Loosen the connections for the discharge drain pipe and the dishwasher hose (if you have one).
- Remove the Unit: Insert a screwdriver into the mounting ring and turn it counter-clockwise. The disposal will unlock and drop slightly onto your support. Move it out of the way.
- Loosen the Mounting Assembly: Unscrew the three bolts on the mounting assembly until you can remove the rings and gaskets from the sink flange.
- Remove the Old Flange and Putty: From inside the sink, push the flange up and out. Use a plastic scraper to remove all the old, dried-out plumber's putty from the sink's surface.
- Apply New Plumber's Putty: Take a small amount of plumber's putty and roll it between your palms to create a rope about ½-inch thick. Press this rope firmly and evenly around the underside of the new (or cleaned) sink flange.
- Reinstall: Press the flange firmly back into the sink drain opening. From below, reinstall the gasket, backup ring, and mounting ring. Tighten the three bolts evenly until the ring is secure and you see a little putty squeeze out around the flange in the sink basin.
- Reattach the Disposal: Lift the disposal back into place, align the tabs, and turn the mounting ring clockwise until it locks. Reconnect the drain pipe and dishwasher hose.
- Turn the power back on and test for leaks.
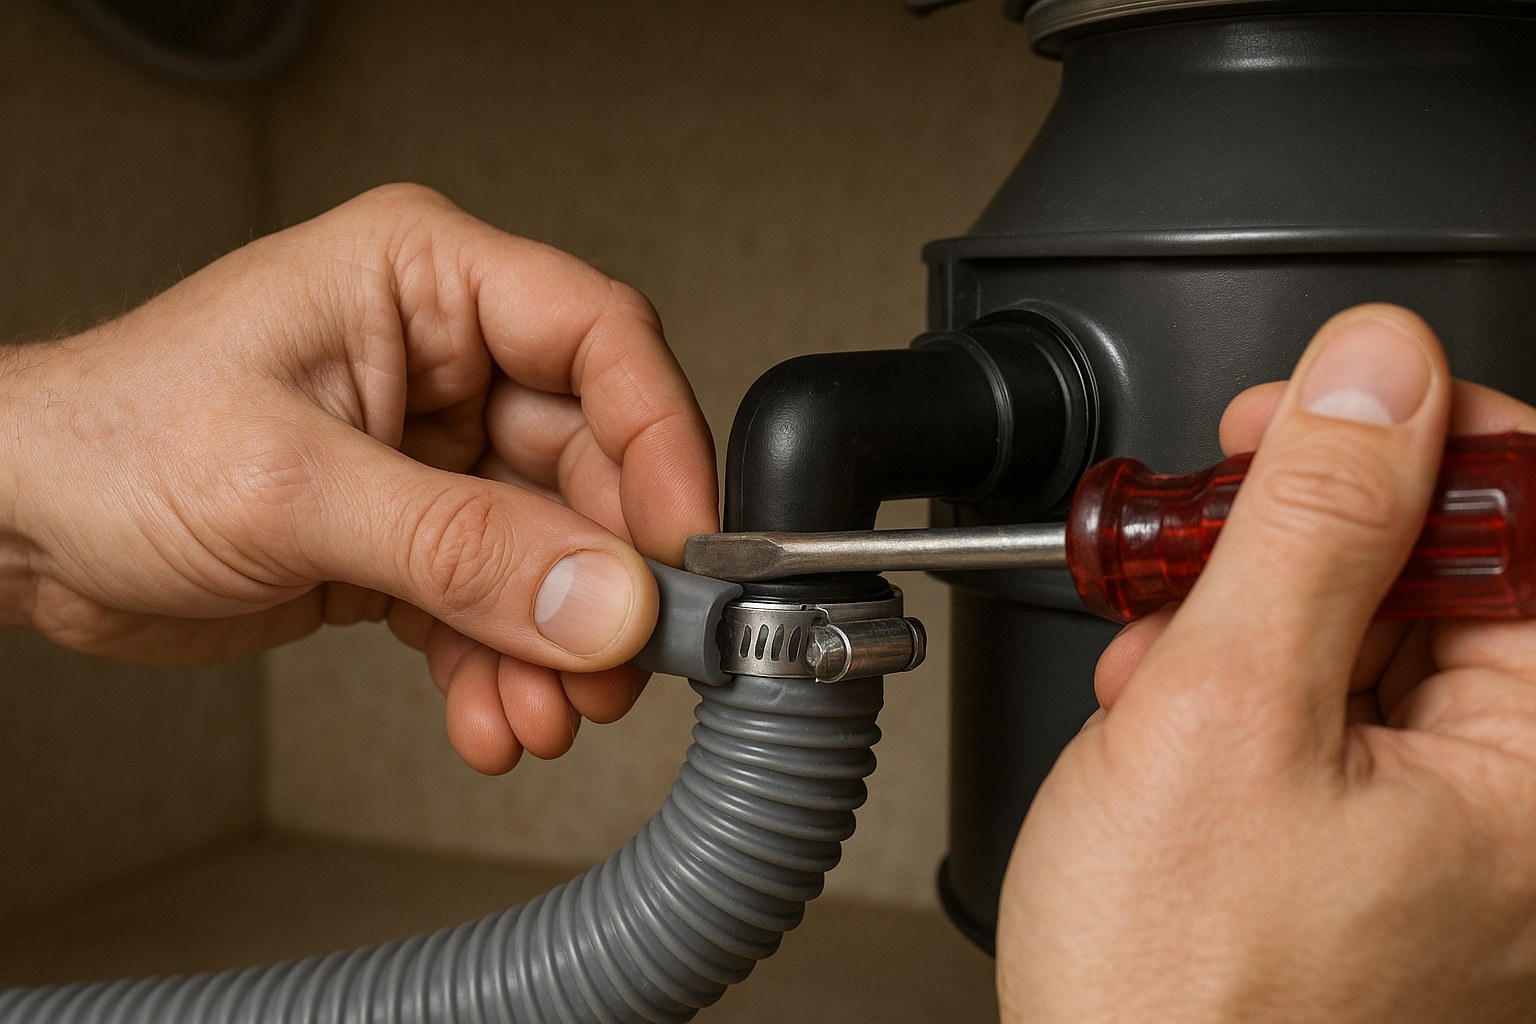
If the Leak is Coming from the Side Connections
Leaks on the side of the disposal almost always come from one of two places: the smaller hose connecting to the dishwasher or the larger pipe that carries waste to your main drain.
Fixing the Dishwasher Hose Leak:
- Use a flathead screwdriver or a nut driver to tighten the metal clamp that holds the rubber dishwasher hose to the disposal's inlet connection.
- If it still leaks, loosen the clamp and slide the hose off. Inspect the end of the hose for any cracks or splits. If it’s damaged, you’ll need to replace it. A new hose is inexpensive and available at any hardware store.
- If the hose looks fine, simply reseat it firmly on the inlet and tighten the clamp securely about ¼-inch from the end of the hose.
Fixing the Discharge Drain Pipe Leak:
- This pipe is connected to the disposal with either a metal clamp and a rubber gasket or a threaded PVC coupling.
- If it has bolts, try tightening them first. If it still leaks, the internal rubber gasket has likely failed.
- Unscrew the bolts, detach the pipe, and remove the old gasket. Take it to a hardware store to find an exact replacement.
- Install the new gasket and re-attach the pipe, making sure the bolts are tightened securely but not so much that they crack the plastic.
If the Leak is Coming from the Bottom or Housing
If you’ve checked all the connections and found that water is dripping from the main body of the garbage disposal itself, often from the bottom or the reset button, I have some bad news. This indicates that an internal seal has failed.
Unfortunately, these seals are not designed to be replaced. A leak from the housing means the unit has reached the end of its life and the entire garbage disposal needs to be replaced. Most garbage disposals have a lifespan of 8 to 12 years, so if your unit is older, a replacement is often the most practical solution.
DIY vs. Hiring a Plumber: What's the Cost?
One of the best parts about fixing a garbage disposal leak is the potential savings.
- DIY Costs: A container of plumber's putty costs around $5. A replacement gasket or dishwasher hose is typically $10-$15. Your total cost could be less than $20.
- Professional Costs: According to Forbes, hiring a plumber can cost anywhere from $70 to $150 per hour, plus parts. A simple repair might take an hour, but if the job is more complex, you could be looking at a bill of $200 or more.
By tackling this yourself, you not only save money but also gain valuable home maintenance experience.
Take Control of Your Home Maintenance
Fixing a leaking garbage disposal is a satisfying project that can save you from water damage and a hefty plumbing bill. By following these steps—staying safe, finding the source, and applying the right fix—you can solve the problem in no time.
Feeling empowered? There's more you can do! For more step-by-step guides, maintenance reminders, and a direct line to trusted professionals for those jobs you can't tackle alone, download the Casa app today. Casa is your partner in home maintenance, making it easy to care for your biggest investment.


