But a misaligned door isn't just an inconvenience. Over time, it can cause real damage to the door itself, the jamb, and even the surrounding wall. The good news is that you don’t have to live with it. Most door alignment issues are caused by common problems that you can fix yourself with a few basic tools and a little bit of know-how.
Whether your door is sticking, creating uneven gaps, or refusing to latch, we're here to walk you through it. Think of us as your friendly expert on the other end of the line, ready to help you get that door swinging smoothly again.
Why Do Doors Become Misaligned in the First Place?
Before we jump into the fix, it helps to understand what causes a perfectly good door to go rogue. Usually, it comes down to one of these culprits:
- Loose Hinge Screws: This is the number one cause. Over years of opening and closing, the screws holding the hinges to the door and the frame can work themselves loose. This causes the door to sag, leading to rubbing and latching problems.
- House Settling: All homes settle over time. These subtle shifts in the foundation can knock a door frame slightly out of square, changing the door's alignment.
- Humidity Changes: If you have wooden doors, they are susceptible to humidity. Wood naturally expands when it absorbs moisture and shrinks when it dries out. This "breathing" can cause a door to stick in the humid summer months and be fine in the winter.
- Worn-Out Hinges: The hinges themselves can wear down. The pin can become loose, or the metal plates can bend, preventing the door from hanging straight.
Now that you have an idea of what might be going on, let's figure out exactly what’s wrong with your door.
Step 1: Assess the Door for Misalignment
First things first, we need to play detective. Grab a notepad and let's carefully examine the door to pinpoint the problem. This will save you a ton of time and effort later.
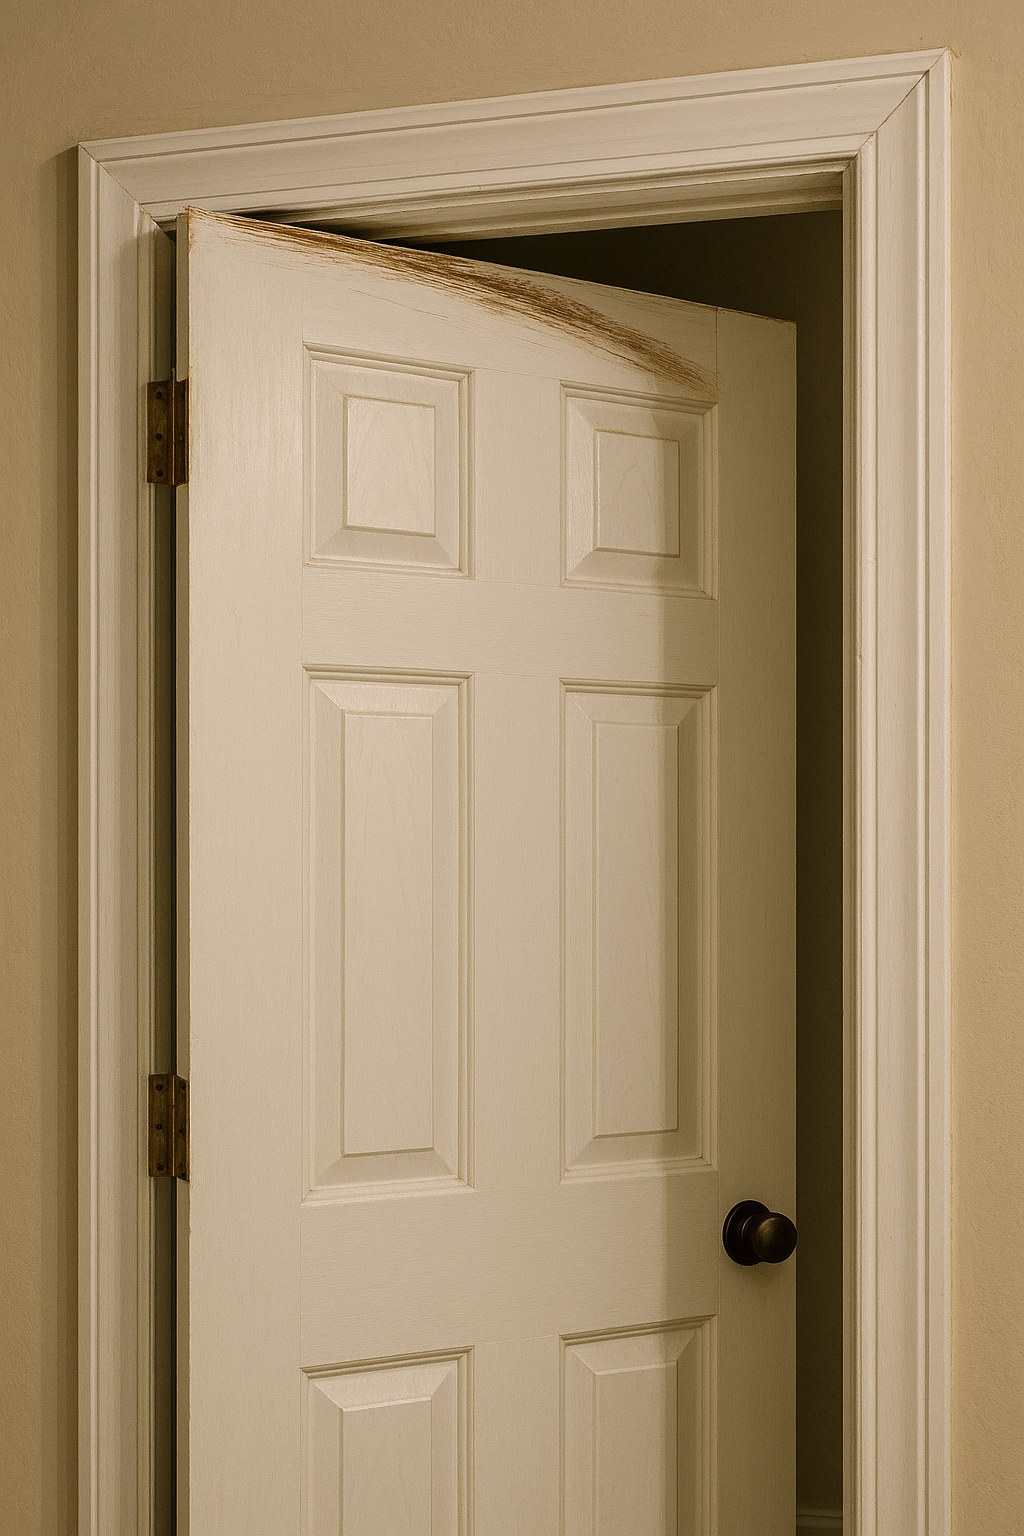
- Observe the Gaps: Close the door slowly and look at the gap between the door and the frame. Is it even all the way around? A properly aligned door should have a consistent gap (about the thickness of a nickel) on the top and both sides. Note where the gap is too wide or too narrow. A tapering gap often points to a sagging door.
- Find the Rubbing Spot: Open and close the door a few times and listen. Where does it make contact with the frame? Is it rubbing at the top, on the floor, or near the latch?
- Check for Hinge Movement: With the door almost closed, grab the handle and try to lift the door up and down. If you feel movement or see the door shifting at the hinges, you’ve almost certainly found your problem: loose hinge screws.
- Inspect the Hinges: Take a close look at each hinge. Are any of the screws sticking out? Do the hinge plates look bent or warped?
Once you’ve identified the symptoms, you can move on to the right fix. We’ll start with the easiest and most common solution.
Step 2: Time for the Fix! Four Ways to Align Your Door
We’ll work our way from the simplest fix to the most involved. Chances are, you’ll solve your problem with the very first method.
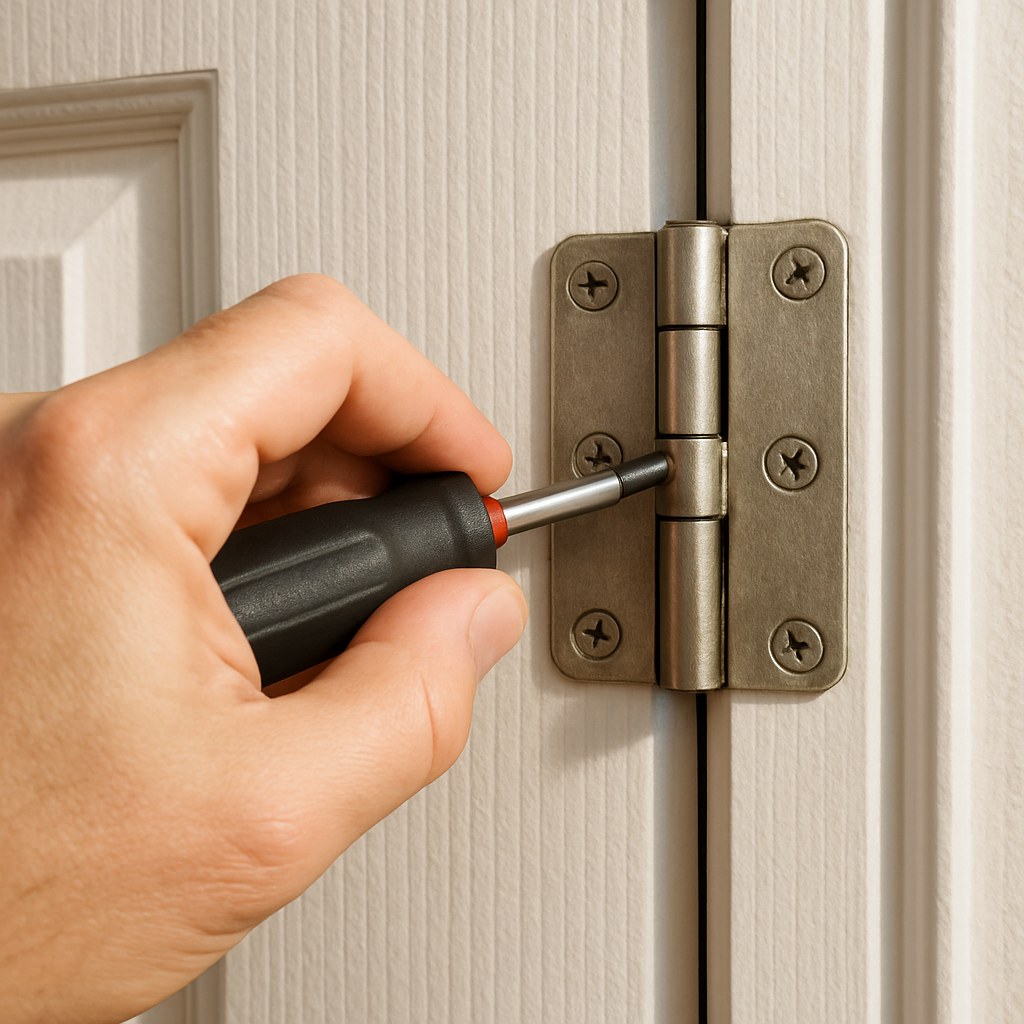
Fix #1: Tighten or Replace the Hinge Screws
If your assessment in Step 1 revealed any wiggle in the hinges, this is your starting point. A sagging door is almost always due to loose screws in the top hinge.
Tools you’ll need:
- Phillips screwdriver
- Wooden wedge or a few books
- Longer wood screws (optional, for stripped holes)
Here's how to do it:
- Place a wooden wedge or some books under the bottom corner of the door on the handle side. This will support the door's weight and take the pressure off the hinges.
- Using your screwdriver, start with the top hinge and tighten every screw on both the door side and the frame side. Don’t overtighten, just make them snug. Move down to the middle and bottom hinges and do the same.
- What if a screw just keeps spinning? This means the screw hole is stripped. Don't worry! A simple trick is to replace the existing screw with a longer one (about 2.5-3 inches). This new screw will bypass the stripped wood and anchor into the solid wall stud behind the door frame, pulling the door back into alignment.
- Once all the screws are tight, remove the wedge and test the door. Open and close it several times. Does it close smoothly? Does it latch securely? If so, you're done! Congratulations, you’ve just fixed the most common door problem.
Fix #2: Adjust the Strike Plate
If your door closes without rubbing but just won't "click" shut, the latch isn't lining up with the strike plate—the metal plate on the door jamb.
Tools you’ll need:
- Phillips screwdriver
- Pencil
- Wood chisel and hammer (or a rotary tool)
Here's how to do it:
- Close the door slowly and watch very closely to see where the latch bolt hits the strike plate. Is it too high? Too low?
- Mark the jamb with a pencil where the latch needs to go.
- Unscrew and remove the strike plate.
- Hold the plate over its new, correct position (lined up with your pencil mark) and trace its outline on the door jamb.
- Now, you need to extend the mortise (the recessed area where the plate sits). Using a sharp wood chisel, carefully remove thin layers of wood within your new outline until the strike plate can sit flush with the jamb.
- Screw the strike plate back in its new position.
- Test the door. It should now latch securely.
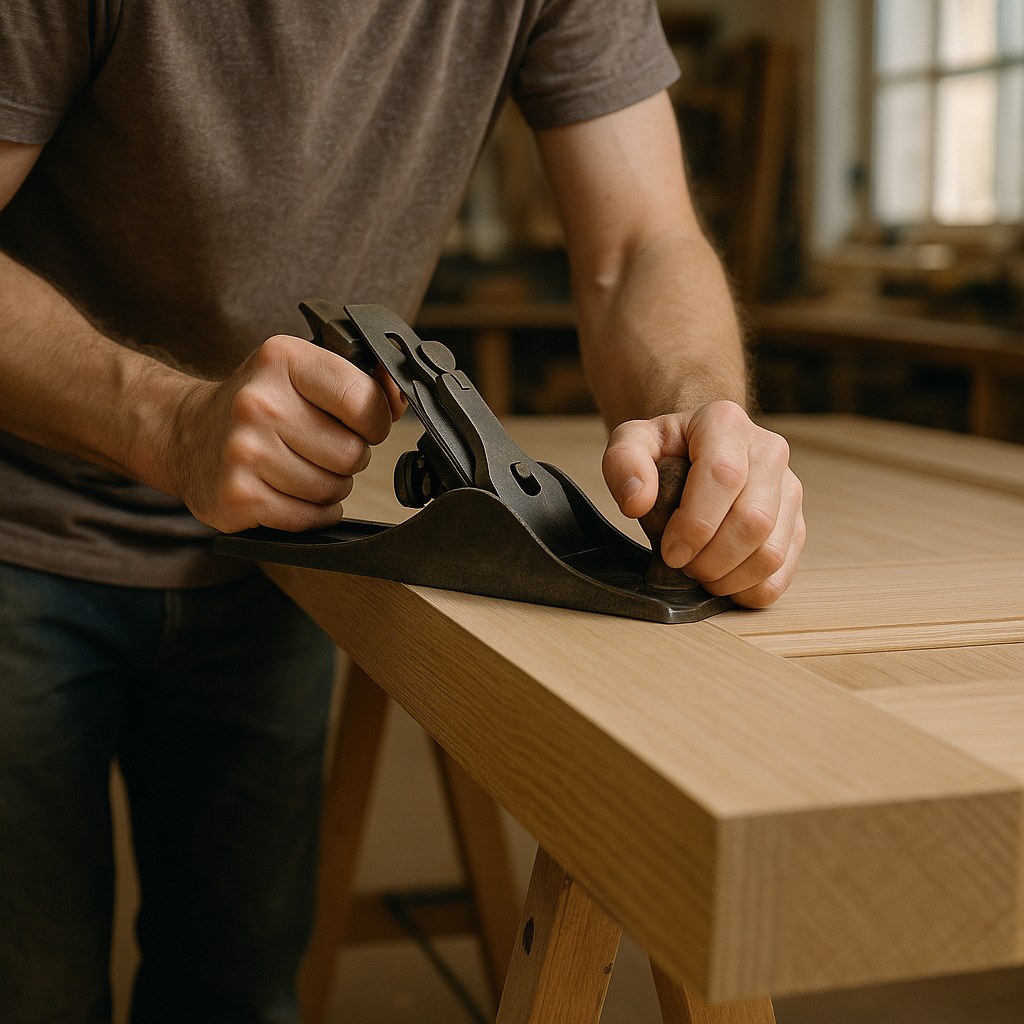
Fix #3: Plane the Door Edge (For Wooden Doors Only)
If tightening the hinges didn't solve a rubbing issue, the door itself might be slightly swollen from humidity. For wooden doors, you can carefully shave a tiny bit of material off the edge.
Tools you’ll need:
- Chalk or a pencil
- Hammer and nail punch
- Sawhorses
- Wood plane (a hand plane works great)
- Medium-grit sandpaper
- Wood sealer or paint
Here's how to do it:
- Identify the exact spot where the door is rubbing. A good trick is to rub chalk along the door frame where it makes contact, then open and close the door a few times. The chalk will transfer to the high spot on the door.
- Remove the door from its hinges. Use a hammer and nail punch to tap the hinge pins out from the bottom. With a helper, lift the door off the frame.
- Lay the door across a pair of sawhorses and clamp it down.
- Using a wood plane, make long, even strokes along the chalk-marked edge. The key is to remove very thin shavings. You can always take more off, but you can't put it back on.
- After a few passes, the chalk line should be gone. Sand the edge smooth with medium-grit sandpaper.
- This is a crucial step: Seal the exposed wood with a coat of wood sealer or paint. This prevents the door from absorbing moisture and swelling up again.
- Once the sealer is dry, rehang the door and test it. It should now swing freely without any rubbing.
Fix #4: Shim the Door Frame (An Advanced Fix)
If you have large, uneven gaps and the hinge fixes didn't work, the entire door frame may be out of square. This sounds intimidating, but it's manageable. We'll use shims to nudge the frame back into position.
Tools you’ll need:
- Flat pry bar
- Wood shims
- Drill and wood screws (3-inch)
- Utility knife
- Finish nails and hammer
Here's how to do it:
- Using a flat pry bar, carefully remove the interior door trim (molding) from around the frame. Work slowly to avoid cracking it.
- You should now see a gap between the door frame (jamb) and the wall studs. This is where the shims go.
- Start on the hinge side. Slide tapered wood shims (in pairs, from opposite sides) into the gap behind the top hinge. Add them until the frame is perfectly vertical (plumb).
- Drill a pilot hole and drive a long screw through the jamb, through the shims, and into the wall stud to secure it.
- Repeat this process for the middle and bottom hinges.
- Move to the latch side of the door and add shims to create an even gap between the door and the frame. Secure this side with screws as well.
- Once the door is operating smoothly, use a utility knife to score and snap off the protruding ends of the shims.
- Re-attach the door trim with finish nails.
How Much Does It Cost to Fix a Misaligned Door?
One of the best parts about this home repair is the cost.
- DIY Cost: If you just need to tighten or replace screws, your cost could be less than $5. Even if you need to buy shims or a hand plane, you're likely looking at a total cost of $20 - $50.
- Hiring a Professional: According to HomeGuide, hiring a carpenter or handyman to adjust a door typically costs between $75 and $250, depending on the complexity of the fix.
By tackling this yourself, you’re not only saving money but also learning a valuable home maintenance skill.
Final Thoughts
A misaligned door is a common household headache, but with a little patience and the right approach, it's a problem you can solve. By starting with the simplest fix—checking the hinges—you can often get your door back in perfect working order in under 15 minutes.
Feeling empowered to take on more home projects? Download the Casa app today! Casa provides clear, step-by-step guides for all your home maintenance needs. From simple fixes like this to bigger projects, we give you the confidence to be the master of your own home. Stop putting off those little repairs and let Casa help you get it done right.