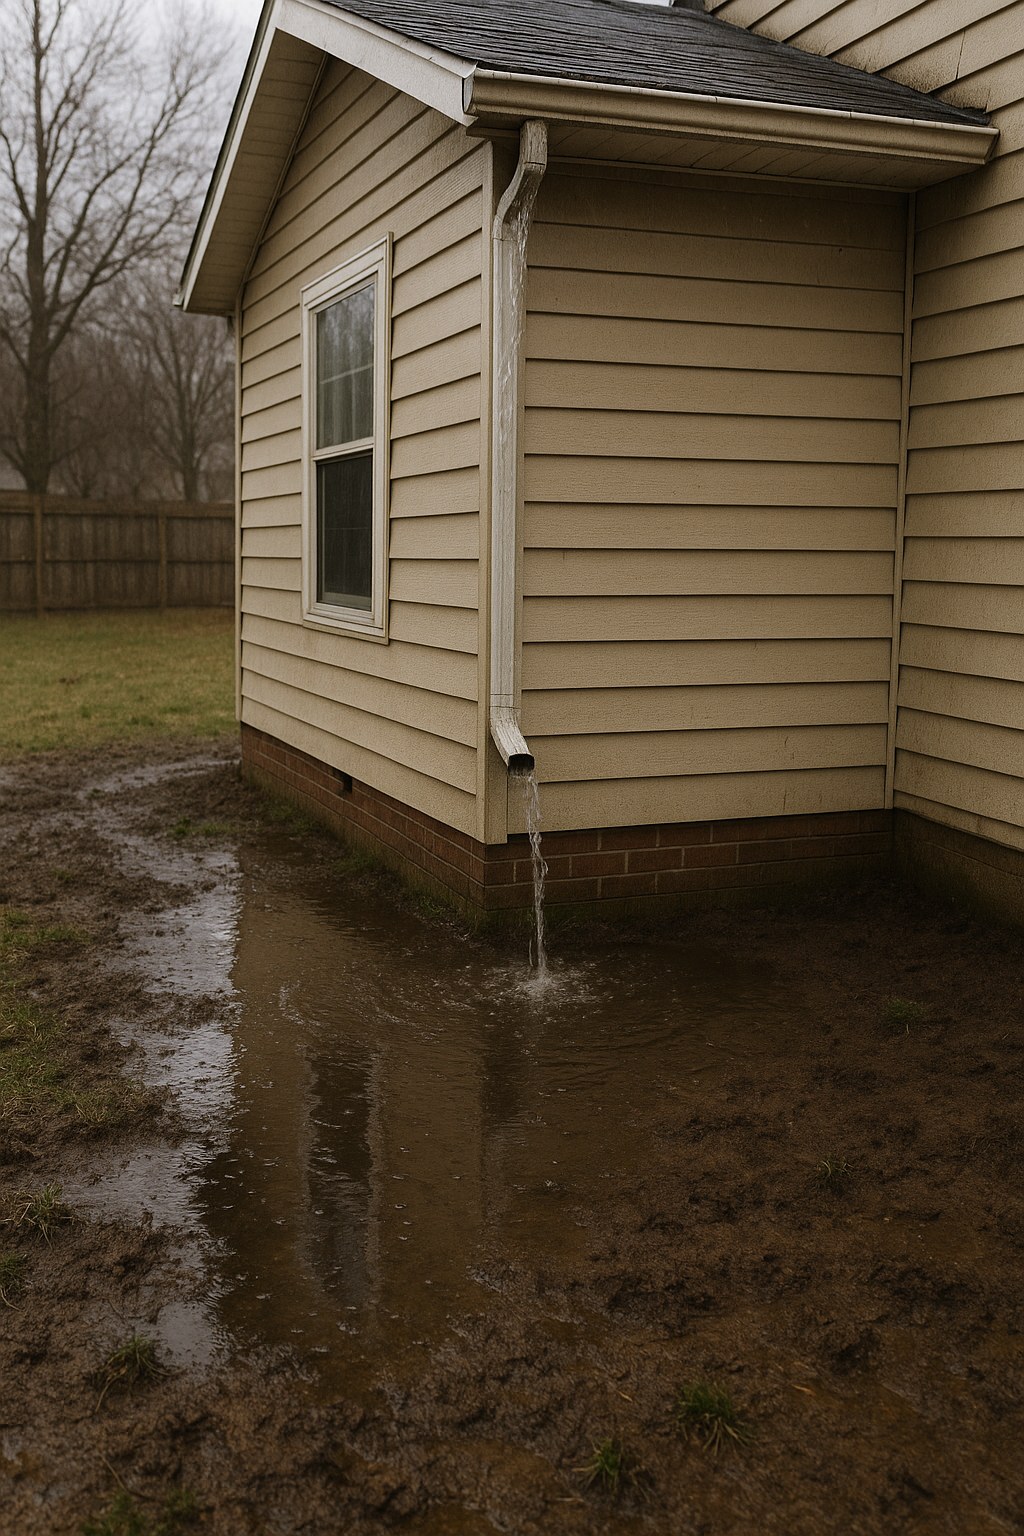
When water isn't properly channeled away from your house, it pools directly against your foundation. This can lead to cracks, leaks in your basement or crawlspace, and even compromise the structural integrity of your home. But don't worry—we're here to walk you through it. Fixing a missing downspout is often a very manageable DIY project, and with the right guidance, you can get it done in an afternoon.
This guide will help you diagnose your specific gutter situation, gather the right tools, and securely install a new downspout. Let's protect your home and get that water flowing where it’s supposed to go.
Why a Missing Downspout Is a Critical Fix
Before we grab the ladder, let's quickly cover why this is such an important repair. A functional gutter and downspout system is your home's first line of defense against water damage. Without it, you're inviting trouble.
Here are the primary risks of a missing downspout:
- Foundation Damage: This is the big one. Water that pools around your foundation can saturate the soil, causing it to expand and exert immense pressure on your foundation walls. Over time, this can lead to cracks and structural failure. According to HomeAdvisor, foundation repairs can cost thousands of dollars, making a small gutter fix a very wise investment.
- Basement Flooding: If water seeps through foundation cracks, your basement or crawlspace is the first place it will go, leading to mold, mildew, and ruined belongings.
- Siding and Paint Damage: Water cascading down your walls can stain siding, peel paint, and eventually cause the underlying wood to rot.
- Landscape Erosion: Uncontrolled water flow can wash away mulch, soil, and plants, destroying your landscaping and creating muddy pits around your home.
The good news is that you can prevent all of this with a timely repair. So, let’s get started.
Step 1: Safely Inspect Your Gutter System
First things first, you need to get a clear look at what you’re dealing with. This means getting up on a ladder, so safety is paramount.
- Position Your Ladder: Place a sturdy extension ladder on firm, level ground directly underneath the spot where the downspout is missing. Make sure the ladder's feet are secure and it's angled correctly—a 4-to-1 ratio is a good rule of thumb (for every four feet of height, the base should be one foot away from the wall).
- Gear Up: Put on a pair of heavy-duty work gloves to protect your hands from sharp metal edges and safety glasses to shield your eyes from debris.
- Climb Carefully: Climb the ladder until your shoulders are about level with the gutter. This gives you a good vantage point without needing to overreach.
- Examine the Gutter: Look closely at the gutter run where the downspout used to be. The key question you need to answer is: Is this a seamless gutter or a sectional gutter?
- Seamless (or Continuous) Gutters: These are single, long pieces of gutter custom-fit to your home. You won't see any joints, seams, or connectors near the missing downspout area, except at the corners.
- Sectional Gutters: These are made from 10-foot sections of gutter joined together with connectors. You'll see visible seams every 10 feet or so.
This distinction is crucial because it determines how you'll attach the new downspout.
Step 2: The Repair Plan for Seamless Gutters
If you have a seamless gutter, your repair process depends on the condition of the outlet stub—the piece that connects the gutter to the downspout.
Assess the Outlet Stub
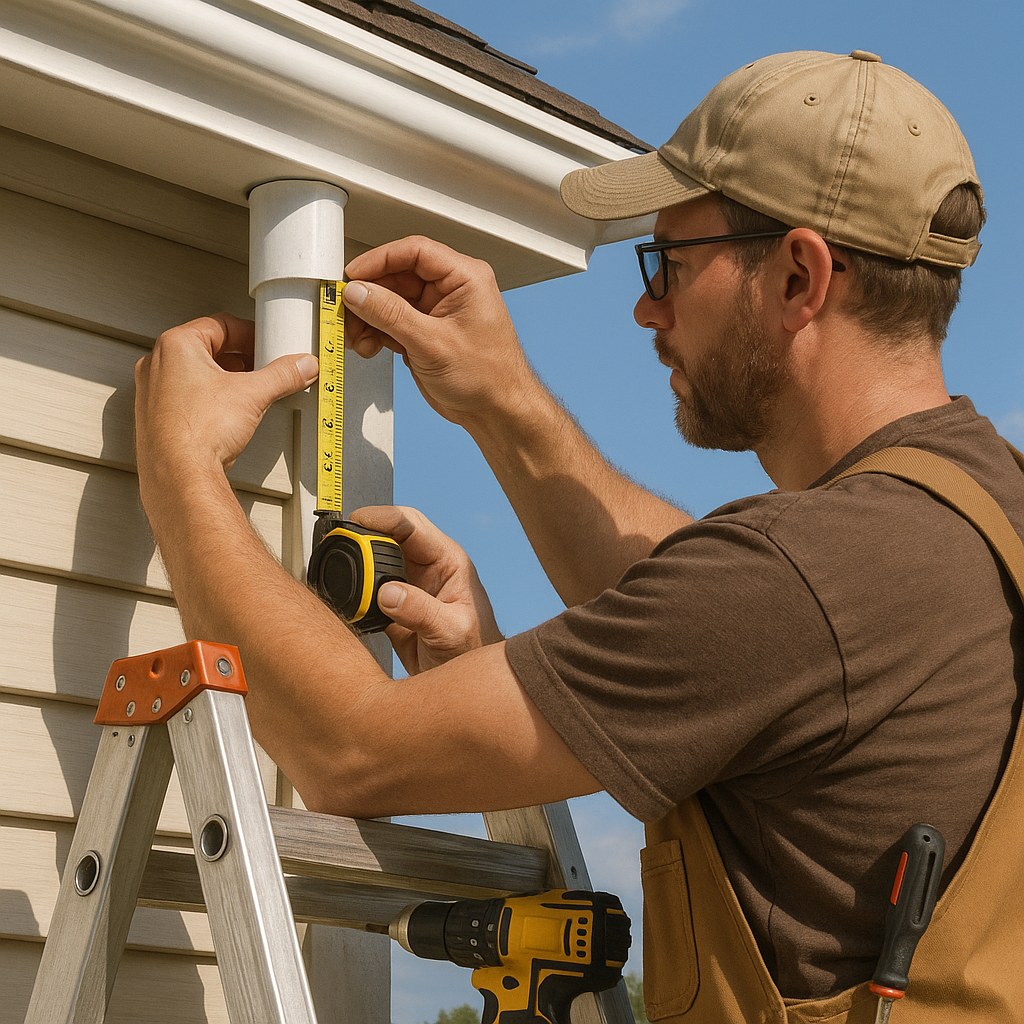
While you're still on the ladder, look at the bottom of the gutter where the downspout was attached. You should see a rectangular or round opening with a short metal stub protruding downwards.
- Check Its Condition: Is the outlet stub still there? Is it cracked, bent, or heavily corroded?
- Measure It: Use a tape measure. Is the stub at least 2 inches long? You need enough material to securely attach the new downspout elbow.
- Test Its Stability: Gently wiggle the stub. Does it feel loose or firmly attached to the gutter?
If the outlet stub is damaged, missing, or less than 2 inches long: Stop here. Creating a new outlet in a seamless gutter requires specialized tools to make a clean, leak-proof cut. This is a job for a professional. Trying to cut it yourself can easily damage the gutter.
If the outlet stub is intact and sturdy: Great! You're ready to attach a new downspout. This is the most common scenario.
How to Reattach a New Downspout to an Existing Outlet
This is a straightforward process that requires a few common tools and a downspout kit from your local hardware store.
Tools & Materials:
- Aluminum downspout kit (matching the size and shape of your outlet)
- Drill with a hex-head driver bit
- Tape measure
- Hacksaw
- Pencil
- Splash block
Instructions:
- Fit the Elbow: The top piece of your new downspout is an elbow. Slide it onto the outlet stub until it's fully seated. Make sure it's oriented to direct the downspout flush against the wall of your house.
- Secure the Elbow: Using your drill, drive four hex screws through the sides of the elbow and into the outlet stub to create a strong, lasting connection.
- Measure for the Downspout Pipe: Measure the distance from the bottom opening of the elbow down to about one foot above the ground. You want the downspout to terminate high enough to fit a splash block underneath and direct water away from the foundation effectively.
- Cut the Pipe: Transfer your measurement to the main downspout pipe and use a hacksaw to make a straight, clean cut.
- Connect the Pipe: Slide the top of the cut pipe into the bottom of the elbow. The crimped end of the elbow should fit inside the pipe to prevent leaks. Secure it with two more hex screws.
- Strap it to the Wall: Use downspout straps to secure the pipe to your home's siding. A good rule is one strap for every 6 feet of pipe, plus one near the top and one near the bottom. If you live in an area with heavy snow or ice, adding an extra strap is a smart move.
- Add the Splash Block: Place a splash block on the ground directly under the downspout opening to prevent erosion and guide water away from your foundation.
- Test Your Work: Carefully pour a large bucket of water into the gutter a few feet away from the new downspout. Watch closely to ensure water flows smoothly through the new assembly with no leaks at the joints.
Step 3: The Repair Plan for Sectional Gutters
If your inspection revealed you have sectional gutters (made of aluminum or vinyl), the process is a bit different. You'll likely need to install a new outlet fitting before attaching the downspout.
Identify Your Gutter Material
First, confirm your gutter material. Most sectional systems are aluminum or vinyl, which are DIY-friendly.
- Aluminum: Lightweight, metallic sheen (unless painted), makes a "ting" sound when tapped.
- Vinyl (Plastic): Lightweight, feels like plastic, makes a dull thud when tapped.
- Copper or Steel: These are much heavier and less common in sectional DIY systems. Copper has a distinct brownish color or a green patina. Steel is very rigid and may show signs of orange rust.
If you have copper or steel gutters, we recommend calling a professional. These materials require special techniques and tools for a proper, leak-proof installation.
How to Install a New Downspout on a Sectional Gutter
For aluminum or vinyl gutters, you can install a new outlet and downspout yourself.
Tools & Materials:
- Downspout installation kit (with outlet fitting, elbows, pipe, straps, screws)
- Tin snips (for aluminum) or a utility knife (for vinyl)
- Drill with a hex-head driver bit
- Marker
- Hacksaw
- Tape measure
- Splash block
Instructions:
- Trace the Outlet: Hold the new outlet fitting against the bottom of the gutter where you want to place the downspout. Use a marker to trace the inside of the fitting onto the gutter.
- Cut the Opening: Carefully cut along the traced line using tin snips for an aluminum gutter or a sharp utility knife for vinyl. Wear your gloves! The cut edges will be sharp.
- Install the Outlet Fitting: Insert the outlet fitting into the hole from inside the gutter. The flange of the fitting should rest flat on the gutter's bottom. Secure it in place with four hex screws drilled from the bottom up.
- Attach the Elbow & Pipe: From here, the process is the same as for seamless gutters. Snap the elbow onto the new outlet fitting, measure and cut your downspout pipe, connect it, and secure it to the wall with straps.
- Place the Splash Block: Position your splash block to channel water safely away.
- Test for Leaks: Pour a bucket of water into the gutter and check for any drips around the new outlet fitting or elbow connections.
DIY vs. Hiring a Pro: What's the Cost?
One of the best parts about this repair is the potential savings.
- DIY Cost: You can typically buy a complete downspout kit for $30 - $70, depending on the material and length. If you already have the basic tools, this is your total cost.
- Professional Cost: Hiring a gutter professional to replace a downspout typically costs between $150 and $500, according to Forbes Home. The price depends on the height of your home, the complexity of the job, and local labor rates.
Take the Guesswork Out of Home Maintenance
Fixing a missing downspout is a rewarding project that protects your biggest investment—your home. By following these steps, you can confidently tackle the job and save a significant amount of money.
But we know that not every home repair is this straightforward. For those tricky projects, complex diagnostics, or times when you'd rather just have an expert handle it, there's Casa.
Download the Casa app today! Our app provides clear, step-by-step guides for hundreds of home repairs, helping you build your DIY skills. And when you need a professional, Casa connects you with trusted, vetted pros in your area. Take control of your home maintenance with Casa.
Related Reading


