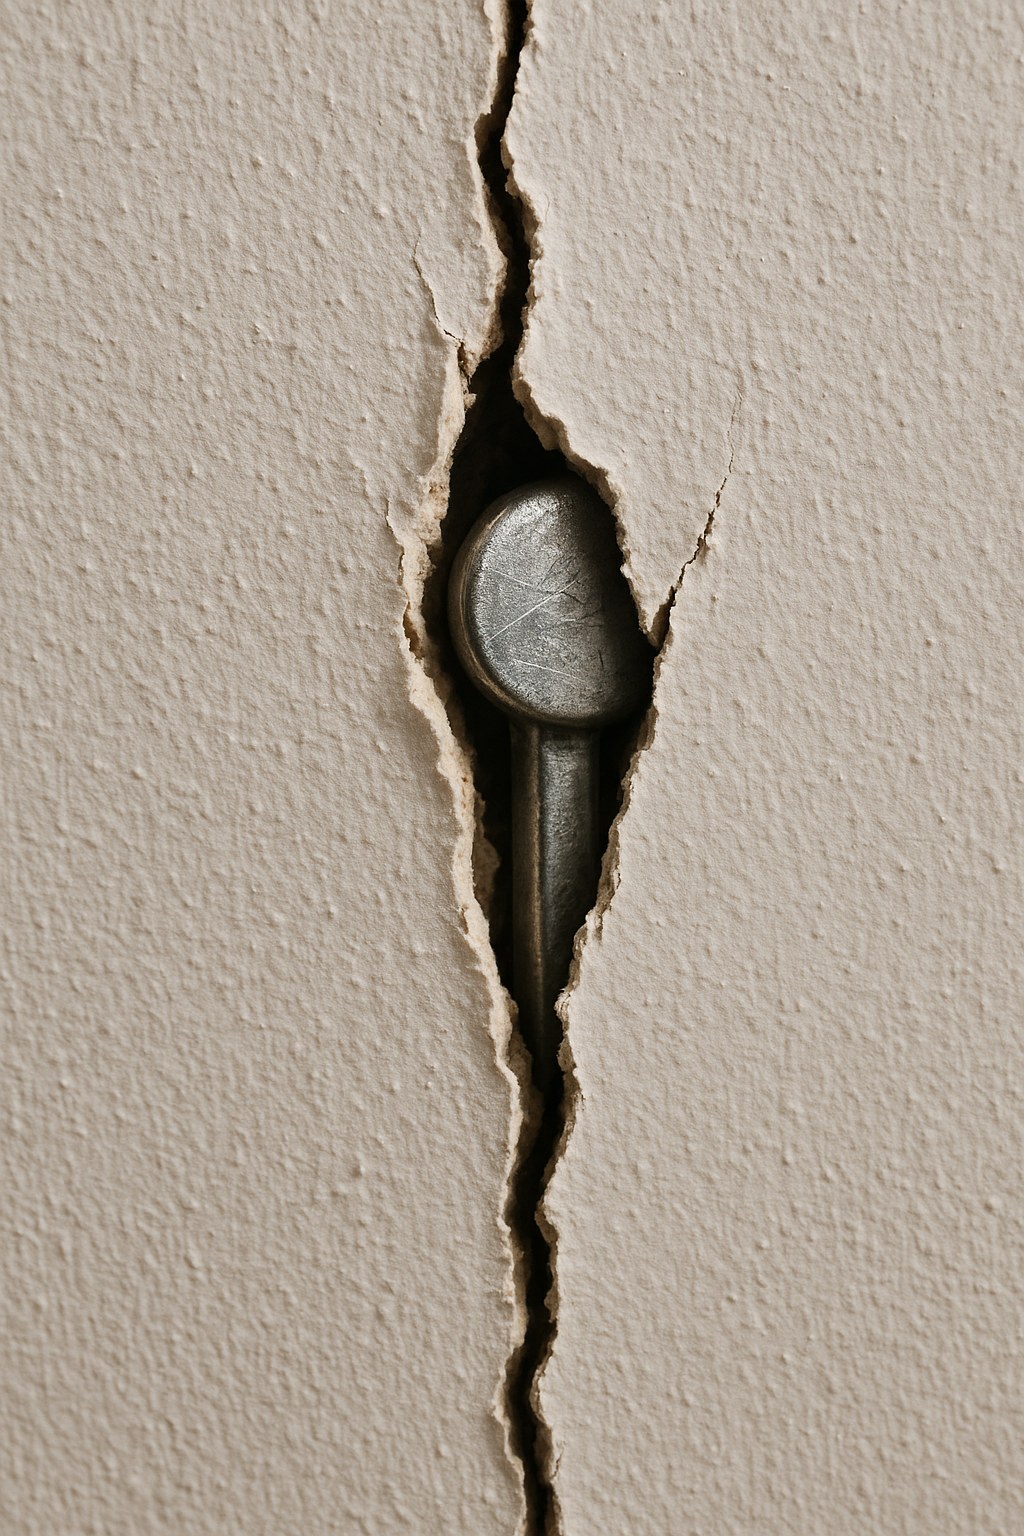
Immediately, your mind starts racing. Is that an electrical wire? A pipe that’s about to burst? Is my house falling apart?
Take a deep breath. While seeing an unknown object behind your wall is certainly cause for investigation, it’s not always a sign of a major catastrophe. More often than not, it's something perfectly normal that has simply become exposed due to the house settling or a minor drywall issue. The key is to identify what it is, determine if it’s dangerous, and then proceed with the right repair.
In this guide, I’ll walk you through it, just like I would over the phone. We’ll cover how to perform a safe initial inspection, identify the mystery material, and follow the correct steps to patch up your wall for good.
Safety First: Your Initial Inspection
Before you do anything else, the first rule is: don’t touch it. You don’t know what that material is yet, so poking at it with your finger or a screwdriver is a bad idea. Instead, let’s get a better look safely.
Grab a good flashlight. Shine the light directly into the crack to get a clear view of the object. Try holding the flashlight at a few different angles, as this can help reveal textures, colors, and shapes that will be crucial for identification. Your only goal right now is to gather visual information.
What Is That Behind My Wall? Identifying the Object
Once you have a good view, it's time to play detective. The metal or plastic you're seeing is most likely one of a few common things found inside a standard wall. Let’s break down the possibilities.
- Electrical Components: This is usually the biggest concern. You might be seeing the edge of a metal or plastic electrical box (which holds an outlet or switch), or in rarer cases, the sheathing of an electrical wire. Wires are typically coated in colored plastic (black, red, white, or green), and electrical boxes are usually rectangular and either silver (metal) or blue (plastic).
- Plumbing Pipes: Your home’s water supply lines and drain pipes run through the walls. These can be copper (a dull brownish-orange color), galvanized steel (dull gray), or plastic like PVC (white), ABS (black), or PEX (often red or blue). They are almost always round.
- HVAC Ducts: Heating, ventilation, and air conditioning ducts can be made of sheet metal (large, flat, and silver) or flexible foil-covered plastic. These are typically much larger than pipes or wires.
- Wall Framing or Fasteners: It might not be a utility at all. You could be seeing the edge of a metal wall stud, a protective plate that covers utilities, a drywall corner bead, or even a screw or nail head that has popped through the paint.
- A Previous Repair: Sometimes, a crack reveals a metal or mesh backing plate used in a previous drywall patch that wasn't properly covered with joint compound.
Now that you have an idea of what you might be looking at, let's go through the steps for each scenario.
Scenario 1: You See Electrical Wires or a Metal Box
If the object looks like it’s part of your home’s electrical system, you need to proceed with extreme caution.
Step 1: Turn Off the Power
Before you even think about patching the wall, you must ensure the power is off. Go to your home's main electrical panel (breaker box). Find the breaker that controls the circuit for that room or wall and flip it to the "OFF" position.
Step 2: Verify the Power is Off
This is a non-negotiable step. Use a non-contact voltage tester—an inexpensive and essential tool for any homeowner. Hold the tip of the tester near the exposed wire or box. If it beeps or lights up, there is still power. This could mean you flipped the wrong breaker or there’s a more complex electrical issue. If it shows voltage, stop immediately and call a licensed electrician.
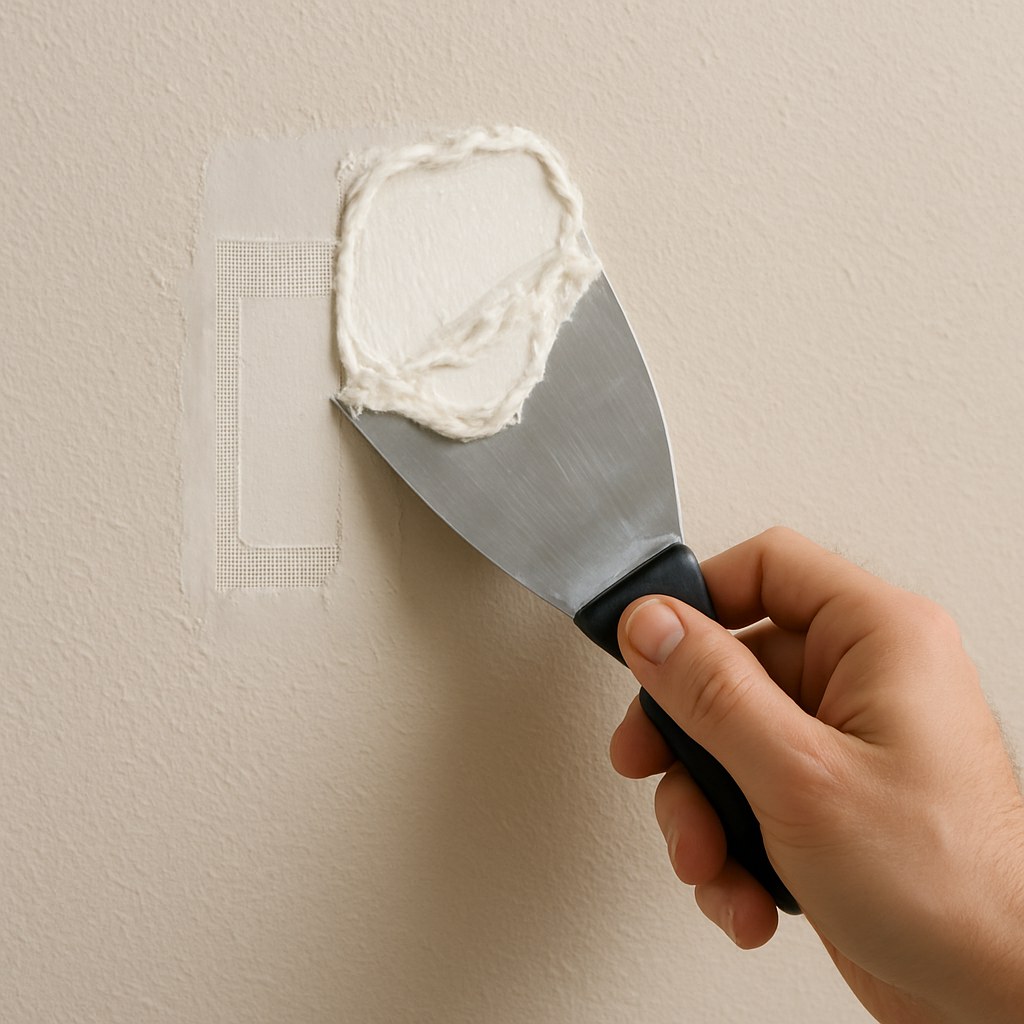
Step 3: Patch the Drywall
If your voltage tester confirms there is no power, you can safely proceed with the repair. For a small crack around an electrical box, the fix is straightforward:
- Carefully use a utility knife to widen the crack slightly (to about 1/8 inch). This helps the joint compound adhere better.
- Clean out any dust or debris from the crack.
- Apply a thin layer of joint compound over the crack with a putty knife.
- Press a piece of drywall tape firmly into the wet compound.
- Smooth another thin layer of compound over the tape, feathering the edges to blend with the wall.
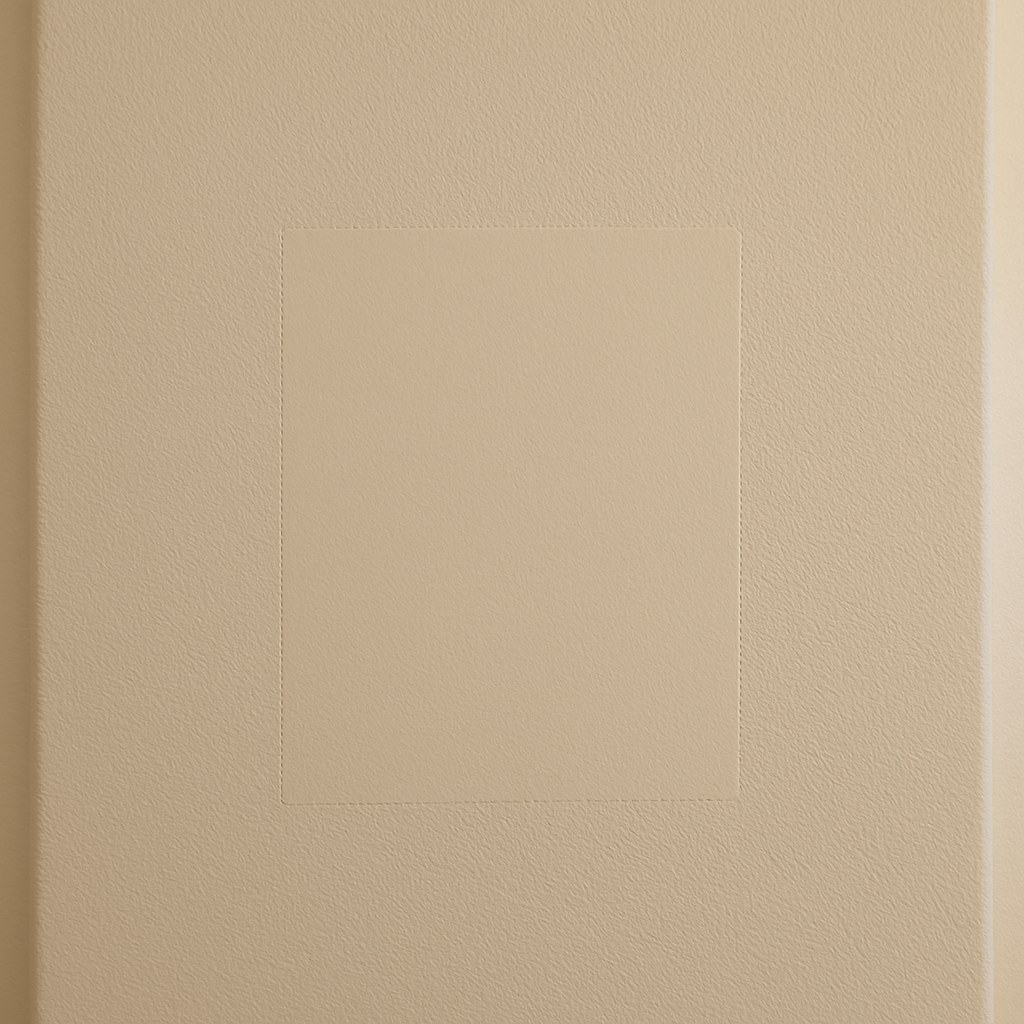
- Let it dry completely, then sand it smooth. You may need a second coat for a seamless finish.
- Once smooth, prime and paint the patch to match your wall.
Scenario 2: You See a Plumbing Pipe
Seeing a pipe is less of an immediate danger than wiring, but the primary concern is a potential leak. Even a slow drip can lead to significant water damage and mold growth.
Step 1: Check for Leaks
First, dry the visible section of the pipe completely with a towel. Then, wrap a dry paper towel around it and leave it for about ten minutes.
Remove the paper towel and check it for any dampness. If it’s wet, you have a leak. Do not attempt to patch the wall. Call a licensed plumber immediately.
Step 2: Patch the Drywall (If No Leak is Found)
If the pipe is completely dry, the crack is likely due to normal house settling or temperature changes causing the pipe to expand and contract. The repair is a bit more involved because you'll want to create a clean, solid patch.
- Use a keyhole saw to cut a neat square around the damaged area. Try to end your cut in the middle of a wall stud if possible.
- Cut a new piece of drywall to the exact size of your opening.
- Secure the new patch to the stud with drywall screws. If you’re not over a stud, you can install small wooden cleats inside the wall to screw the patch into.
- Tape the seams with drywall tape and apply joint compound in thin layers, allowing each to dry before applying the next.
- Sand, prime, and paint for a flawless finish.
Scenario 3: You See Wall Framing or an Old Repair Plate
This is the best-case scenario! If the metal is a stud, a corner bead, or a backing plate from a previous fix, there’s no immediate danger. This is a purely cosmetic repair.
- For a Crack Over a Stud: This often happens as a house settles and is called a "nail pop" or seam crack. The fix is the same as patching a small crack: widen it, apply compound, tape, apply more compound, sand, and paint.
- For an Exposed Backing Plate: This means a previous patch wasn't finished correctly. The fix is to apply a "skim coat." Using a wide putty knife, spread a very thin layer of joint compound over the entire area, feathering the edges out at least 6 inches. Let it dry, sand lightly, and apply a second thin coat if needed. This will hide the plate and blend the repair into the wall.
How Much Will This Cost to Fix?
The cost can vary dramatically depending on what you find.
- DIY Repair: If it's a simple drywall fix, you're looking at a minimal cost. A small tub of joint compound, tape, and a putty knife will likely cost you less than $30.
- Hiring a Professional: If you need to call in an expert, the costs go up.
- Electrician: Expect to pay $50 to $150 per hour for an electrician to diagnose and secure an electrical issue.
- Plumber: A plumber will also typically charge in the $50 to $150 per hour range to fix a leaky pipe.
- Drywall Contractor/Handyman: If you're not comfortable doing the drywall repair yourself, hiring a professional can cost anywhere from $250 to $750, depending on the size and complexity of the patch, according to sources like Angi.
Don't Let Home Maintenance Intimidate You
Finding something unexpected behind a crack in your wall can be stressful, but by following a calm, methodical process, you can safely diagnose and handle the issue. Remember, the most important step is identification—once you know what you’re dealing with, the path to a solution becomes clear.
For more step-by-step guides on everything from simple drywall patches to more complex home repairs, download the Casa app. Our app is designed to empower homeowners like you, providing the expert guidance you need to tackle any project with confidence. And if you ever find yourself in over your head, Casa can connect you with trusted, vetted professionals to get the job done right.


