Your gutter system is your home’s first line of defense against water damage, designed to collect rainwater and channel it safely away. But when a downspout is misaligned or directs water to the wrong place, it can lead to a cascade of expensive and stressful problems, from a flooded basement to a cracked foundation.
The good news is that fixing a misaligned downspout is often a straightforward DIY project that you can tackle in an afternoon. In this guide, we'll walk you through everything you need to know, from assessing the problem to realigning or even relocating your downspout for optimal drainage. Let's get that water flowing where it’s supposed to go!
Why Proper Downspout Positioning is Critical for Your Home
Before we grab the ladder, let’s talk about why this matters so much. When water is deposited too close to your home, it can cause significant damage. According to the American Society of Home Inspectors, improper drainage is one of the top ten most common problems found during home inspections, and for good reason.
Here’s what you’re preventing by fixing your downspout:
- Foundation Damage: Water pooling near your home saturates the soil, creating immense pressure against your foundation walls (this is called hydrostatic pressure). Over time, this can lead to cracks, shifting, and structural failure. Foundation repairs can cost thousands, making this preventative fix incredibly valuable.
- Basement and Crawlspace Flooding: That saturated soil is also looking for a place to go. Water can easily seep through cracks in the foundation, leading to a damp, moldy basement or crawlspace.
- Siding and Paint Damage: Water splashing back from the ground can damage your home's siding, cause paint to peel, and even lead to wood rot over time.
- Landscape Erosion: A concentrated flow of water can quickly wash away mulch, soil, and your carefully planted flower beds, creating unsightly channels in your yard.
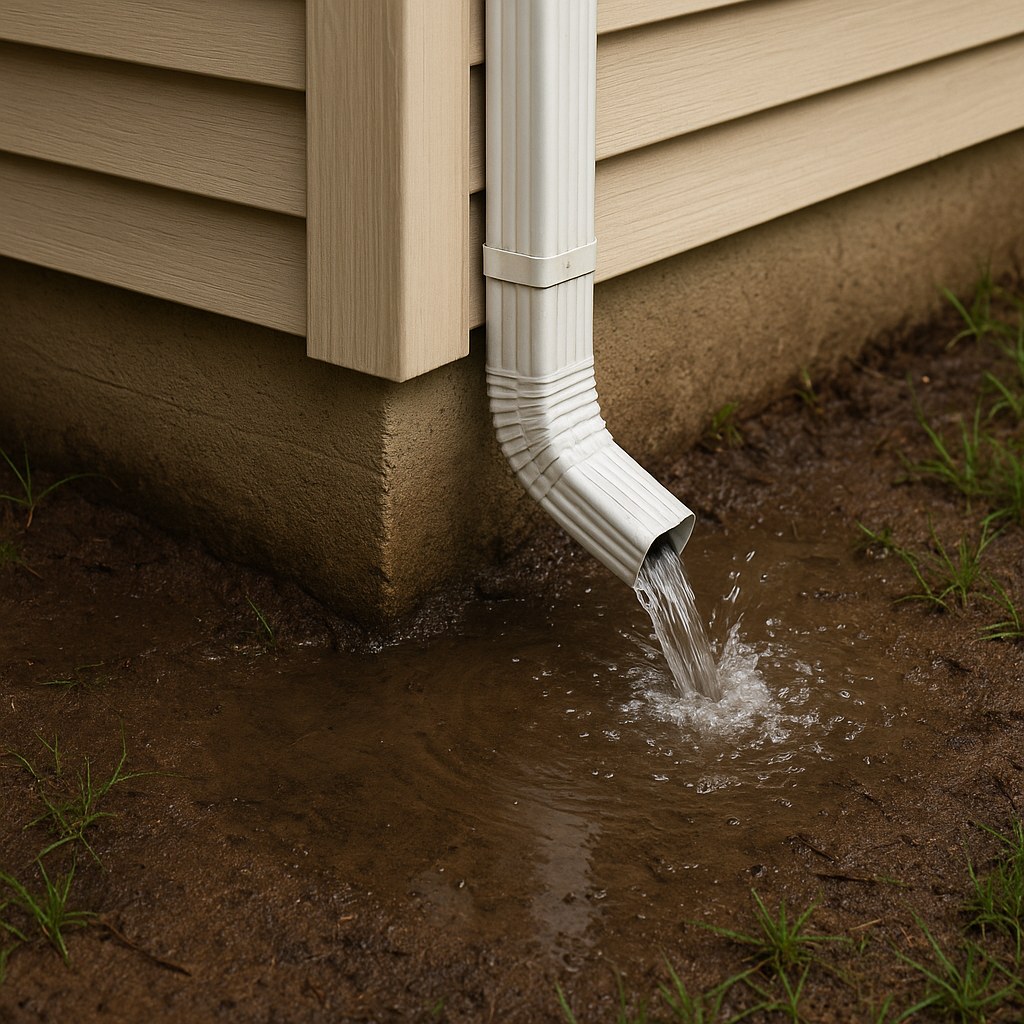
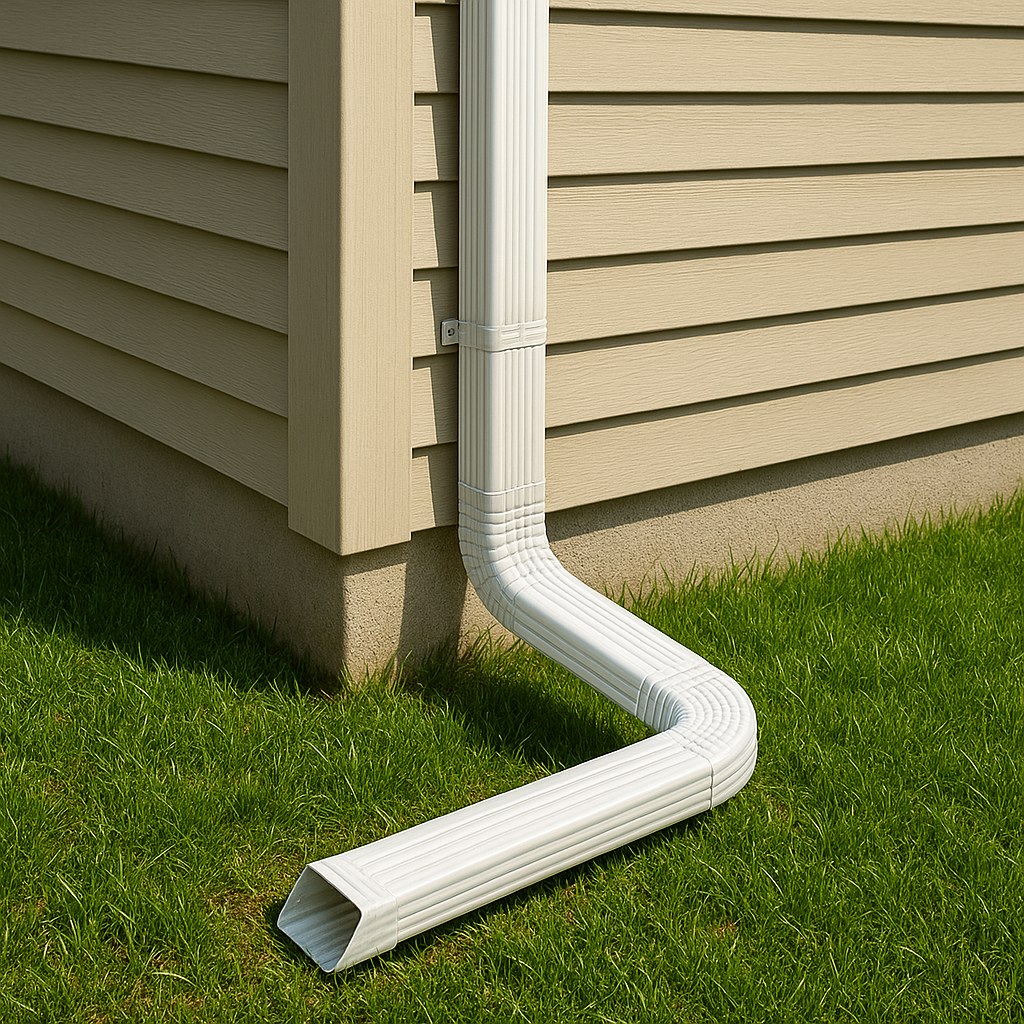
By ensuring your downspout deposits water at least 3-6 feet away from your foundation, you protect your home’s structural integrity and save yourself from future headaches.
Getting Started: Tools and Materials
You won’t need a workshop full of tools for this job. Here’s a list of what you’ll likely need, depending on your specific situation:
Essential Tools:
- Sturdy ladder
- Work gloves
- Safety glasses
- Garden hose (for testing)
For Realigning:
- Nut driver or screwdriver
- Drill with Phillips and 1/8-inch bits
For Relocating (Vinyl Gutters):
- New vinyl drop outlet
- Straight gutter section (if needed)
- New downspout brackets
- Galvanized screws
A downspout extension is also a highly recommended and inexpensive addition to ensure water is channeled far enough away from your home.
A Step-by-Step Guide to Fixing Your Downspout
Ready to get to it? Let's break this down into simple, manageable steps.
Step 1: Assess the Alignment
First, you need to get a good look at what's going on.
- Safety First: Place your ladder on firm, level ground directly under the problem downspout. Put on your work gloves and safety glasses before you climb.
- Inspect the Connection: Carefully climb the ladder and examine where the downspout connects to the gutter. This opening is called the gutter outlet. Is the downspout sitting directly beneath it, or is it off to one side? A poor connection here can cause leaks and overflows.
- Check the Drainage Path: From the ground, look at where the downspout ends. Does it release water right next to the foundation? Does it drain onto a sidewalk, driveway, or patio, creating a slippery hazard? The ideal path is onto a sloped part of your yard where water can flow away from the house.
Once you’ve identified the issue, you can move on to the fix. Is the downspout connected but just misaligned? If so, you're likely looking at a simple realignment.
Step 2: Realigning an Existing Downspout
This is the most common scenario and the easiest fix. There are two types of connections you might find at the top of your downspout: a flexible connector or a rigid elbow.
Scenario A: Adjusting a Flexible Connector
If you see a corrugated, bendable tube connecting your downspout to the gutter outlet, you’re in luck.
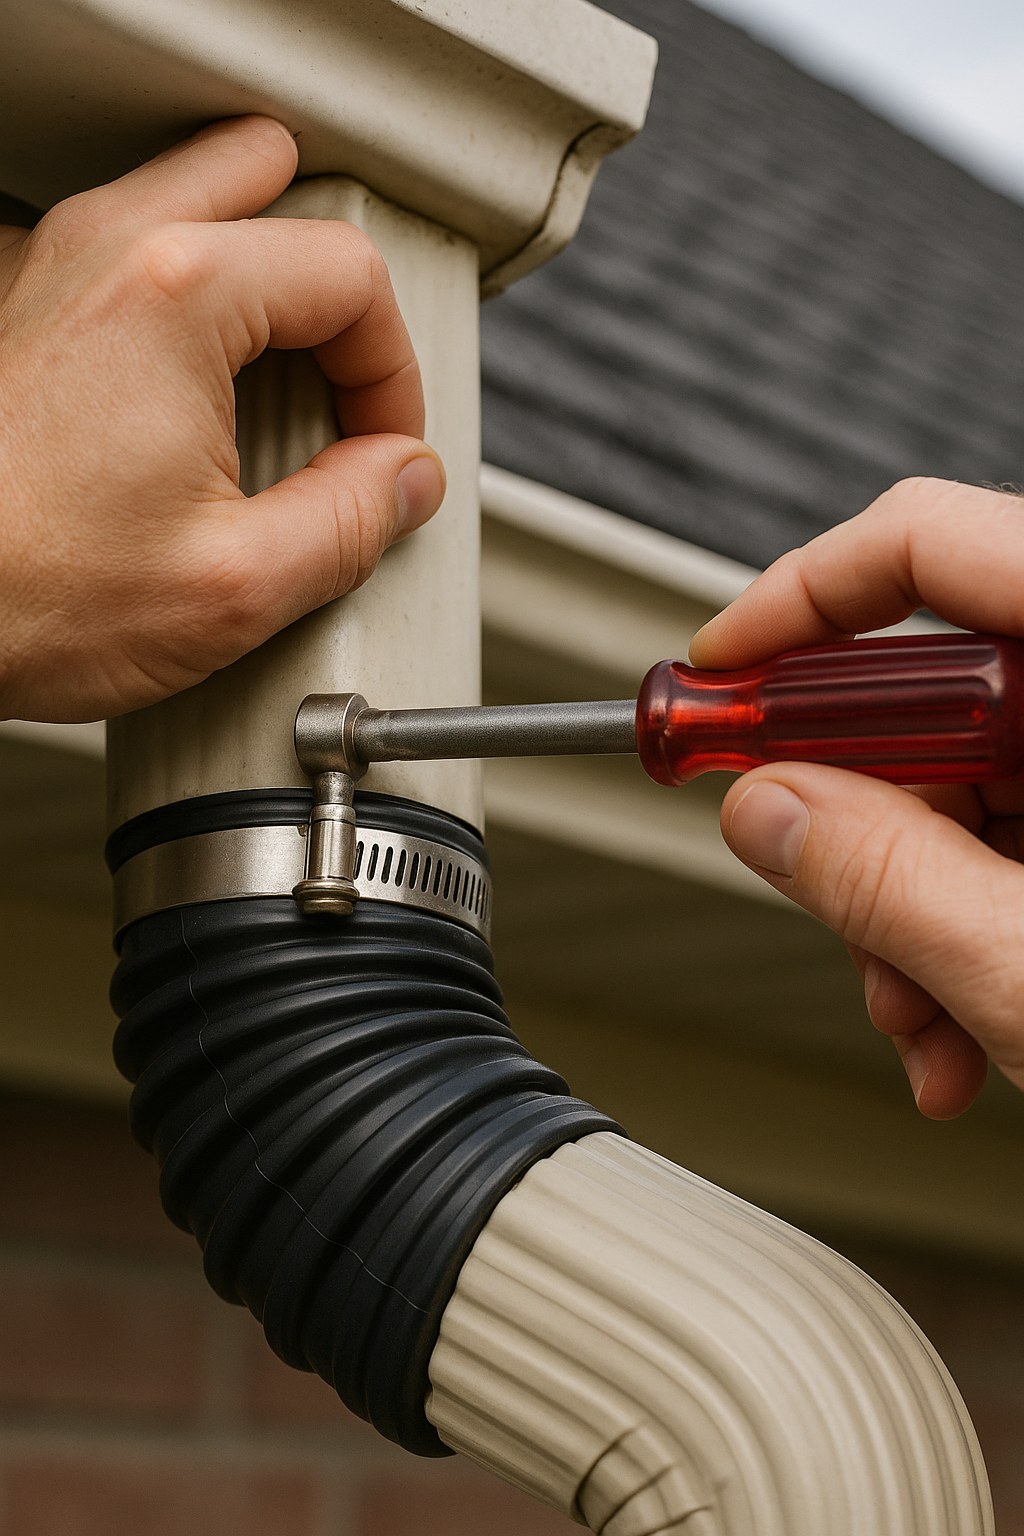
- Loosen the Clamp: While securely on your ladder, locate the metal clamp holding the flexible connector to the gutter outlet. Use a nut driver to loosen it with one full turn.
- Reposition the Downspout: Gently rotate the downspout until it is properly aligned and points in a direction away from your home's foundation.
- Tighten the Clamp: Once you're happy with the position, tighten the clamp until it’s snug. Don’t overtighten it, as you could crack the vinyl or damage the connector.
- Add an Extension: Attach a downspout extension to the bottom to carry water further away from the house.
Scenario B: Re-bracketing a Rigid Downspout
If your downspout is connected with a solid, angled piece (a rigid elbow), the fix involves repositioning the brackets that hold it to the house.
- Remove the Upper Bracket: While on the ladder, use your drill to remove the screws holding the top downspout bracket to the siding.
- Align the Downspout: With one hand firmly supporting the downspout, shift it so the elbow sits perfectly centered under the gutter outlet.
- Mark and Drill New Holes: Mark the new position for the bracket screws on the siding. Use a 1/8-inch bit to pre-drill pilot holes. This prevents the siding from splitting.
- Re-attach the Bracket: Secure the downspout bracket in its new position using galvanized screws.
- Adjust Lower Brackets: Work your way down, repeating the process for any middle or lower brackets to ensure the entire downspout runs straight and vertical.
After any adjustment, it’s crucial to test your work. Use a garden hose to run water into the gutter for a few minutes. Watch the downspout to ensure water flows smoothly and exits where you want it to, away from the foundation.
Step 3: Relocating a Downspout Entirely
Sometimes, simple realignment isn’t enough. The downspout might be in a fundamentally bad location—draining onto a flat area or a concrete patio. In this case, you may need to move it.
This process is very manageable for homeowners with segmented vinyl gutters, but it's a job best left to a professional for continuous metal gutters.
For Segmented Vinyl Gutters:
- Find a Better Location: Walk around your house and identify a new spot where water can drain away safely. Look for a clear, vertical path from the gutter to the ground.
- Remove the Old Downspout: Use your drill to remove the brackets and detach the existing downspout.
- Replace the Old Outlet: On your ladder, disconnect the gutter section containing the old drop outlet. Replace it with a standard, solid gutter section to close the gap.
- Install the New Outlet: At the new location, separate two gutter sections and snap in a new vinyl drop outlet. Make sure the pieces lock together securely.
- Install the Downspout: Hold the downspout in its new position, mark the locations for the brackets, drill pilot holes, and secure it to the wall. Add an elbow at the bottom to direct the flow.
Again, test your work thoroughly with a hose to check for leaks and ensure proper flow.
When to Call in a Professional
While many downspout issues are DIY-friendly, some jobs are best left to the experts.
You should call a professional if:
- You have continuous metal gutters. These systems are seamless and require specialized tools to cut new outlets and seal old ones. A mistake here can ruin a long section of gutter and cause serious leaks.
- The gutter slope is incorrect. If water is pooling in your gutters instead of flowing toward the downspout, the gutters themselves may need to be re-pitched.
- You're not comfortable working on a ladder. Safety is always the top priority.
- You've tried the fixes and still have issues. A professional can diagnose hidden problems like blockages within the downspout or underground drainage system.
Hiring a gutter professional for a realignment or relocation can cost anywhere from $150 to $500, depending on the complexity of the job. It's a small price to pay to prevent catastrophic foundation damage.
Final Thoughts
Your gutters and downspouts are unsung heroes, quietly protecting your home from the elements. Taking an hour or two to ensure they’re working correctly is one of the smartest investments you can make in your home's health. By following this guide, you can confidently tackle a misaligned downspout and keep your home safe and dry for years to come.
Feeling overwhelmed or want more expert guidance at your fingertips? Download the Casa app today! Casa provides clear, step-by-step instructions for hundreds of home maintenance projects and connects you with vetted, local professionals when you need a helping hand. Take control of your home maintenance with Casa.
Related Reading


