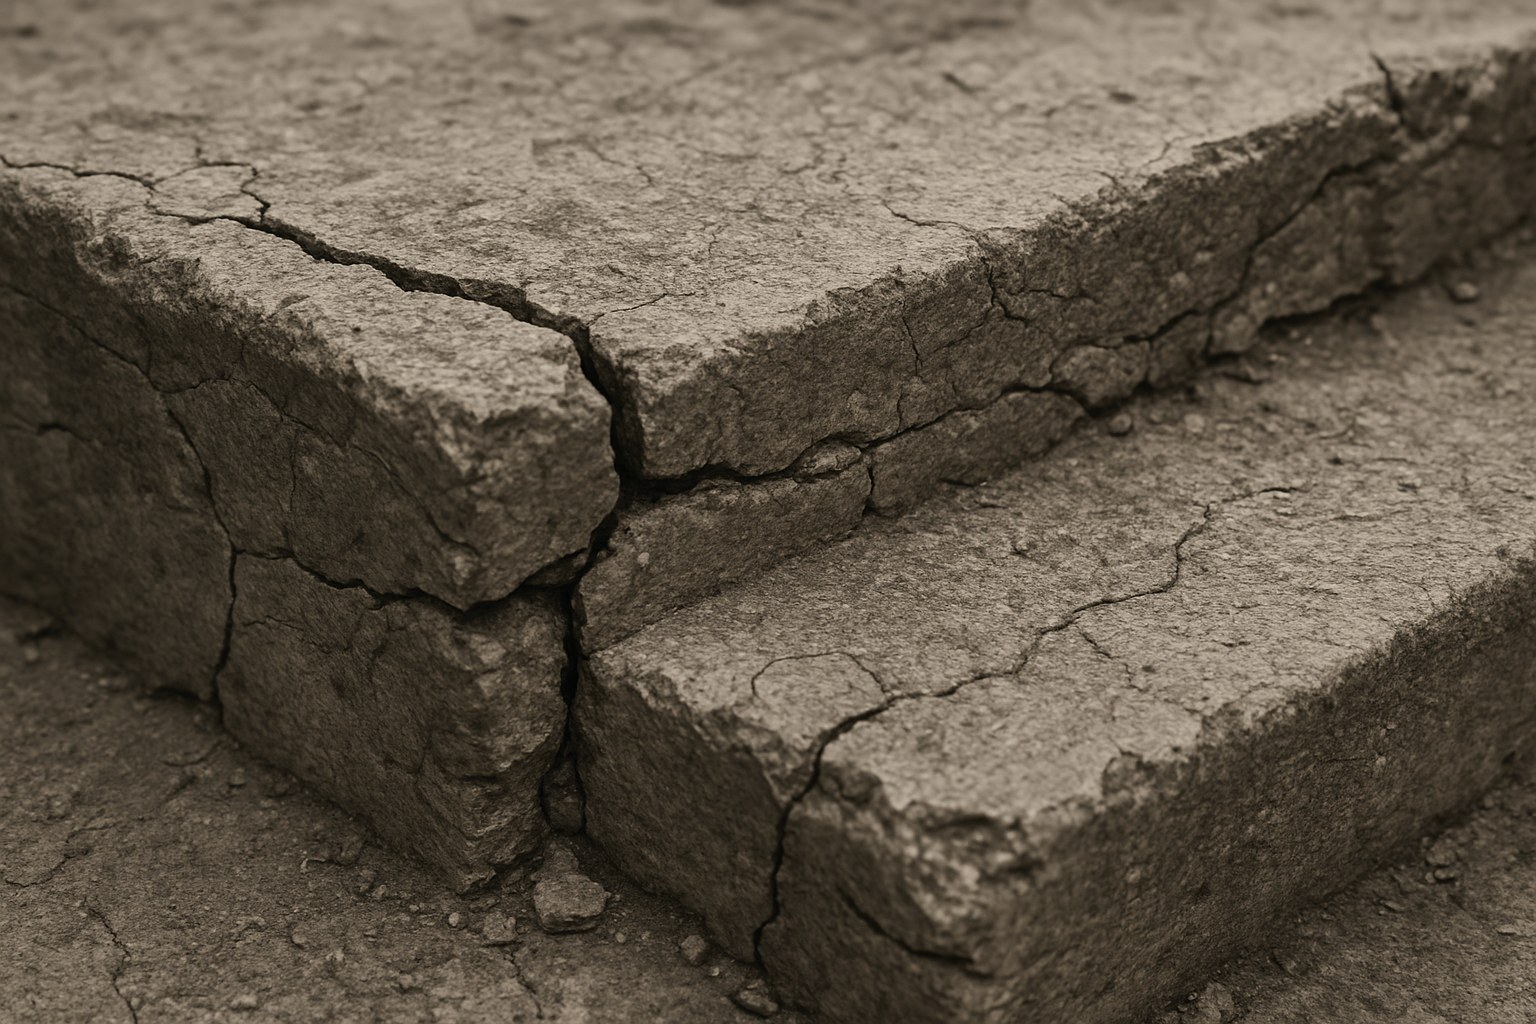
Ignoring them, however, isn't a great idea. Small cracks can quickly grow, allowing water to seep in, which can lead to larger structural problems—especially in climates with freeze-thaw cycles. Plus, uneven or broken steps are a serious safety hazard.
In this guide, I’ll walk you through everything you need to know about fixing your concrete stairs. We'll cover how to assess the damage, what tools you'll need, and the step-by-step process for patching, filling, and sealing your way back to safe, sturdy, and great-looking stairs.
Why You Shouldn't Ignore Damaged Concrete Stairs
It’s easy to put off a small repair, but with concrete, a little crack can be a big warning sign. Here’s why you should tackle this project sooner rather than later:
- Water Intrusion: Concrete is porous. When water gets into a crack and freezes, it expands, forcing the crack to become wider and deeper. This "freeze-thaw" cycle is one of the biggest enemies of concrete.
- Structural Integrity: While a hairline crack might be cosmetic, it can be a symptom of a deeper issue. Over time, unchecked damage can compromise the stability of the entire staircase.
- Safety Hazards: Chipped corners and uneven surfaces are tripping hazards for you, your family, and any visitors. A solid repair is essential for peace of mind.
- Curb Appeal: Let’s be honest—crumbled stairs just don’t look good. Fixing them can instantly boost your home’s curb appeal and perceived value.
When to DIY vs. When to Call a Pro
Before you roll up your sleeves, it's crucial to determine if this is a job you can handle yourself. Your safety is the top priority.
It's time to call a professional contractor if you notice:
- Large Cracks: Any crack that is wider or deeper than 1/4 inch. These could indicate a problem with the foundation or sub-base.
- Loose or Sagging Stairs: If you can feel any movement, shifting, or sagging when you press down on a step, the entire structure may be unstable. This requires immediate professional assessment.
- Extensive Damage: If the majority of the steps are crumbling or there are multiple large, deep chips, a simple patch job won't be enough. The stairs may need to be completely resurfaced or rebuilt.
For these major issues, trying to fix it yourself could be dangerous and may only be a temporary solution. A professional can diagnose the root cause and ensure a safe, long-lasting repair. According to Forbes Home, professional concrete step repair can range from $300 to over $1,200, depending on the extent of the damage. While DIY is cheaper, it’s not worth the risk if the problem is structural.
If your stairs only have minor chips (less than 1/2 inch deep) and hairline cracks, you're in the right place to fix it yourself!
Tools and Materials You'll Need
Gathering your supplies beforehand makes the job go much smoother. Here’s what you’ll need:
Safety Gear:
- Safety glasses
- Work gloves
- N95 mask (especially for cleaning and mixing)
Tools for Preparation & Repair:
- Tape measure
- Stiff wire brush
- Paint scraper (if removing old coatings)
- Broom
- Hammer and cold chisel (for larger chips)
- Spray bottle
- Bucket (for mixing)
- Steel trowel
- Caulk gun
- Putty knife
- Hand pump air blower (or canned air)
Materials:
- Concrete patch mix (for chips and larger damaged areas)
- Concrete crack sealant (in a caulk tube for small cracks)
- Concrete sealer (for outdoor stairs)
- Plastic sheeting
Step-by-Step Guide to Repairing Your Concrete Stairs
Ready to get started? Let’s break this down into a simple, manageable process.
Step 1: Inspect and Clean the Stairs
First, you need a clean slate. Remove any pots, mats, or other items from the stairs.
- Examine Every Surface: Look closely at each tread (the part you step on) and riser (the vertical part) for any damage.
- Measure the Cracks: Use your tape measure to check the width and depth of any cracks. Remember our rule: if it's over 1/4 inch, it's best to consult a pro.
- Check for Stability: Carefully press down on each step with your full weight to feel for any looseness or shifting.
- Scrub and Rinse: Use your stiff wire brush to scrub away any dirt, moss, or loose, flaky concrete. If there's old paint or sealant, use a paint scraper to remove as much as you can. Once you've scrubbed everything, sweep away the debris and rinse the stairs thoroughly with water.
Crucially, you must let the stairs dry completely before moving on to the repair steps. This can take several hours or even a full day, depending on the weather.
Step 2: Patching Large Chips and Corners
For any chips deeper than 1/2 inch or broken corners, a concrete patching compound is your best friend.
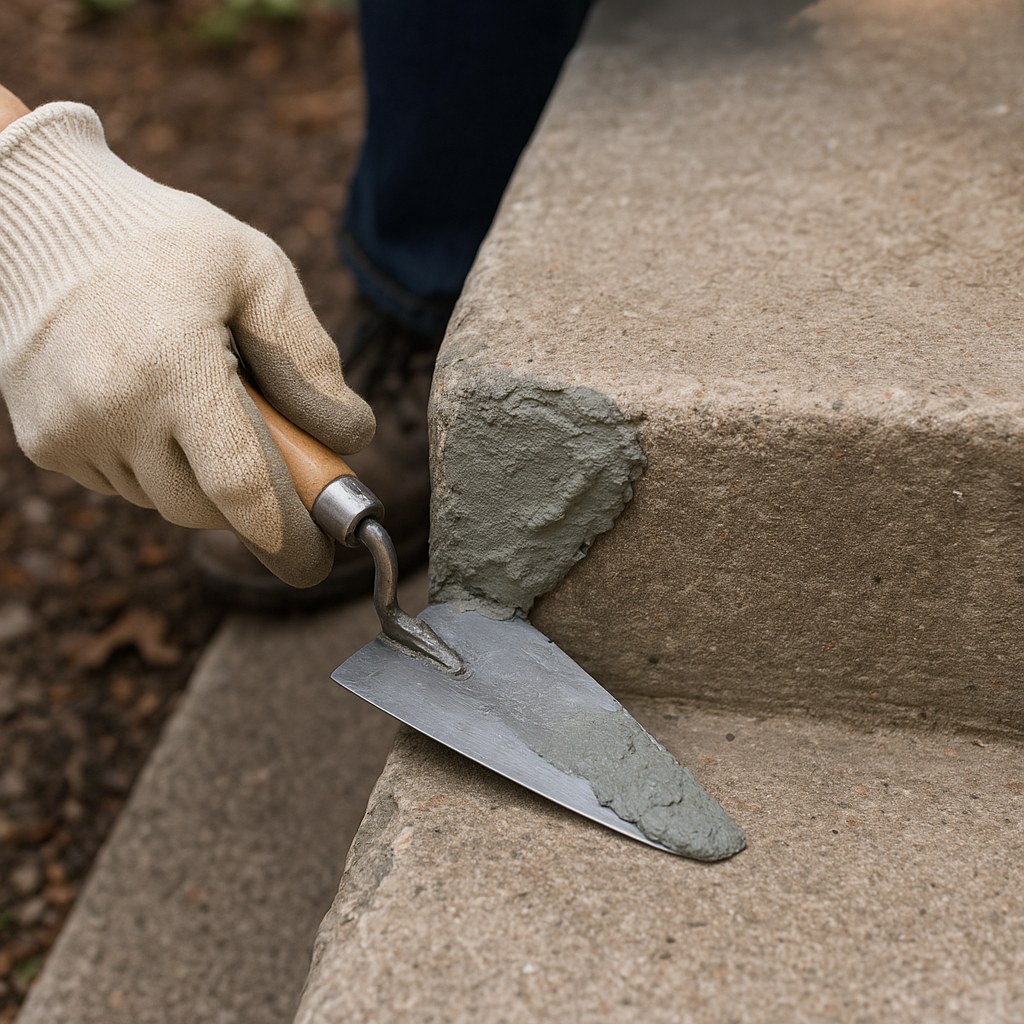
- Prepare the Chip: Using your hammer and cold chisel, gently chip away any loose or crumbling concrete from inside the damaged area. Try to create a slightly wider base inside the chip than at the surface—this helps "lock" the patch in place.
- Clean Out Debris: Use your wire brush and air blower to remove every last bit of dust from the hole. A clean surface is essential for a strong bond.
- Dampen the Surface: Lightly mist the inside of the chip with water from your spray bottle. You want it to be damp, not soaking wet. This prevents the old concrete from sucking the moisture out of your new patch too quickly.
- Mix the Patch: In your bucket, mix the concrete patching compound with water according to the manufacturer's directions. Aim for a thick, peanut-butter-like consistency. Only mix as much as you can use in about 10-15 minutes.
- Apply the Patch: Scoop the patch material onto your steel trowel and press it firmly into the chip. Make sure you push it into all the corners to eliminate any air pockets. Overfill the area slightly, building it a little higher than the surrounding surface.
- Smooth It Out: Use the edge of the trowel to scrape off the excess material and smooth the patch so it's perfectly flush with the rest of the step. For corners, you can use two trowels or a piece of wood as a form to create a sharp edge.
- Let It Cure: Cover the patch with plastic sheeting to keep it from drying out too fast. Let it cure for at least an hour before moving on, or as directed by the product instructions.
Step 3: Filling Small Cracks
For those hairline cracks (less than 1/4 inch wide), a flexible concrete crack sealant is the perfect solution.
- Clean the Crack: Use the tip of a screwdriver or your wire brush to clean out any dirt or debris from inside the crack. Use your air blower to get it completely clean.
- Apply the Sealant: Load the tube of concrete crack sealant into your caulk gun. Cut the nozzle at a 45-degree angle to a size that matches the crack.
- Fill It In: Place the nozzle at one end of the crack and gently squeeze the trigger, drawing a steady bead of sealant along the entire length. The sealant should fill the crack completely and sit just slightly above the surface.
- Smooth the Seam: Before the sealant starts to skin over, run a damp putty knife over the bead to smooth it flush with the surrounding concrete.
- Allow to Cure: Let the sealant cure for at least 30 minutes (or as directed) before walking on it.
Step 4: Seal the Stairs for Long-Lasting Protection
If your stairs are outdoors, this final step is non-negotiable. Applying a concrete sealer will protect your hard work from water, ice, and UV rays.
Wait at least 24 hours after your last patch or fill has cured before sealing.
- Ensure the Stairs are Dry: The concrete must be completely dry for the sealer to adhere properly.
- Apply the First Coat: Pour some concrete sealer into a paint tray. Using a smooth-surface paint roller, apply a thin, even coat to all the treads and risers. Work from the top down.
- Let It Dry: Allow the first coat to dry for about 2 hours, or as specified on the can.
- Apply the Second Coat: Apply a second thin coat to ensure complete coverage.
- Final Cure: Block off the stairs to foot traffic for at least 2 more hours to let the sealer fully cure.

You've Done It!
Congratulations! With a bit of time and effort, you’ve not only repaired your concrete stairs but also protected them for years to come. You've improved your home's safety and curb appeal, all while saving money.
Feeling empowered? Home maintenance doesn't have to be intimidating. For more DIY guides, project tracking, and access to a network of trusted professionals for those jobs you can’t tackle alone, download the Casa app today. We’re here to help you manage your home with confidence, one project at a time.


