The good news? You don't have to live with it, and you probably don't need to call in a professional for a minor repair. With a little bit of patience and the right guidance, fixing a chipped or cracked tile is a very manageable DIY project.
This guide will walk you through everything you need to know, from assessing the severity of the damage to performing the repair yourself. We’ll cover the two main methods: filling a minor chip with epoxy and completely replacing a badly damaged tile.

First Things First: A Thorough Inspection
Before you grab any tools, you need to play detective. The right repair method depends entirely on the type and extent of the damage. So, grab a flashlight and get down on the floor for a closer look.
Here’s what you need to figure out:
- How widespread is the damage? Are you dealing with a single chipped tile, or do you see issues across several tiles? A single damaged tile is a straightforward fix. If multiple tiles are cracked or the grout lines around them are crumbling, it could signal a deeper issue.
- How deep is the chip or crack? Use your flashlight to examine the blemish. Is it a shallow surface chip that just affects the glaze? Or is it a deep crack that goes all the way through the tile? Shallow blemishes can often be filled, while through-cracks almost always require a full replacement.
- Is the floor stable? Gently walk and press on the tiles surrounding the damaged one. Do you feel any movement, flexing, or sponginess? Tap the center of the damaged tile and its neighbors with the plastic handle of a screwdriver. Do you hear a hollow sound? Flexing or hollow sounds can indicate that the tile has come loose from the mortar underneath or that there might be a problem with the subfloor.
If you notice widespread damage, a flexing floor, or multiple hollow-sounding tiles, stop right there. These are red flags for a potential subfloor or moisture issue that a simple tile repair won't solve. In this case, it’s best to consult a professional flooring contractor to diagnose the root cause.
However, if you're just dealing with one or two damaged but stable tiles, you’re ready to proceed with a DIY fix!
Method 1: Filling a Minor Surface Chip
This method is perfect for small, shallow chips where the rest of the tile is structurally sound. You're essentially using a color-matched filler to make the blemish disappear. It’s fast, easy, and requires minimal tools.
When to use this method:
- You have a small surface chip or gouge.
- The crack does not go through the entire tile.
- The tile is firmly attached to the floor (no flexing or hollow sounds).
Tools and Materials You'll Need:
- Tile epoxy repair kit (these often come with different pigments to match your tile color)
- Vacuum with a hose attachment
- Damp sponge or microfiber cloth
- Plastic applicator or putty knife
Step-by-Step Instructions:
- Clean the Area: First, thoroughly clean the damaged tile with a damp sponge and a mild cleaner to remove any dirt or grime. Let it dry completely.
- Vacuum the Debris: Use a vacuum to carefully suck out any loose dust or tiny fragments from inside the chip. A clean surface is essential for the epoxy to bond properly.
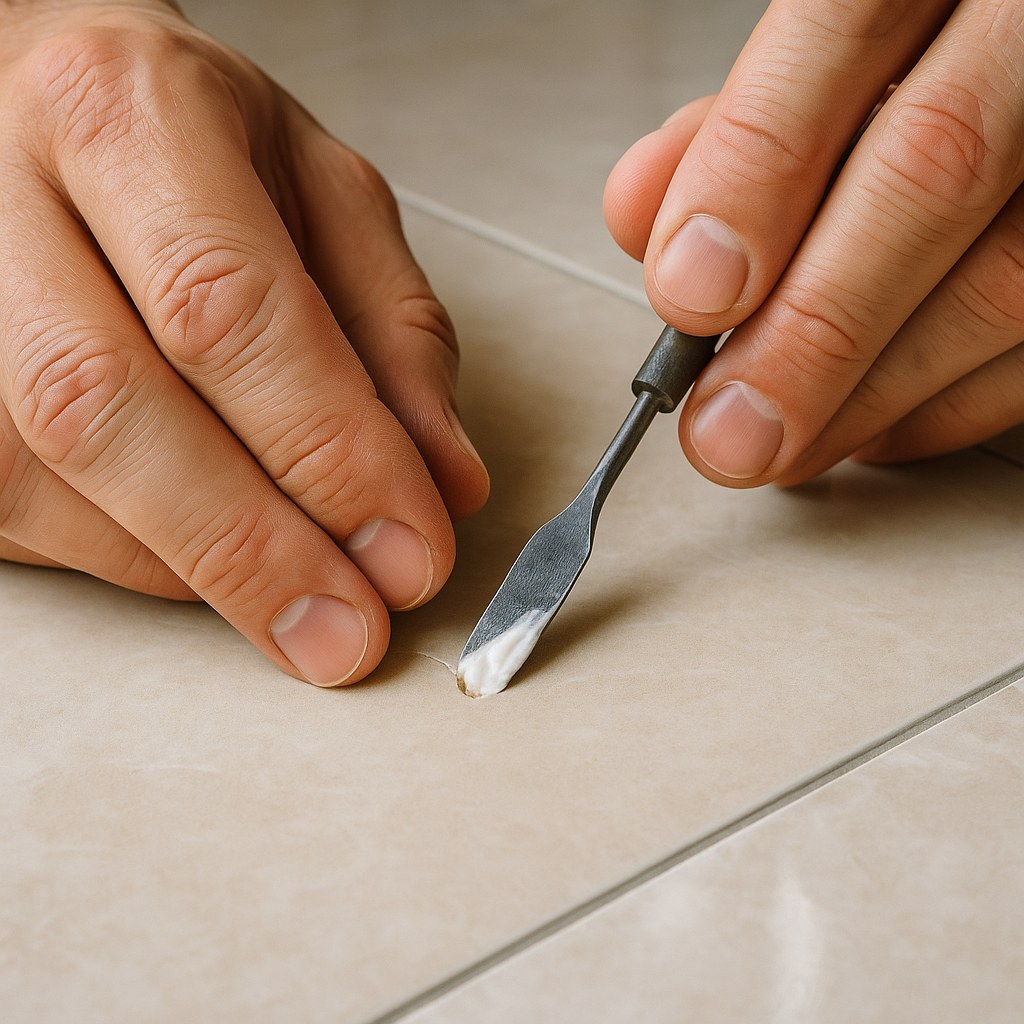
- Mix the Epoxy: Following the package directions on your tile epoxy repair kit, mix the resin and hardener. If your kit includes color tints, add them incrementally until you get a perfect match for your tile. Mix a small amount first to test the color.
- Apply the Filler: Using a small plastic applicator, press the mixed epoxy into the chip. Overfill it slightly, as the epoxy may shrink a bit as it dries.
- Level the Surface: Take a straight edge, like a plastic scraper or an old credit card, and drag it across the filled area to scrape away the excess epoxy and make the repair level with the surrounding tile surface.
- Clean Up: Quickly wipe away any excess epoxy from around the chip with a damp cloth before it starts to set.
- Let It Cure: Patience is key! Allow the epoxy to cure completely, which typically takes about 24 hours. Avoid walking on or getting the area wet during this time. Check the product instructions for the specific curing time.
Once cured, the repair should be hard, level, and blend in seamlessly with your floor.
Method 2: Replacing a Damaged Tile
For deep cracks, shattered corners, or any damage that compromises the integrity of the tile, a full replacement is the only way to go. This process is more involved but is absolutely achievable for a determined DIYer. The biggest prerequisite? Having a matching spare tile.
When to use this method:
- The tile has a crack running all the way through it.
- A large piece or corner has broken off.
- The tile is loose or sounds completely hollow when tapped.
Tools and Materials You'll Need:
- A matching spare tile
- Hammer and cold chisel
- Utility knife or grout saw
- Putty knife
- Thin-set mortar
- Notched trowel
- Plastic tile spacers
- Pre-mixed grout or grout powder
- Grout float
- Sponge and bucket of water
- Safety glasses and gloves
Step-by-Step Instructions:
- Remove the Old Grout: Put on your safety glasses. Use a utility knife or a grout saw to carefully score and scrape out the grout lines around the entire damaged tile. This is the most tedious part, but it’s crucial for isolating the tile and preventing damage to its neighbors.
- Break Up the Tile: Place the tip of a cold chisel in the center of the damaged tile at a 45-degree angle. Gently tap it with a hammer until the tile cracks. Continue to carefully break the tile into smaller, manageable pieces.
- Remove the Pieces: Use the chisel and hammer to pry up and remove all the broken tile fragments. Be careful not to damage the surrounding tiles.
- Prepare the Subfloor: Once the tile is out, you'll see the old layer of adhesive (thin-set mortar). Use your putty knife or chisel to scrape this away. You need the surface to be as smooth and level as possible for the new tile to sit flush. Vacuum up all the dust and debris.
- Apply New Mortar: Mix a small batch of thin-set mortar according to the package directions. Using a notched trowel, spread an even layer of mortar onto the empty spot on the subfloor.
- Set the New Tile: Firmly press the spare tile into the mortar with a slight twisting motion to ensure good adhesion. Check that it’s level with the surrounding tiles. Insert plastic tile spacers on all sides to maintain consistent grout lines.
- Let the Mortar Cure: Wait at least 24 hours for the mortar to set completely. Don't skip this step!
- Apply New Grout: After 24 hours, remove the tile spacers. Mix your grout and apply it to the joints using a grout float, pressing it firmly into the gaps.
- Clean and Cure: Wipe away the excess grout from the tile surface with a damp sponge. Let the grout cure for another 24-48 hours as recommended by the manufacturer.
How Much Does It Cost to Fix a Chipped Tile?
One of the biggest benefits of a DIY repair is the cost savings.
- DIY Chip Repair: A tile epoxy repair kit costs around $15 to $30.
- DIY Tile Replacement: If you already have a spare tile, your costs will be for materials like a small bag of thin-set mortar and grout, totaling about $20 to $40.
- Hiring a Professional: According to Forbes Home, hiring a professional for a small tile repair job can cost anywhere from $200 to $700, with the national average around $450. The cost depends on the complexity and your location.
Take Pride in Your Floor Again
A chipped tile might seem like a permanent flaw, but with the right approach, it’s a problem you can solve in a weekend. By correctly assessing the damage and choosing between filling and replacing, you can restore the look of your floor, prevent further damage, and save a significant amount of money.
Feeling empowered? We thought so. For more expert home maintenance guides, easy-to-follow tutorials, and a direct line to trusted professionals for those jobs you’d rather not handle, download the Casa app today. We’re here to help you tackle any project and keep your home in perfect shape.


