The good news is that fixing a few damaged tiles is often a straightforward DIY project that you can tackle in a weekend. Whether you're dealing with a simple crack or a tile that's completely popped off, we’re here to walk you through it.
Think of us as your friendly expert on the other end of the line. We’ll guide you through assessing the damage, making the repair, and knowing when it might be time to call in a professional. Let’s get your pool back to pristine condition!
Why You Shouldn't Ignore Damaged Pool Tiles
It’s easy to look at a small crack in a pool tile and think, "I'll get to it later." However, this seemingly minor issue can escalate quickly. Here’s why prompt action is so important:
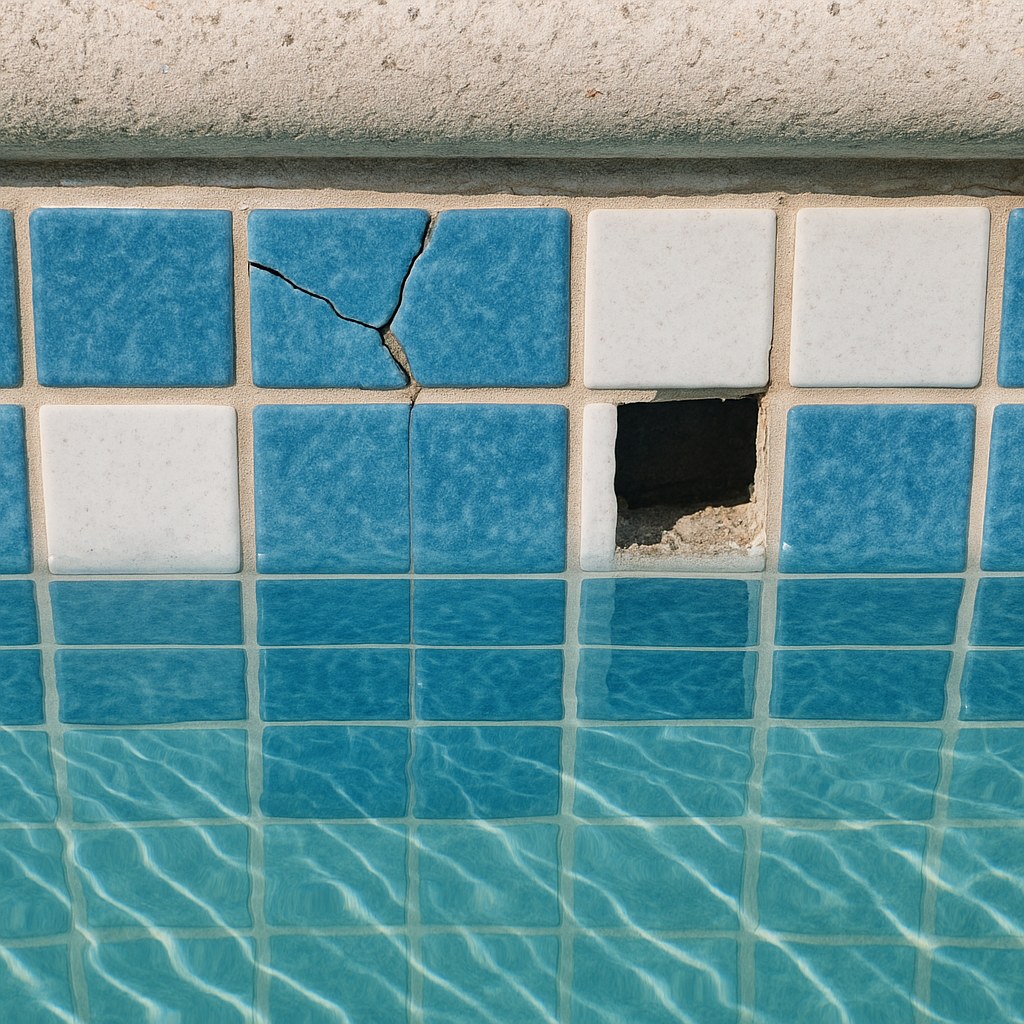
- Safety First: A cracked tile can create razor-sharp edges just below the water's surface, posing a serious cutting hazard for you and your family. A missing tile leaves a rough, abrasive surface that can easily scrape feet and hands.
- Preventing Leaks: Your pool's tiles and grout are the first line of defense for its concrete shell (gunite). When a tile is compromised, water can seep behind it and begin to degrade the underlying structure. This can lead to more tiles loosening and, in worst-case scenarios, costly structural leaks.
- Stopping the Spread: One missing tile creates a weak point. Water pressure and changing temperatures can cause neighboring tiles to loosen and fall off, turning a small repair job into a major project.
- Maintaining Your Investment: Your pool is a significant investment. Keeping the tile in good repair not only keeps it looking beautiful but also helps protect its long-term value.
Step 1: Assess the Damage and Prepare the Area
Before you can start the repair, you need to understand the scope of the problem. This initial assessment will help you decide whether this is a manageable DIY task or one that requires a professional touch.
- Turn Off the Power: For safety, start by switching off the pool pump and any other related electrical equipment at the circuit breaker.
- Do a Full Inspection: Carefully walk the perimeter of your pool and spa. Locate and count every single cracked, chipped, or missing tile.
- Note the Location: Pay attention to where the damaged tiles are. Are they above the waterline, right at the waterline, or deep underwater? This will determine how much, if any, water you need to drain.
Now, ask yourself the key question: Are there three or fewer damaged tiles, and can you reach them easily without draining most of the pool?
If the answer is yes, great! You’re in a good position to tackle this yourself.
If you have widespread damage (more than three or four tiles), or if the tiles are in a hard-to-reach area like the deep end floor, it's best to call a professional. According to HomeAdvisor, hiring a pro for tile repair can cost anywhere from $25 to $65 per square foot, not including the cost of draining and refilling the pool if necessary. For minor jobs, you might pay a minimum service fee of around $150 to $300. Tackling a small job yourself can save you a significant amount.
Step 2: How to Repair a Cracked (But Still Attached) Tile
If your tile is cracked but still firmly in place, you can often seal it without having to remove it. For this, you'll use underwater epoxy pool putty, a magical substance that hardens like steel, even underwater (though we recommend applying it dry for the best results).
Tools and Materials You'll Need:
- Submersible pump (optional, for lowering water level)
- Clean towels or cloths
- Fine-grit sandpaper
- Underwater epoxy pool putty
- Putty knife
Here’s how to get it done:
- Lower the Water Level: If the tile is near the waterline, use a submersible pump or a bucket to lower the water at least 2 inches below the damaged area. This ensures the epoxy can be applied to a dry surface for the strongest bond.
- Clean and Dry the Tile: Thoroughly dry the cracked tile and the area around it with a clean towel.
- Prep the Crack: Lightly scuff the surface of the crack with fine-grit sandpaper. This roughs up the glaze just enough for the epoxy to get a solid grip. Wipe away any dust with a damp cloth, then dry the area completely again.
- Mix the Epoxy Putty: Underwater epoxy typically comes in a two-part stick. Cut off an equal amount of each part and knead them together with your fingers until the color is completely uniform. Work quickly, as you only have a few minutes before it starts to harden.
- Apply the Putty: Press the mixed putty firmly into the crack. Use a putty knife to smooth the surface, ensuring it's flush and level with the surrounding tile. Scrape away any excess putty immediately.
- Let It Cure: This is the most important step! Follow the manufacturer's instructions for curing time, which is typically 24 hours. Don't be tempted to refill the pool early.
Once the epoxy has fully cured, the crack should be completely sealed and smooth. You can now refill the pool to its normal level.

Step 3: How to Replace a Missing or Loose Tile
If the tile is loose, falling off, or completely missing, you’ll need to replace it. This process is a bit more involved but is completely achievable with the right tools and a little patience.
Tools and Materials You'll Need:
- Safety glasses
- Submersible pump
- Cold chisel and rubber mallet
- Grout saw or multi-tool with a grout removal blade
- Stiff wire brush
- Thinset mortar (specifically for underwater use)
- Notched trowel
- Waterproof pool grout
- Grout float
- Bucket and sponge
- Matching replacement tile
Let's get that new tile in place:
- Lower the Water Level: Drain the pool so the water level is at least 6 inches below the work area. This gives you plenty of room and prevents water from interfering with the mortar and grout.
- Safety First! Put on your safety glasses. Chipping away at old tile and grout can send small, sharp fragments flying.
- Remove Old Tile and Grout: If any fragments of the old tile remain, place the tip of a cold chisel against the edge and tap it gently with a rubber mallet to break them free. Then, use a grout saw to carefully scrape out all the old grout from around the empty space.
- Clean the Surface: Use a stiff wire brush to scrub the exposed pool shell (substrate). You want to remove all old mortar, dust, and debris to create a clean surface for the new mortar to adhere to.
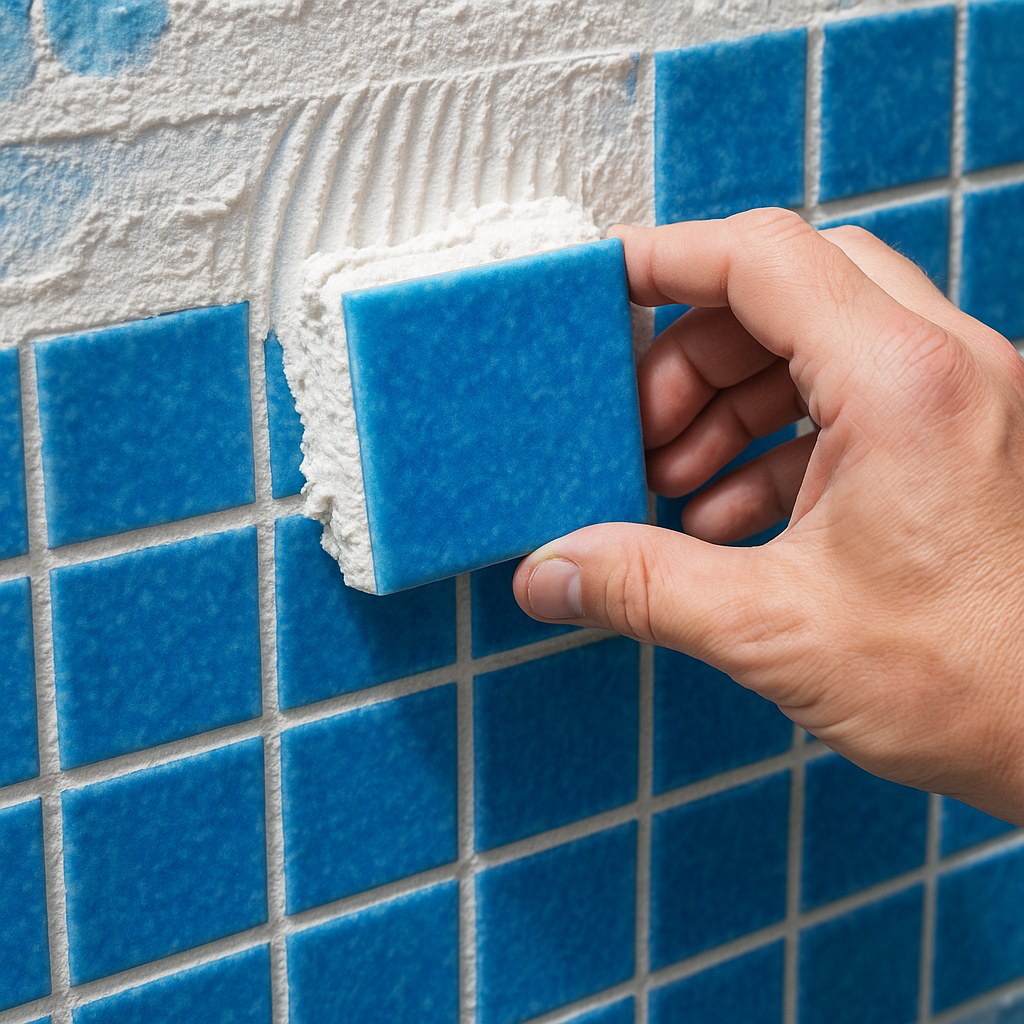
- Mix and Apply Mortar: In a small bucket, mix the thin-set mortar according to the package directions until it has a peanut-butter-like consistency. Using a notched trowel, spread a thin, even layer onto the back of the replacement tile.
- Set the New Tile: Press the replacement tile firmly into the opening. Wiggle it slightly to set it into the mortar and ensure it's level with the surrounding tiles. Use painter's tape to hold it in place if it's on a vertical wall.
- Clean Up and Wait: After about 20 minutes, use a damp sponge to gently wipe away any excess mortar that squeezed out onto the tile face. Now, let the mortar set for a full 24 hours.
- Apply the Grout: After the mortar has cured, mix your waterproof pool grout. Pack the grout into the joints around the tile using a grout float, holding it at a 45-degree angle.
- Final Clean and Cure: Wipe the excess grout off the tile face with a damp sponge. Be careful not to pull the grout out of the joints. Now for the final wait: let the grout cure for another 24 hours before refilling the pool.
What if You Can't Find a Matching Tile?
This is a common challenge, especially with older pools. If you don't have any spare tiles left over from the installation, try taking a piece of the broken tile to local pool stores. If you strike out there, consider using a decorative or accent tile in a complementary color to create a unique mosaic look. If many tiles are damaged and you can't find replacements, it might be time to consult a professional about options for retiling a section or the entire waterline.
Final Thoughts
Fixing a few cracked or missing pool tiles is a rewarding project that boosts your pool’s safety, appearance, and longevity. By following these steps, you can confidently handle minor repairs and save yourself the cost of a professional service call.
But we know that not every home project goes according to plan. Sometimes you need a little extra guidance or run into an issue that’s bigger than you expected. That’s where Casa comes in.
Download the Casa app today for more expert DIY guides, maintenance reminders, and a direct line to vetted, local professionals for those jobs that are best left to the experts. Let Casa help you keep your home in perfect shape, from your pool to your roof.


