The good news? You don’t always need to call in a professional for this. Many common sprinkler leaks are surprisingly straightforward to fix yourself with just a few tools and a little bit of guidance. Think of us as your friendly expert on the other end of the line, ready to walk you through it.
In this guide, we’ll help you play detective to find the source of the leak, then give you step-by-step instructions on how to repair leaking sprinkler valves and pipes like a pro.
Signs You Have a Sprinkler System Leak
Before you can fix the problem, you need to be sure you’ve found it. A leak isn't always as obvious as a geyser shooting up from your flowerbed. Here are the common telltale signs:
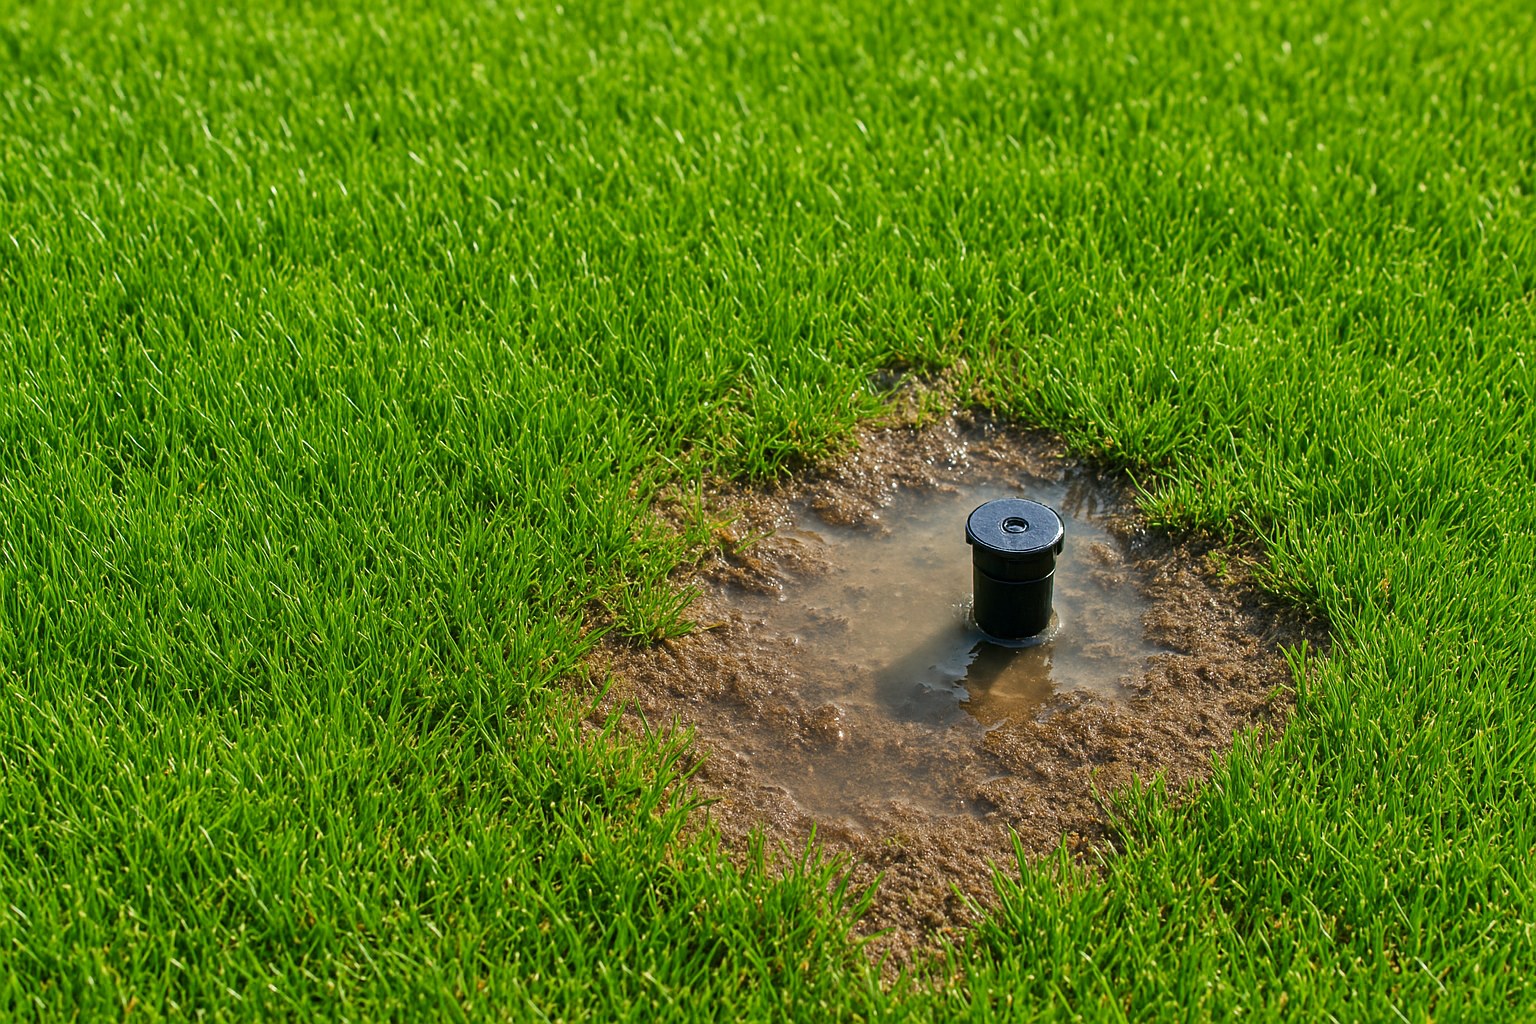
- Soggy Spots or Puddles: If you have areas of your lawn that are constantly wet or marshy, even when the sprinklers haven’t run recently, that’s a red flag.
- Unusually Green Patches: A leak can over-water one specific area, causing the grass there to be much greener and grow faster than the surrounding lawn.
- Erosion or Sunken Ground: A persistent underground leak can wash away soil, causing dips, holes, or even small sinkholes to form along the pipe line.
- Low Water Pressure: If sprinklers in one zone seem weaker than others or don’t pop up fully, a leak in that zone could be robbing them of pressure.
- Water Gushing from a Sprinkler Head: If a sprinkler head is spewing water constantly, even when the system is off, it usually points to a faulty valve that’s stuck open.
- High Water Bills: A sudden, unexplained increase in your water usage is one of the most common ways homeowners discover a hidden irrigation leak.
Step 1: Emergency First Aid Assess the Leak and Shut It Down if Needed
Okay, you’ve confirmed there’s a leak. Before you grab your shovel, take a moment to assess the severity. Is it a slow drip creating a small puddle, or is water gushing out and threatening to flood your patio?
If the leak is severe, your first priority is to shut off the water to prevent waste and damage.
How to Perform an Emergency Sprinkler System Shutdown:
- Find the Sprinkler Shut-Off Valve: Your irrigation system should have its own main shut-off valve. It's often located in a valve box near your water meter or where the water line enters your house. It might have a ball valve (a single lever) or a gate valve (a round handle like a hose spigot).
- Turn it Clockwise: Turn the handle or lever clockwise until it stops. This should cut off the water supply to the entire sprinkler system.
- If That Doesn’t Work, Use the House Main: If you can’t find the sprinkler shut-off or if it fails, you’ll need to shut off the water to your entire house. The main shut-off valve is typically located where the water main enters your home (in a basement, crawlspace, or on an exterior wall) or in a utility box in your front yard near the street. Again, turn it clockwise to close it.
- Relieve the Pressure: Once the water is off, open an outdoor faucet or hose bib to drain any remaining water and relieve pressure in the lines.
If you’ve shut off the water and the leak stops, great! You’ve bought yourself time to diagnose the problem properly. If water is still flowing heavily after shutting off the main, you could have a leak in the main water line itself, and you should call a professional plumber immediately.
Step 2: Playing Detective How to Find the Source of the Leak
With the immediate crisis averted, it’s time to pinpoint the exact location of your leak. Most sprinkler leaks originate from one of two places: a sprinkler valve or a pipe.
Finding the General Leak Area:
- Go to your sprinkler controller and run only the zone where you suspect the leak.
- Walk along the path of that zone. Watch for water bubbling up from the ground, listen for the sound of running water, and look for the wettest, soggiest spot. This is your primary search area.
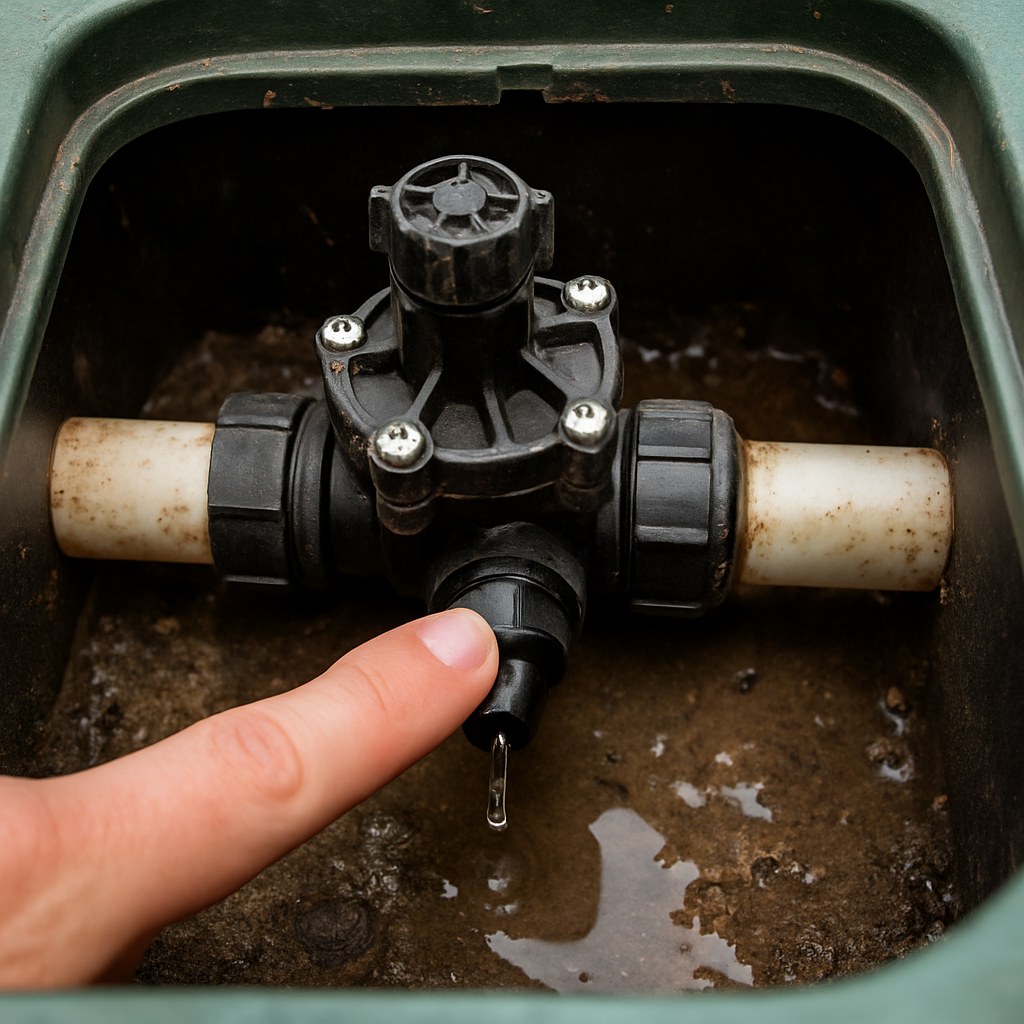
Is it a Leaking Valve?
Sprinkler valves are the traffic cops of your irrigation system, opening and closing to send water to specific zones. They are usually grouped together in a green, in-ground box (the valve box).
- Find the valve box for the leaking zone.
- Open the lid and carefully clear away any dirt or debris.
- Wipe the valves and connections dry with an old towel.
- Turn the water supply back on for a moment and watch closely. Do you see water seeping or spraying from the body of the valve itself, or from where the pipes screw into it? Make a note of what you see.
Is it a Leaking Pipe?
If the valves look dry, the problem is likely somewhere along the underground pipe.
- Go to the wettest spot you identified earlier.
- Using a small trowel, carefully dig a small inspection hole. You don't need a huge crater, just enough to expose a 6- to 12-inch section of the pipe.
- Wipe the exposed pipe dry.
- Have someone run that sprinkler zone for just 15-20 seconds while you watch the pipe. You should be able to see exactly where the water is escaping—either from a crack along the pipe’s length or from a fitting where two pieces of pipe join.
Step 3: The Fix A Step-by-Step Guide to Sprinkler Repairs
You’ve found the culprit! Now it’s time to get your hands dirty. We’ll cover the four most common repairs.
Important Note: These instructions are for white PVC pipe, which is the most common material for residential sprinkler systems. If your pipes are black poly pipe or another material, it's best to call a professional, as they require different tools and techniques.
How to Fix a Leaking Sprinkler Valve
Scenario 1: The Leak is Coming from the Valve Body
This often means the internal rubber diaphragm is worn out or has debris trapped in it.
- Tools/Materials: Phillips screwdriver, new valve diaphragm and spring (get a rebuild kit for your specific valve model).
- Turn off the main sprinkler shut-off valve.
- Unscrew the screws on top of the valve bonnet (the lid of the valve).
- Carefully lift off the cover. Pay close attention to how the diaphragm and spring inside are oriented. Taking a quick photo with your phone is a great idea.
- Remove the old diaphragm and spring. Check for any rocks or grit inside the valve body and clean it out.
- Place the new diaphragm and spring inside, positioning them exactly like the old ones.
- Replace the cover and tighten the screws in a star pattern to ensure an even seal.
- Slowly turn the water back on and check for leaks.
Scenario 2: The Leak is from a Threaded Connection
This is an easier fix. It just means the seal has failed.
- Tools/Materials: Adjustable wrench, thread seal tape (also called Teflon tape).
- Turn off the main sprinkler shut-off valve.
- Unscrew the leaking connection.
- Clean any old tape or gunk off both the male and female threads.
- Wrap the male threads with 3-4 layers of new thread seal tape. Important: Wrap the tape clockwise, in the same direction you will tighten the fitting. This prevents it from unraveling.
- Screw the connection back together by hand until it’s snug, then give it an extra quarter-turn with the wrench. Don’t overtighten!
- Slowly turn the water back on and check for leaks.
How to Fix a Leaking Sprinkler Pipe (PVC)
Scenario 1: Repairing a Leaking Pipe Joint/Fitting
- Tools/Materials: PVC cutter (or hacksaw), PVC primer, PVC cement, and a PVC slip coupling.
- Turn off the main sprinkler shut-off valve and dig out enough space to work around the joint.
- Using a PVC cutter, cut out the entire leaking fitting, leaving two clean, square pipe ends.
- "Dry fit" your repair. Make sure the slip coupling will cover the gap you created.
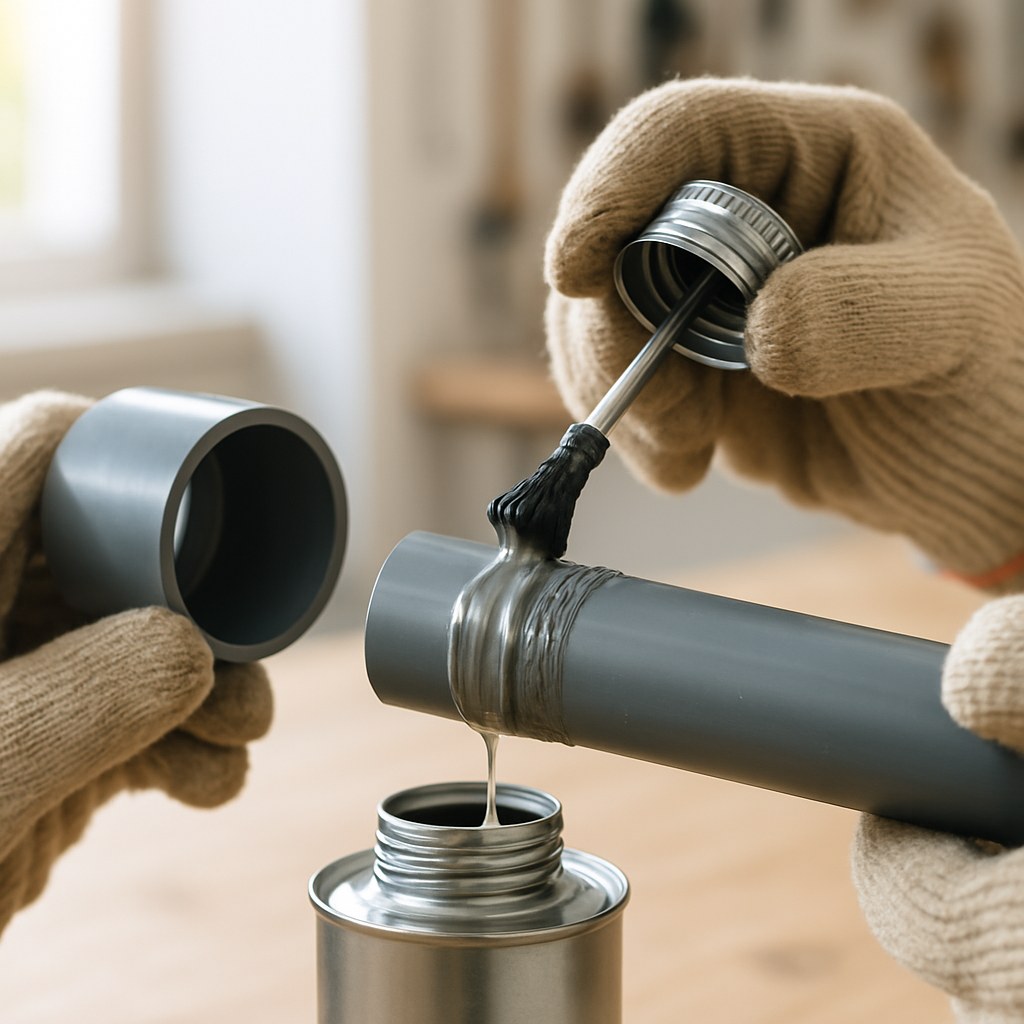
- Apply purple PVC primer to the outside of both pipe ends and the inside of the slip coupling. The primer cleans and softens the plastic for a strong weld.
- Quickly apply a thin, even layer of PVC cement over the primed areas.
- Push the coupling completely onto one pipe end, give it a quarter-turn to spread the cement, then immediately slide it over the other pipe end. Hold it firmly in place for 30 seconds as the cement sets quickly.
- Wait at least 15-20 minutes before slowly turning the water back on to check your work.
Scenario 2: Repairing a Crack in a Pipe Segment
- Tools/Materials: PVC cutter, PVC primer, PVC cement, two PVC couplings, and a small piece of new PVC pipe of the same diameter.
- Turn off the water and excavate around the cracked section.
- Cut out the cracked portion of the pipe, making your cuts a couple of inches beyond the crack on either side.
- Measure the gap and cut a new piece of PVC pipe to fit.
- Using the primer-and-cement method described above, attach a coupling to each end of the existing pipes.
- Apply primer and cement to the ends of your new pipe segment and the open ends of the couplings, then insert the new piece, making sure it's fully seated in both couplings.
- Hold everything in place for 30 seconds, wait 20 minutes for it to cure, and then test your repair.
How Much Does It Cost to Fix a Sprinkler Leak?
One of the biggest benefits of DIY is the savings.
- DIY Cost: You can buy all the materials for a simple pipe or valve repair for under $25. A valve rebuild kit is typically $10-$20, and PVC fittings, primer, and cement are very inexpensive.
- Professional Cost: According to Angi, hiring a professional to repair a sprinkler system can cost anywhere from $100 to $400, depending on the complexity and location of the leak.
When to Put Down the Tools and Call a Pro
While many repairs are DIY-friendly, some situations are best left to the experts:
- The leak is in a non-PVC pipe.
- The leaking pipe is buried very deep or is located under a driveway or patio.
- Your DIY repair didn't solve the problem.
- The threads on a valve connection appear stripped or cracked.
- You simply don't feel comfortable tackling the job yourself.
Keep Your Home Running Smoothly with Casa
Fixing a sprinkler leak is a fantastic way to build your home maintenance confidence and save significant money. By following these steps, you can protect your lawn, conserve water, and keep your utility bills in check.
Feeling proud of your work? We knew you could do it! For your next project, don’t go it alone. Download the Casa app today! Casa provides easy-to-follow, step-by-step guides for hundreds of home repairs and maintenance tasks. And if you ever run into a job that’s bigger than you want to handle, Casa can connect you with trusted, vetted professionals in your area. Take control of your home maintenance with Casa in your corner.


