But here’s the good news: you don't always have to call in a professional flooring specialist right away. With a little detective work and the right technique, you can often fix these issues yourself. It's one of those incredibly satisfying DIY projects that makes a huge difference in how your home looks and feels.
In this guide, we'll walk you through everything you need to know, just like a friendly expert on the phone. We'll help you figure out what kind of flooring you have and then provide step-by-step instructions on how to secure loose boards and close those pesky gaps for good.
Why Do Floors Become Loose and Gapped?
Before we dive into the "how," let's quickly touch on the "why." Understanding the cause can help prevent future problems. Common culprits include:
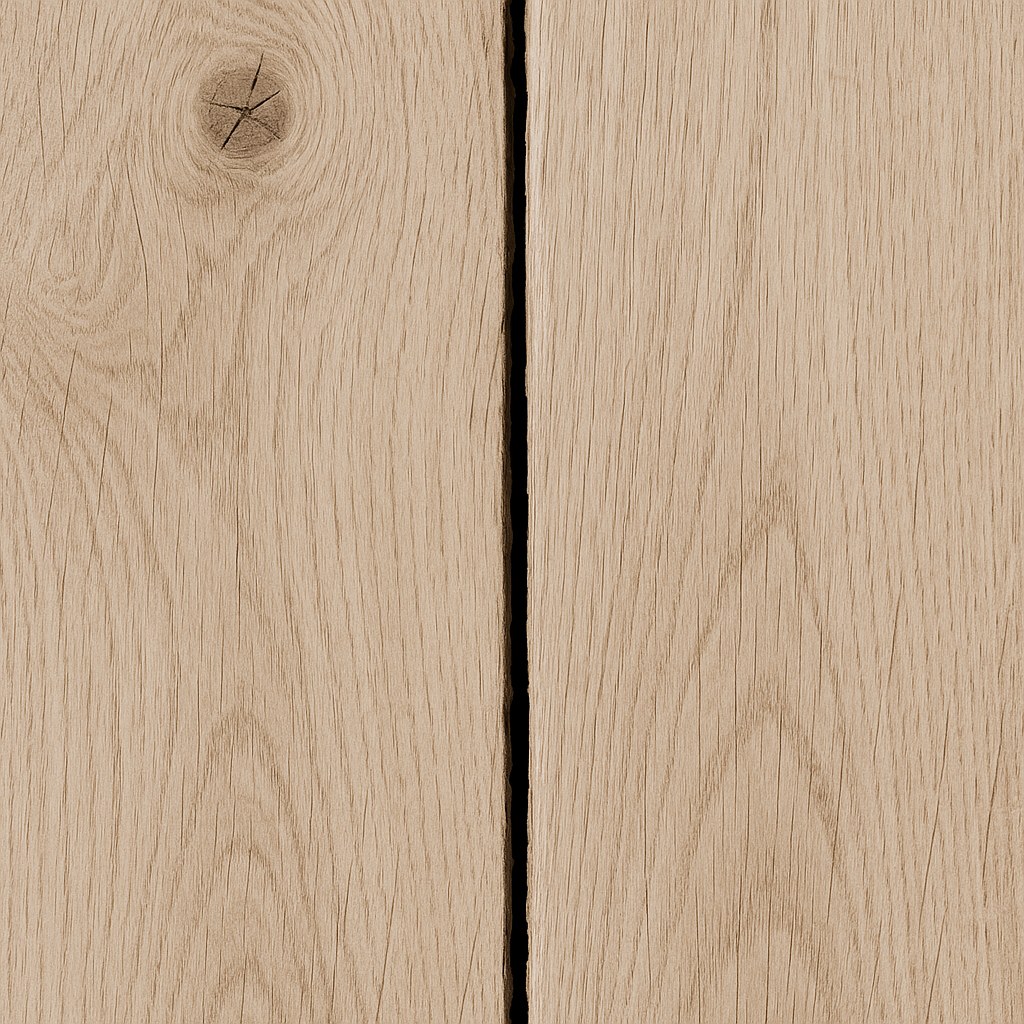
- Changes in Humidity and Temperature: Wood is a natural material that expands and contracts with changes in its environment. High humidity can cause boards to swell, and dry conditions can cause them to shrink, leading to gaps.
- Foundation Settling: Minor shifts in your home's foundation over time can put stress on flooring, causing boards to loosen.
- Subfloor Issues: An uneven or damaged subfloor is a primary cause of squeaks and loose boards.
- Improper Installation: If the flooring wasn't installed correctly—with enough expansion space or the right fasteners—problems are bound to appear down the road.
- Wear and Tear: High-traffic areas simply wear out over time. Adhesives can fail, and fasteners can work themselves loose.
Step 1: Identify Your Flooring Type
The first and most crucial step is to figure out what kind of floor you're dealing with. The repair method depends entirely on how the planks were installed. There are three main types:
- Floating Floor (Click-Lock): This is very common with laminate, luxury vinyl plank (LVP), and engineered hardwood. The planks aren't attached to the subfloor at all. Instead, they lock into each other along the edges with a special tongue-and-groove system, "floating" as a single unit over a thin underlayment.
- Nailed or Stapled Floor: This is the traditional method for solid hardwood floors. Each board is fastened directly to the wooden subfloor with nails or staples, usually driven at an angle through the "tongue" of the board so the fasteners are hidden.
- Glued-Down Floor: Common for engineered hardwood and some vinyl planks, especially when installed over a concrete subfloor. A strong adhesive is spread on the subfloor, and the planks are set into it.
How to Tell Them Apart:
- Check for movement: Gently press down on a board in the middle of the room. If you feel a very slight give or flex across a wide section, it's likely a floating floor.
- Look at the edges: Examine the gaps or find an edge near a floor vent or transition strip. Do you see a groove system where planks interlock? That's a classic sign of a click-lock floating floor.
- Search for fasteners: Look very closely along the seams between boards. You might spot the tiny heads of finish nails or the marks from a staple, indicating a nailed-down floor.
- The paper test: Try to slide a thin piece of paper or a business card into the gap under a loose board. If it hits resistance or comes out with sticky residue, you're probably dealing with a glued-down floor where the adhesive has failed.
Once you've identified your floor type, you're ready to pick the right repair strategy.
How to Fix a Floating Floor with Gaps
Gaps in floating floors are usually caused by planks sliding apart over time. The fix is often about shifting them back into place.
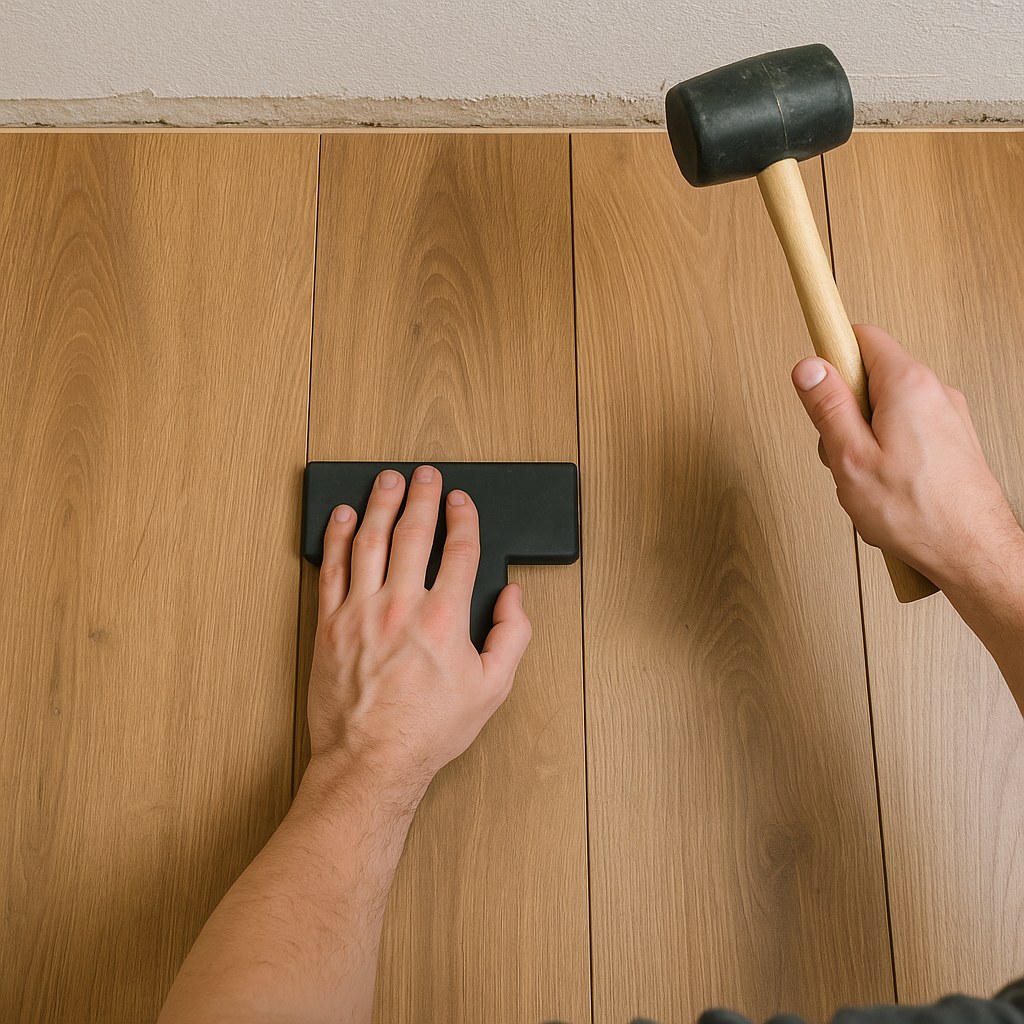
Method 1: Tapping the Planks Together
This is the simplest fix and often all that's needed.
Tools You'll Need:
- Flat pry bar
- Tapping block (a scrap piece of flooring works great)
- Rubber mallet
- Hammer
Step-by-Step Instructions:
- Remove the Baseboard: Find the wall closest to the gapped plank. You'll need to remove the baseboard on that wall to access the edge of the flooring. Use a flat pry bar to gently pry it away. Work slowly to avoid damaging the wall or trim.
- Position the Tapping Block: Place your tapping block against the exposed edge of the first plank.
- Gently Tap: Use your rubber mallet to gently strike the tapping block. This will push the entire row of planks, closing the gap. Don't hit it too hard! A few firm, controlled taps are better than one massive blow.
- Work Your Way Across: Continue this process for each row until all the gaps in the area are closed.
- Reinstall the Baseboard: Once you're satisfied, use your hammer to nail the baseboard back in place.
- Test It Out: Walk over the repaired area. It should feel solid and secure, with no visible gaps.
Method 2: Using a Floor Gap Repair Kit
If the gaps are stubborn or you can't easily access the edge of the floor, a specialized kit can work wonders. These kits typically use suction or adhesive pads and a ratchet system to pull boards together from the top.
Tools You'll Need:
Step-by-Step Instructions:
- Position the Pads: Place the adhesive pads from the kit on the two boards that border the gap.
- Attach the Strap: Hook the ratchet strap to the pads.
- Ratchet it Closed: Slowly tighten the ratchet. You will see the gap magically close as the planks are pulled together.
- Let it Settle: Leave the strap in place for about 15-20 minutes to allow the joints to settle into their locked position.
- Release and Remove: Release the ratchet and carefully remove the adhesive pads.
What if a Plank is Damaged?
If a plank is warped, chipped, or otherwise damaged, tapping won't solve the problem. In this case, you'll need to replace it. This is the most advanced repair for a floating floor but is still very doable. You'll essentially disassemble the floor from the nearest wall to the damaged plank, swap it out with a spare, and then reassemble it.
How to Secure a Nailed or Stapled Wood Floor
With nailed-down floors, looseness usually comes from a single board or small section where the fasteners have failed. The goal here is to re-secure that specific board to the subfloor.
Tools You'll Need:
- Shop vacuum
- Drill with a 1/16-inch bit
- 2-inch finish nails
- Hammer
- Nail set
- Matching wood putty
Step-by-Step Instructions:
- Clean the Gap: Use a shop vacuum with a crevice tool to clear any dust and debris from the gap. This ensures the board can sit flush.
- Drill a Pilot Hole: Position the loose board tightly against its neighbor. Drill a pilot hole at a 45-degree angle down through the "tongue" (the edge of the board) and into the subfloor. This angle helps hide the nail and provides strong holding power.
- Drive the Nail: Carefully drive a 2-inch finish nail through the pilot hole. Use a hammer to get it almost flush with the surface.
- Set the Nail: To avoid denting the wood with your hammer, use a nail set and a final tap from the hammer to sink the nail head just below the surface.
- Cover with Putty: Dab a small amount of matching wood putty over the nail hole. Wipe away any excess with a clean cloth. The repair will be nearly invisible.
- Test for Movement: Stand on the board and shift your weight around. The squeaking and movement should be gone! If not, you may need to add a second nail a few inches away.
How to Re-Adhere a Glued-Down Floor
When a glued-down plank comes loose, it means the original adhesive has failed. The fix involves injecting new, strong adhesive underneath the board to bond it back to the subfloor.
Tools You'll Need:
- Shop vacuum
- Painter's tape and plastic sheeting
- Flooring adhesive syringe
- Urethane wood flooring adhesive
- Heavy weights (paint cans, books, dumbbells)
- Damp cloth
Step-by-Step Instructions:
- Clean the Area: Vacuum out any dust from under and around the loose board.
- Protect the Surface: Use painter's tape and plastic sheeting to protect the surrounding floor from any excess adhesive. This stuff is powerful and hard to remove once cured!
- Inject the Adhesive: Load your syringe with the urethane adhesive. Carefully insert the needle into the gap and inject the adhesive under the loose plank. Move the needle around to get good coverage. You’ll feel a bit of resistance as the space fills.
- Clean Up Immediately: Wipe away any adhesive that squeezes out with a damp cloth right away.
- Apply Weight: Place your heavy weights directly on top of the plank. This ensures a tight bond with the subfloor as the adhesive cures.
- Let it Cure: Patience is key! Leave the weight in place for at least 60 minutes, but check your adhesive's instructions—some may require several hours to fully cure.
- Test the Bond: After the recommended curing time, remove the weights and gently test the board. It should feel completely solid.
When to Call a Professional
While many flooring issues are perfect for a weekend DIY project, some situations are best left to a professional flooring contractor. According to HomeAdvisor, the cost for professional floor repair can range from $200 to $800, but it's money well spent if you're facing:
- Widespread Gaps or Looseness: If more than a few boards are affected, it could signal a systemic installation or subfloor issue.
- Suspected Subfloor Damage: If the floor feels spongy or you suspect water damage beneath the flooring, a pro needs to assess the subfloor's integrity.
- You're Unsure or Uncomfortable: If you've tried these fixes and they don't work, or if you're not confident in identifying your floor type, a professional can diagnose and fix the problem efficiently.
Take Control of Your Home Maintenance
Fixing a loose floorboard or a nagging gap is a fantastic way to build your home improvement skills and save money. By taking the time to understand your flooring and follow the right steps, you can restore peace, quiet, and stability to your floors.
Feeling empowered? There’s a world of home maintenance waiting for you. For more expert guides, personalized maintenance reminders, and a direct line to trusted professionals for the jobs you can't tackle alone, download the Casa app today. Casa is your partner in creating a safe, functional, and beautiful home, one project at a time.


