This is a very common issue, especially in high-traffic areas like kitchens and bathrooms where heat and moisture can weaken the adhesive over time. The good news is that you often don't need to replace the entire cabinet. Whether it's a small edge lifting up or a larger bubble on a door, fixing peeling veneer is a manageable project.
This guide will help you inspect the damage, understand your options, and walk through the steps for a lasting repair.
First, What Kind of Veneer Do You Have?
Before you begin, it’s helpful to know what you're working with. There are two common types of cabinet surfaces:
- Wood Veneer: A very thin sheet of real wood glued to a core panel, usually particleboard or MDF (medium-density fiberboard). It looks and feels like solid wood because the surface is real wood.
- Laminate: A plastic or resin-based material with a printed pattern (often a wood grain) bonded to a core panel. It often has a more uniform, sometimes slightly glossy, appearance. If you inspect an edge, you may see layers of paper or plastic.
The repair method is slightly different for each, so identifying yours is a key first step.
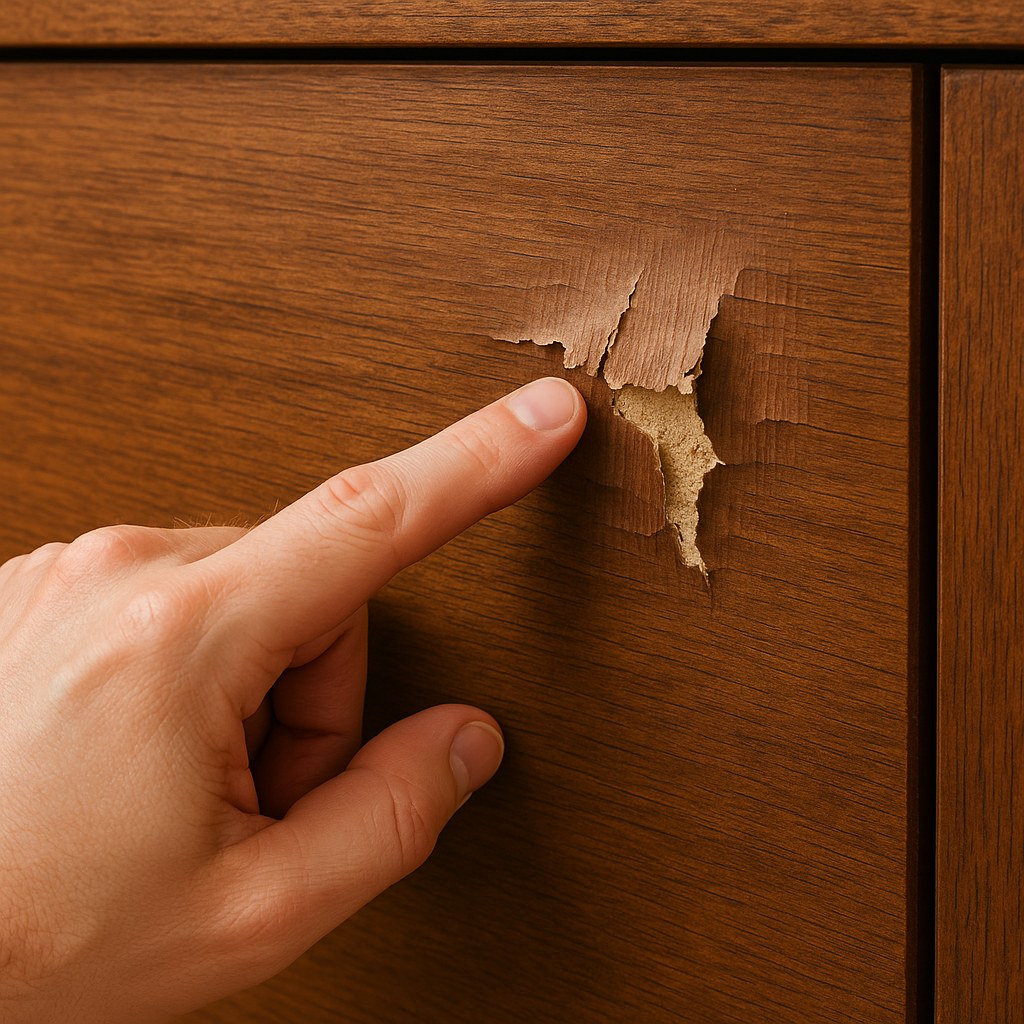
Step 1: Inspect the Damage
Your first task is to get a clear sense of the problem. This will tell you whether you're looking at a quick fix or a more involved project.
- Examine the surface: Look closely at all your cabinet doors and drawer fronts. Note any areas where the veneer is peeling at the edges, bubbling in the middle, or chipped.
- Measure the damage: Use a tape measure to check the size of each damaged spot. Is it a small lift smaller than your hand, or is a whole side of a door delaminating?
- Check the underlying material: Gently press on the exposed core panel, which is often called the substrate. Does it feel solid and dry, or is it soft, swollen, or crumbly?
- Look for water stains: Check inside the cabinets for any signs of water damage, like dark stains or a damp feel. Moisture is the number one enemy of veneer adhesive.
Step 2: Decide on Your Repair Strategy
Based on your inspection, you can now choose the right path forward.
It's safe to try a repair yourself if:
- The damaged area is small (less than 6 inches across).
- The issue is confined to a few specific spots, like a peeling edge or a single bubble.
- The substrate underneath is completely solid, dry, and intact.
If this sounds like your situation, you can proceed with re-gluing the veneer.
It's time to stop and call a professional if:
- The substrate is soft, swollen, or shows signs of water damage. This is the most important warning sign. Gluing new veneer over a damaged core will not work and indicates a larger moisture problem that needs to be addressed first. A carpenter or cabinetmaker can assess if the cabinet structure needs to be rebuilt.
- The damage is widespread across multiple doors or large panels.
- You’ve tried a repair, but it didn’t hold, or you’re not comfortable tackling a larger replacement.
How to Re-Glue a Small Area of Veneer
For small lifts and bubbles with a solid substrate, re-gluing is an effective solution. The process differs slightly depending on whether you have wood veneer or laminate.
For Wood Veneer:
Tools & Materials:
- Wood glue
- Small paintbrush or artist's brush
- Wax paper
- A flat block of scrap wood
- C-clamp
- 220-grit sandpaper
- Clean cloths
Steps:
- Prep the Surface: Gently lift the peeling flap. Use a corner of folded sandpaper to lightly sand both the back of the veneer and the exposed substrate. This roughs up the surface to help the new glue bond. Wipe away all dust with a clean cloth.
- Apply Glue: Use a small brush to apply a thin, even coat of wood glue to the substrate.
- Press and Clamp: Press the veneer flap firmly back into place. Wipe away any glue that squeezes out immediately with a damp cloth.
- Secure It: Cover the repaired area with a piece of wax paper (to prevent the clamp block from getting glued to the cabinet), then place the flat block of wood over it. Secure the block tightly with a C-clamp and let it dry for at least 30-60 minutes, or according to the glue manufacturer's instructions.
For Plastic Laminate:
Tools & Materials:
- Contact cement
- Small paintbrush
- J-roller or other small, hard roller
- Utility knife
- Clean cloths
Steps:
- Prep the Surface: Clean any dust or debris from under the laminate flap and from the substrate.
- Apply Contact Cement: Brush a thin, even coat of contact cement onto both the back of the laminate and the exposed substrate. This is critical. Contact cement works by bonding to itself.
- Wait: Let the cement dry according to the product directions, usually 10-15 minutes. It should feel tacky but not wet.
- Bond the Surfaces: Carefully press the laminate flap back into place. Be precise—once the two surfaces touch, the bond is instant and permanent.
- Apply Pressure: Use a J-roller to apply firm pressure, rolling from the center of the repair outward to push out any air bubbles.
What About Larger Repairs?
If the veneer or laminate is damaged over a large area, a simple re-glue won't be enough. The best approach is to replace the entire sheet on that door or panel. This is a more advanced project that involves removing the old sheet (often with a heat gun), sanding the substrate smooth, and applying a new sheet.
While this is a possible DIY project, it requires precision, especially when working with contact cement. For many homeowners, this is a good time to get an estimate from a professional cabinetmaker, who can ensure a seamless finish. Keeping track of these kinds of project notes and estimates is easy with an advisor like Casa, so you can make an informed decision later.
A Fresh Look is Within Reach
Dealing with peeling cabinet veneer is a common maintenance task that comes with homeownership. By carefully inspecting the damage and understanding the material you're working with, you can confidently decide whether to tackle a simple repair yourself or bring in an expert for a larger job. A small fix can make a big difference, restoring the look of your cabinets and protecting them from further damage.
Ready to take control of your home maintenance? Download the Casa app today. It’s your always-on home advisor, helping you plan projects, track repairs, and feel prepared for whatever your home needs next.


