The good news is that you’ve come to the right place. Fixing peeling deck paint is a totally manageable DIY project. Whether you need a quick touch-up or a complete overhaul, we’re here to walk you through it. Think of me as your expert on the line, ready to guide you from diagnosis to a beautiful, durable finish.
Let's get that deck looking great again!
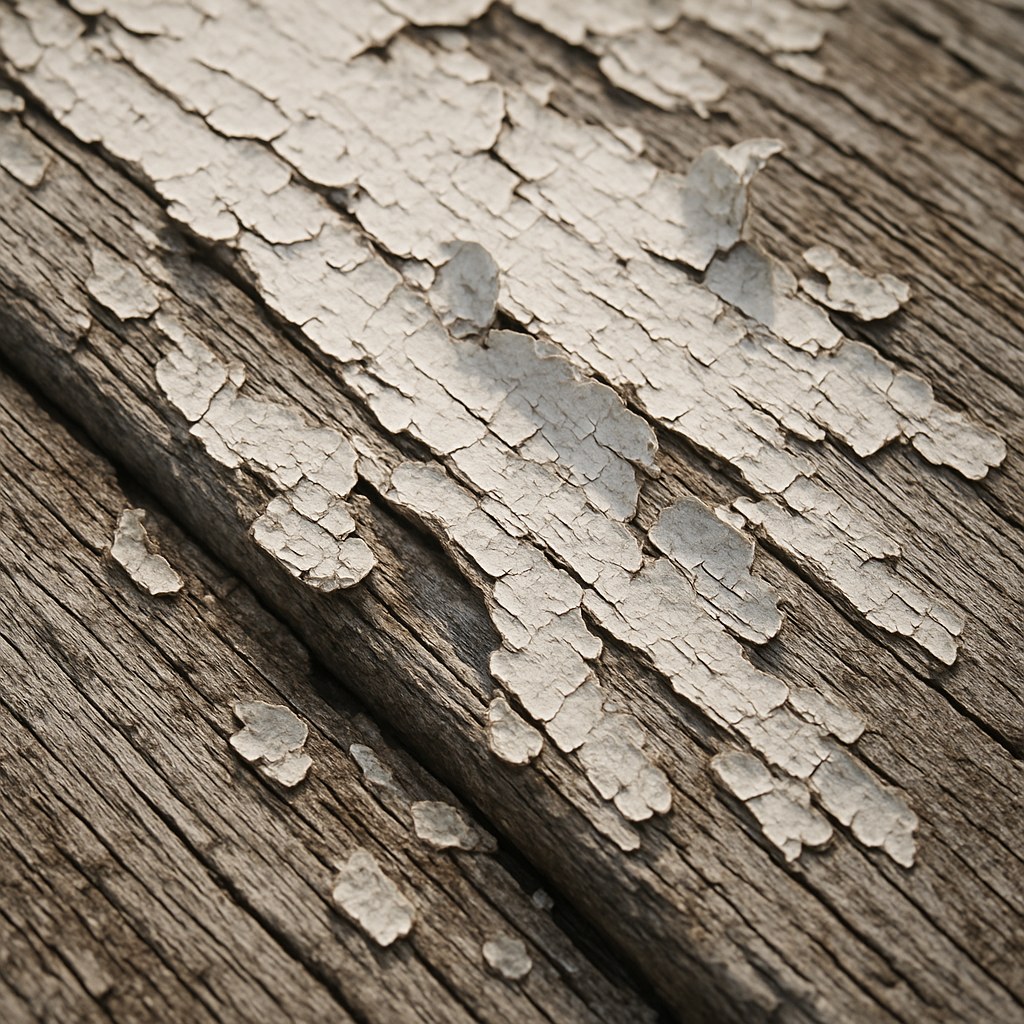
Why Is My Deck Paint Peeling in the First Place?
Before we grab the paint scraper, it helps to understand why this happened. Knowing the cause will help you prevent it from happening again. Deck paint failure almost always comes down to one of these culprits:
- Moisture: This is the number one enemy of any paint job. Water can seep under the paint through tiny cracks, get absorbed by the wood from underneath, or get trapped due to high humidity. When the wood expands and contracts with moisture changes, the inflexible paint film cracks and peels.
- Poor Preparation: The previous paint job might have been rushed. If the deck wasn't thoroughly cleaned, sanded, or primed, the new paint never formed a strong bond with the surface. Paint needs a clean, slightly rough surface to grab onto.
- Using the Wrong Paint: Not all paints are created equal. Using interior paint on an exterior surface is a recipe for disaster. Similarly, applying a latex (water-based) paint directly over an old oil-based paint without a proper bonding primer will cause it to peel away quickly.
- Sun and UV Damage: The sun’s harsh UV rays break down the binders in paint over time, making it brittle and prone to cracking and flaking.
- Simple Old Age: Even the best paint job won't last forever. A high-quality deck finish typically lasts 2 to 5 years, depending on your climate and how much foot traffic it gets.
Now that you’re a peeling paint detective, let’s start the actual repair process.
Step 1: Your Diagnostic Deep Dive
The key to a successful repair is knowing exactly what you're dealing with. We need to figure out three things: your deck's material, the type of paint on it, and the extent of the damage.
Identify Your Deck Material: Wood vs. Composite
First, let's confirm what your deck is made of. The repair methods for wood and composite materials are very different.
- Look at the Grain: Examine the edges and ends of the boards. If you see a natural wood grain pattern, you have a wood deck.
- Listen to the Sound: Give a board a firm tap with your knuckle. Wood will produce a somewhat hollow sound. Composite materials are much denser and will feel more solid.
- Check for Patterns: Composite decking often has a repeating, manufactured pattern and may have a "capped" or plastic-like shell around a core.
Test the Existing Paint: Latex vs. Oil-Based
This is a critical step! Applying the wrong type of paint over the old layer is a primary cause of peeling. Here’s a simple test to identify what you have:
- Grab a clean white rag and some rubbing alcohol (isopropyl alcohol).
- Pour a little alcohol onto the rag and press it firmly onto a painted area for about 30 seconds.
- Rub the spot gently.
If paint color comes off on the rag or the surface feels sticky, you have latex (water-based) paint. If nothing comes off, you're almost certainly dealing with an oil-based paint.
Assess the Damage: Spot Repair or Full Refinish?
Now, take a walk around your entire deck. How widespread is the peeling?
- Spot Repair: If the paint is only peeling in one or two small, isolated spots (like under a planter or in a low-traffic corner), a spot repair is likely all you need.
- Full Refinish: If you're seeing peeling in multiple sections, across several boards, or in high-traffic areas, it's a sign of systemic failure. While more work, a full refinish is the right call. Patching it up will just lead to more peeling elsewhere, and you'll be redoing the work next year.
Most Importantly: Check for Rot
While you're inspecting, grab a screwdriver and gently poke at any suspicious-looking spots, especially around peeled areas. If the wood feels soft, spongy, or crumbles easily, you have rot. Rotted boards must be replaced before you proceed with any painting.
Step 2: Your Action Plan for a Perfect Finish
Based on your diagnosis, find the path below that matches your project.
Path A: How to Spot-Repair Your Wood Deck
This is your go-to for minor peeling. It's a great weekend project that can extend the life of your deck's finish.
Your Toolkit: Stiff broom, paint scraper, medium-grit sandpaper, shop vacuum, exterior primer, and exterior paint matched to your existing type (latex or oil-based).
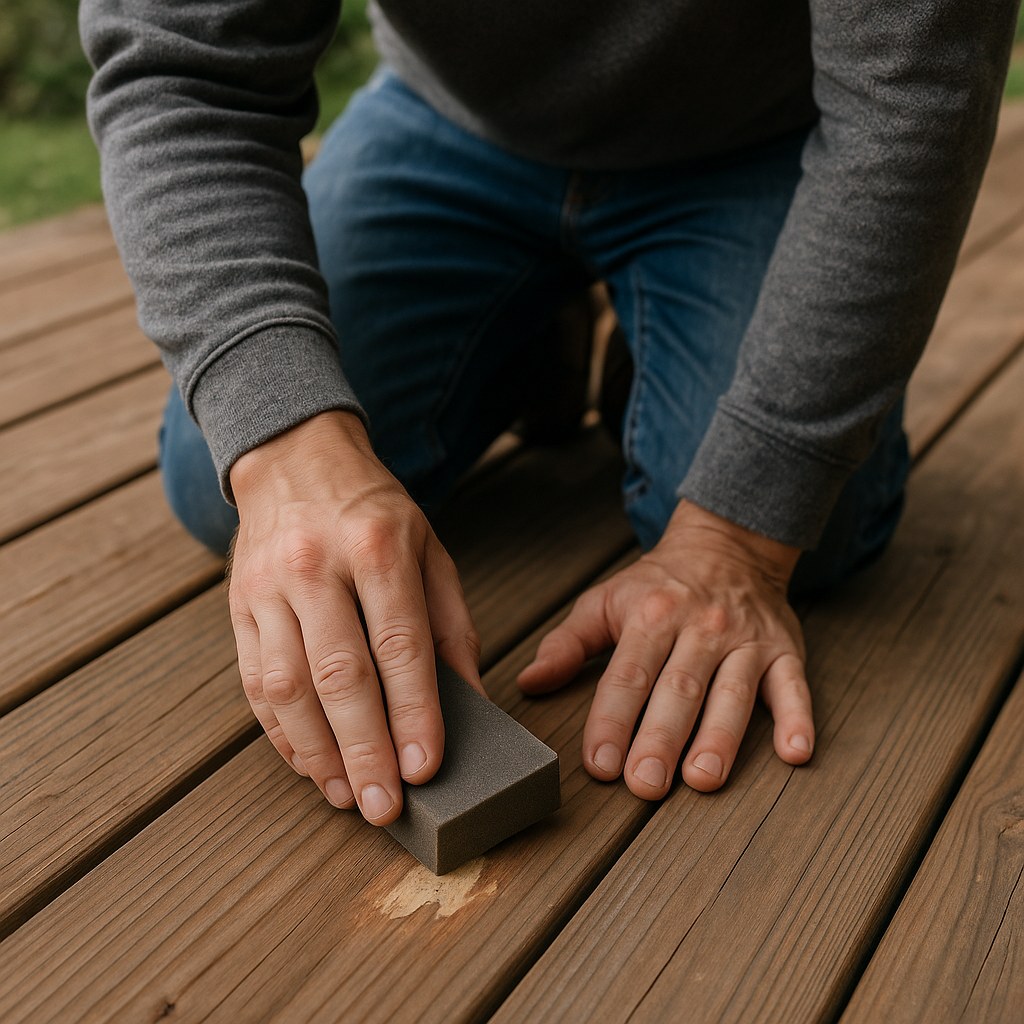
- Prep the Area: Sweep the affected boards to remove any loose dirt. Use your paint scraper to flake off all the loose and bubbling paint. You want to get back to a solid, well-adhered edge.
- Sand for a Smooth Transition: Use your sandpaper to feather the edges of the remaining paint, creating a smooth transition from the painted to the bare wood areas. This is key to making the patch blend in.
- Clean Up: Wipe the area with a damp cloth to remove all sanding dust, and let it dry completely.
- Prime the Bare Spots: Using a brush, apply a single coat of high-quality exterior primer to the bare wood spots you just sanded. This seals the wood and helps the new paint stick.
- For latex paint, allow the primer to dry for at least 4 hours.
- For oil-based paint, allow the primer to dry for a full 24 hours.
- Apply the Top Coat: Once the primer is dry, apply a coat of your exterior deck paint over the primed areas. Let it dry for 24 hours before walking on it.
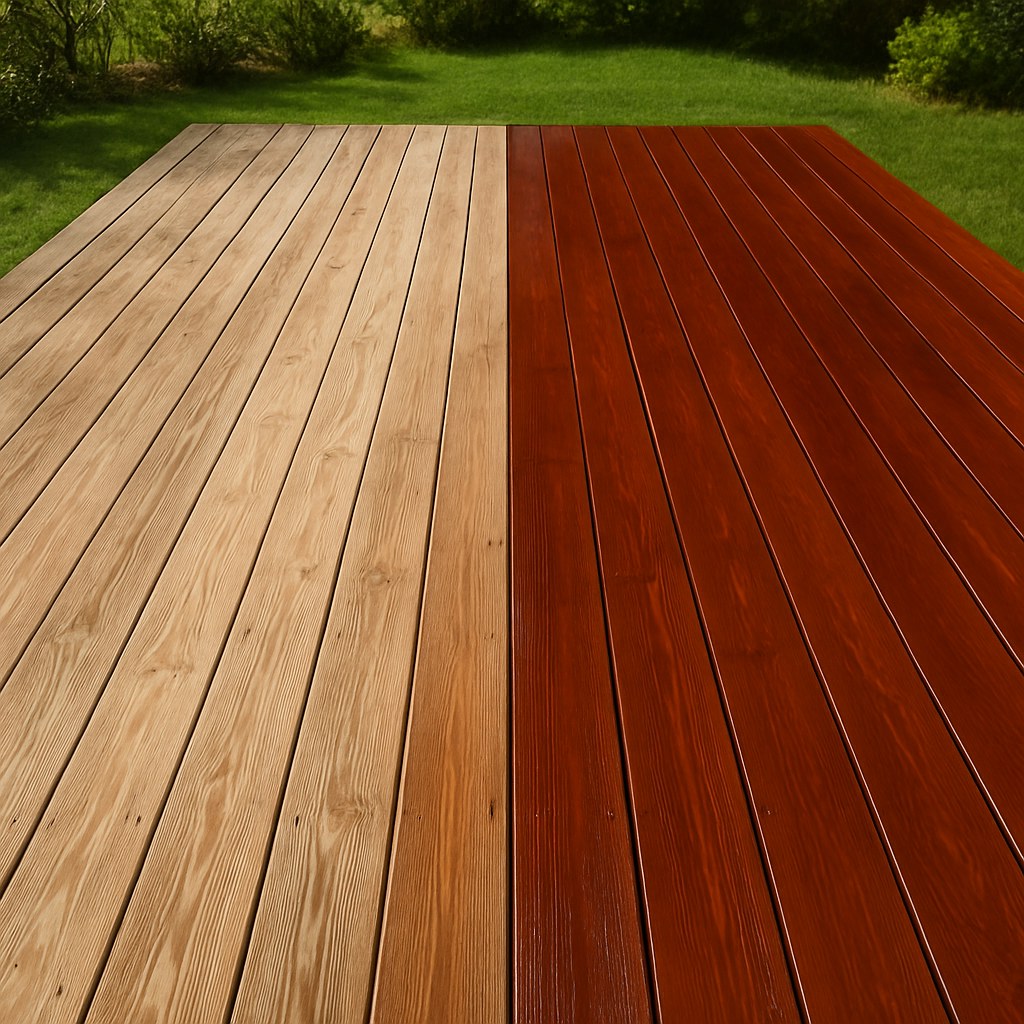
Path B: How to Fully Refinish Your Wood Deck
This is the big one, but the results are worth it. You’ll get a beautiful, uniform finish that will protect your deck for years to come.
Your Toolkit: Everything from the spot repair list, plus: safety glasses, N95 mask, deck cleaner, garden hose, chemical paint stripper, putty knife, and paint rollers.
- Replace Rotted Boards (If Necessary): If you found any rot, address that first. Use a crowbar to carefully pry up the damaged board. Measure it, then cut a new piece of pressure-treated lumber to the exact same length. Secure the new board in place with deck screws.
- Clean the Deck: Sweep the entire surface. Then, scrub the deck with a good deck cleaner, following the product's instructions. Rinse it thoroughly with a garden hose and allow it to dry completely for at least 24 hours.
- Strip the Old Paint: This is the toughest part, but it's non-negotiable for a lasting finish. Working in sections, apply a chemical paint stripper according to the manufacturer's directions. Wait for the paint to bubble and soften, then scrape it away with a putty knife or paint scraper.
- Sand the Entire Deck: Once all the paint is stripped, sand the entire deck with medium-grit sandpaper to remove any remaining paint residue and open up the wood pores. A pole sander or orbital sander can save your back here.
- Final Clean: Use a shop vacuum to remove every last bit of dust. A clean surface is essential.
- Check the Weather: Do not start priming or painting if rain is in the forecast for the next 48 hours.
- Prime and Paint: Apply one full coat of exterior primer to the entire deck using a roller for the flat surfaces and a brush for railings and gaps. Let it dry according to the type (4 hours for latex, 24 for oil). Follow up with your top coat of exterior paint. Let the final coat dry for a full 24 hours before allowing light foot traffic.
Path C: How to Repaint a Peeling Composite Deck
Composite decks are low-maintenance, but they can still have finish failures. The approach here is different.
- Contact the Manufacturer: Before you do anything, try to identify the brand of your composite decking. Look for a stamp on the end or underside of a board. Visit the manufacturer's website or call their support line. Painting a composite deck can sometimes void the warranty, so always follow their specific recommendations.
- If You Proceed: If the manufacturer gives the okay or the deck is out of warranty, the process is about creating a strong bond.
- Clean Thoroughly: Scrub the deck with deck cleaner and rinse well. Let it dry for 24 hours.
- Lightly Sand: Scuff the entire surface with medium-grit sandpaper. This isn't about removing the old finish, but about roughing it up so the new primer can grip.
- Use a Bonding Primer: This is critical. You must use a high-quality bonding primer designed for hard, non-porous surfaces.
- Paint: Apply one or two thin coats of a high-quality exterior floor paint. Allow 24 hours of drying time before use.
Final Thoughts
Tackling a peeling deck can seem daunting, but by carefully diagnosing the issue and following the right steps, you can restore its beauty and protect your investment. Remember, the secret to a long-lasting paint job is 90% preparation. Don't cut corners on cleaning, stripping, and sanding!
Feeling a little overwhelmed or just don’t have the time for a big project? We’ve got your back.
Download the Casa app today! Casa is your go-to resource for home maintenance, offering easy-to-follow DIY guides for projects just like this. And if you decide you'd rather leave it to a professional, Casa can connect you with trusted, vetted contractors in your area. Let's get your home improvement projects done right.


