The good news? Fixing peeling paint is one of the most satisfying DIY projects you can tackle. With the right approach and a little bit of patience, you can restore your surfaces to look brand new. It’s not just about slapping on a new coat of paint; it’s about understanding why it failed in the first place so your new finish will last for years to come.
In this guide, we’ll walk you through everything, just like a friendly expert on the phone. We'll cover how to diagnose the cause, prepare different types of surfaces (from drywall and wood to metal and concrete), and repaint like a pro.
Why Does Paint Peel in the First Place?
Before we grab our scrapers and brushes, let's play detective. Understanding the root cause of your peeling paint is the key to preventing it from happening again. Here are the most common culprits:
- Moisture: This is the number one enemy of a good paint job. Water vapor from steamy showers, cooking, or a hidden leak can get behind the paint film, causing it to lose adhesion and bubble up. On exteriors, it could be rain seeping into poorly sealed wood or masonry.
- Poor Surface Preparation: A successful paint job is 90% preparation. If the surface wasn't cleaned properly, or if old, glossy paint wasn't sanded down, the new paint simply has nothing to stick to.
- Using the Wrong Paint or Primer: Not all paints are created equal. Using an interior paint on an exterior surface will cause it to fail quickly under UV exposure and weather. Similarly, applying latex (water-based) paint directly over an old oil-based paint without a bonding primer is a recipe for peeling.
- Age and Environment: Over time, paint simply wears out. Sunlight can break it down and make it brittle, while extreme temperature changes can cause the underlying surface to expand and contract, cracking the paint on top.
- Poor Application: Applying paint too thickly can prevent it from curing properly, leading to a weak film. Likewise, painting in conditions that are too hot, too cold, or too humid can interfere with adhesion.
Now that you have an idea of what might be going wrong, let's get to the fix.
Step 1: Assess the Damage and the Surface
First things first, let’s figure out exactly what we’re dealing with. Grab a flashlight—holding it at an angle against the wall will help you see all the imperfections.
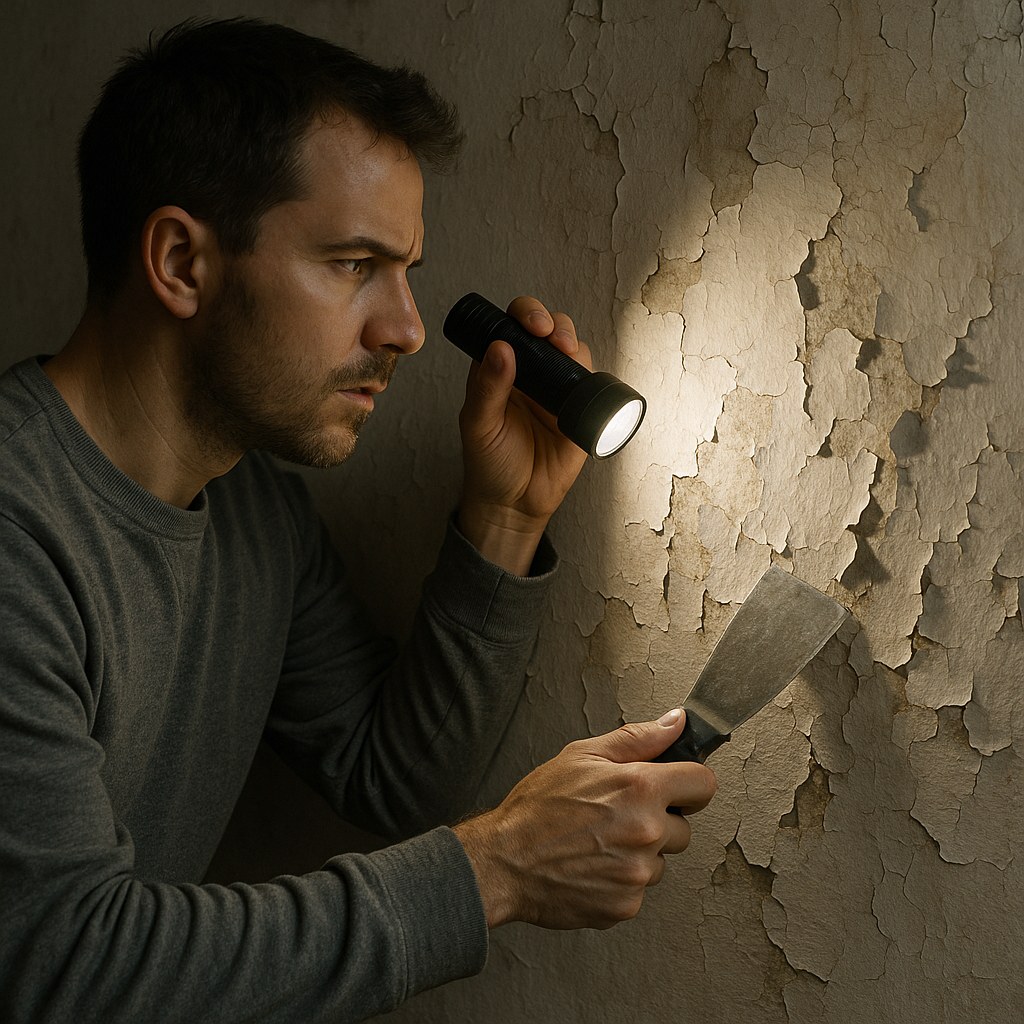
Ask yourself these key questions:
- Is it indoors or outdoors? This is the most important distinction, as it dictates the types of products and repair methods you'll use.
- What material is underneath? Take a close look at the peeling area. Are you dealing with drywall, plaster, wood, metal, concrete, or brick? Each material requires a slightly different preparation process.
- How big is the problem? Is it a small spot that needs a quick touch-up, or is the damage widespread (over 10 square feet)? This will help you decide if you're doing a small patch job or repainting the entire surface.
- Is there underlying damage? Look for signs of trouble beyond the paint. Do you see dark water stains on the drywall? Is the wood underneath soft and rotten? Is there rust on the metal? You must fix these issues first, or your new paint will fail just as quickly as the old.
Step 2: The Prep Work – Your Key to a Perfect Finish
Here’s where the real work begins. Proper preparation is non-negotiable for a paint job that looks great and lasts. The goal is to create a smooth, clean, and stable surface for the new paint to bond to.
Your first step for any material is always the same: scrape away all loose and flaking paint. Use a putty knife or a paint scraper. You only want to remove the paint that comes off easily. For the paint that's still firmly attached, you’ll sand the edges to create a seamless transition.
From there, the process varies by material:
For Interior Drywall and Plaster
This is the most common scenario for interior walls.
- Scrape and Sand: After scraping, use medium-grit sandpaper (around 120-grit) to "feather" the edges of the remaining paint until it feels smooth to the touch.
- Repair Damage: Look for any cracks or holes. For hairline cracks, you can widen them slightly with the corner of your putty knife, then fill them with a lightweight spackle. Smooth it flush and let it dry completely.
- Sand Repairs: Once the spackle is dry, lightly sand it with fine-grit sandpaper (220-grit) until it’s perfectly smooth.
- Clean: Wipe down the entire area with a damp sponge or cloth to remove all dust from sanding. Let it dry thoroughly.
For Wood Surfaces (Interior and Exterior)
- Scrape and Sand: Follow the same process of scraping and sanding the edges smooth.
- Check for Rot: Press the tip of a screwdriver into any suspicious-looking wood. If it feels soft or spongy, you have wood rot. You must dig out all the soft, rotted wood with a utility knife or chisel.
- Repair Rot: Fill the void with a two-part epoxy wood filler. This stuff is amazing—it’s stronger than the wood itself once it cures. Mix it according to the instructions, press it firmly into the cavity, and shape it. Once cured, you can sand it just like real wood.
- Clean: Wash the area with a general-purpose cleaner (or a specialized wood cleaner for exteriors) and rinse. Let it dry completely.
For Metal Surfaces (Interior and Exterior)
- Scrape and Sand: Scrape off the peeling paint. For any exposed metal, sand it down to a bright, shiny surface.
- Address Rust: If you see rust, you must remove it. Use a stiff wire brush to scrub away as much as possible. For any remaining rust, apply a rust-inhibiting converter. This chemical product turns the rust into a stable, paintable surface.
- Clean: Clean the surface with a degreasing cleaner to remove any oils or grime, then rinse and dry completely.
For Masonry and Concrete (Interior and Exterior)
- Scrape and Clean: Use a wire brush to remove any peeling paint and loose, crumbly material. For exteriors, a pressure washer can be very effective.
- Repair Cracks: Fill any cracks with a masonry-specific caulk or concrete patching compound.
- Check for Chalking: Rub your hand over the surface. If a white, chalky powder comes off, you’ll need to apply a masonry sealer or conditioner before priming. This binds the chalky surface so the new paint can adhere.
Step 3: Prime for Success
Skipping primer is one of the biggest DIY mistakes. Primer ensures your paint sticks properly, blocks stains from showing through, and helps you achieve a uniform final color.
The type of primer you need depends on the surface and the old paint. Here’s a pro tip: to figure out if your old paint is oil-based or latex-based, rub a cotton ball soaked in rubbing alcohol on a small spot. If paint comes off, it’s latex. If not, it’s oil.
- For Drywall Repairs: Use a standard interior latex primer over any spackled areas.
- For Wood: Use a quality wood primer. If you’re painting over oil-based paint with latex paint, you’ll need a special "bonding" primer.
- For Metal: Always use a rust-inhibiting primer designed for metal.
- For Masonry/Concrete: Use a primer specifically formulated for masonry, which is designed to fill porous surfaces and withstand alkalinity.
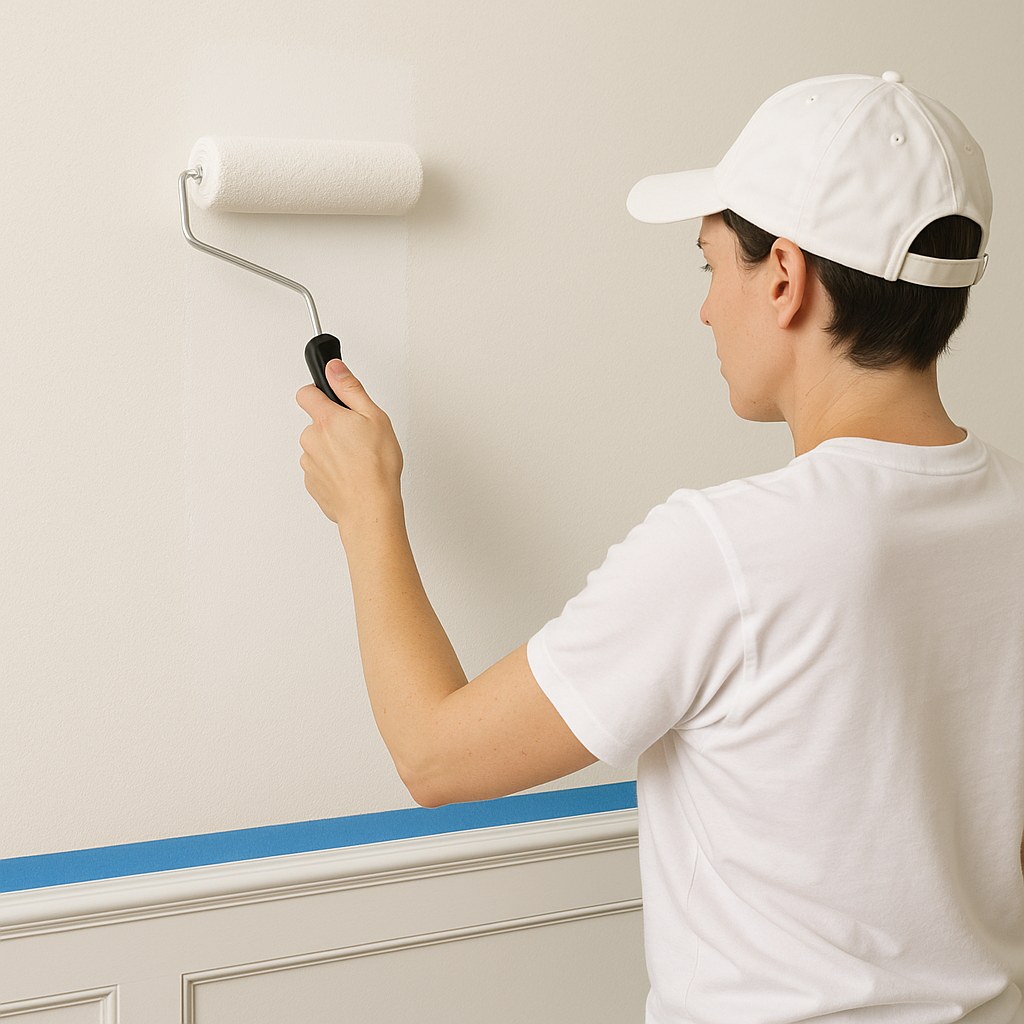
Step 4: Time to Repaint
You’ve done the hard work, and now it’s time for the transformation.
- For Small Touch-Ups: If you’re just fixing a small spot, apply a thin coat of primer over the repaired area. Once it's dry, apply your topcoat, using a small brush or mini-roller. Feather the edges into the surrounding paint to help it blend in. You may need two coats.
- For Large Areas: If you’re repainting the entire wall or surface, start by "cutting in" the edges with a brush (painting a 2-3 inch strip along ceilings, corners, and trim). Then, use a roller to fill in the main area. Apply two thin coats for the most durable and professional-looking finish, making sure to let the first coat dry completely before applying the second.
How Much Will This Cost?
Fixing peeling paint is a very budget-friendly DIY project.
- DIY Cost: For a small patch repair, you can expect to spend $30 - $60 on supplies like a scraper, sandpaper, spackle, a small can of primer, and a sample pot of paint. For a full room, the cost will be higher, mainly driven by the price of paint.
- Professional Cost: If you decide to hire a pro, the cost can vary widely. According to Forbes, painting a single room can cost anywhere from $350 to over $1,000, depending on the size of the room and the amount of prep work required.
Your Flawless Finish Awaits
Tackling peeling paint might seem daunting, but it’s entirely manageable when you break it down into these simple steps. Remember, the key to a lasting fix isn't just the final coat of paint—it's the careful and thorough preparation you do beforehand. By identifying the cause and properly prepping the surface, you’re not just painting; you're restoring your home.
Want to make your next DIY project even easier? Download the Casa app today! Our app provides clear, step-by-step guides for hundreds of home repairs, from fixing peeling paint to tackling plumbing problems. We’ll help you choose the right materials and walk you through every step. And if you ever feel like a project is more than you want to handle, Casa can connect you with trusted, local professionals to get the job done right.


