The good news is that you don’t have to live with a rogue sprinkler. In most cases, fixing a sprinkler head that’s spraying in the wrong direction is a simple, straightforward DIY project that you can tackle in under an hour with just a few basic tools.
Whether your sprinkler head is tilted, clogged, or just needs a quick adjustment, we’re here to walk you through it. Think of us as your friendly expert on the other end of the line, guiding you step-by-step to get your sprinklers back on track and your lawn looking green and healthy again.
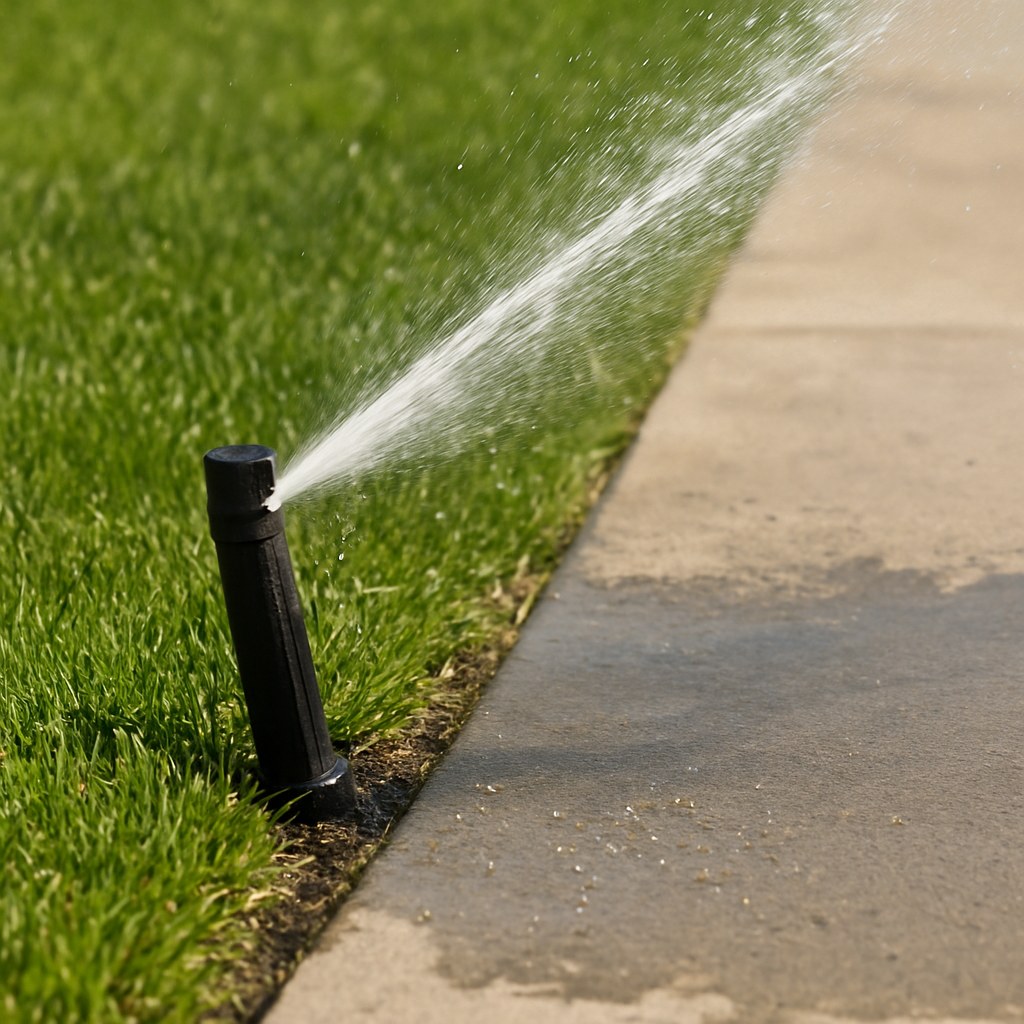
Why Are My Sprinklers Spraying the Wrong Way?
Before we dive into the fix, it helps to understand what’s causing the problem. A sprinkler can go off-course for several reasons, but it usually boils down to one of these common culprits:
- Incorrect Spray Pattern: Many sprinkler heads are adjustable, allowing you to set the arc and direction of the spray. Over time, these settings can get knocked out of alignment.
- Tilted or Sunken Head: Lawn mowers, foot traffic, and shifting soil can push a sprinkler head out of its upright position, causing the water to spray at an incorrect angle.
- Clogged Nozzle: Dirt, grass clippings, or small pebbles can get lodged in the nozzle, disrupting the spray pattern and sending water in unpredictable directions.
- Physical Obstructions: Overgrown grass, nearby plants, or even a misplaced garden gnome can block the spray and deflect the water.
Now that you have an idea of what might be going wrong, let’s get our hands dirty and fix it.
Step 1: Shut It Down and See What You're Working With
First things first: you don't want to get soaked while you work. Head to your irrigation controller (it's usually in the garage or a utility closet) and turn the system to the "Off" position. This will prevent the sprinklers from turning on unexpectedly.
Next, walk over to the sprinkler head that’s causing trouble. Clear away any grass, dirt, or mulch around it so you can get a good look. Now, you need to determine what type of sprinkler head you have. There are two main categories:
- Adjustable Heads: These are the most common type for residential lawns. They include pop-up rotors (which rotate as they spray) and pop-up spray heads. The key feature to look for is a small adjustment screw on the top of the head. If you see one, you have an adjustable head.
- Fixed Heads: These heads are not designed to be adjusted. They spray in a set pattern (e.g., a full circle, half-circle, or quarter-circle). If you don't see an adjustment screw, you likely have a fixed head that has been tilted or blocked.
Knowing which type you have will determine your next steps.
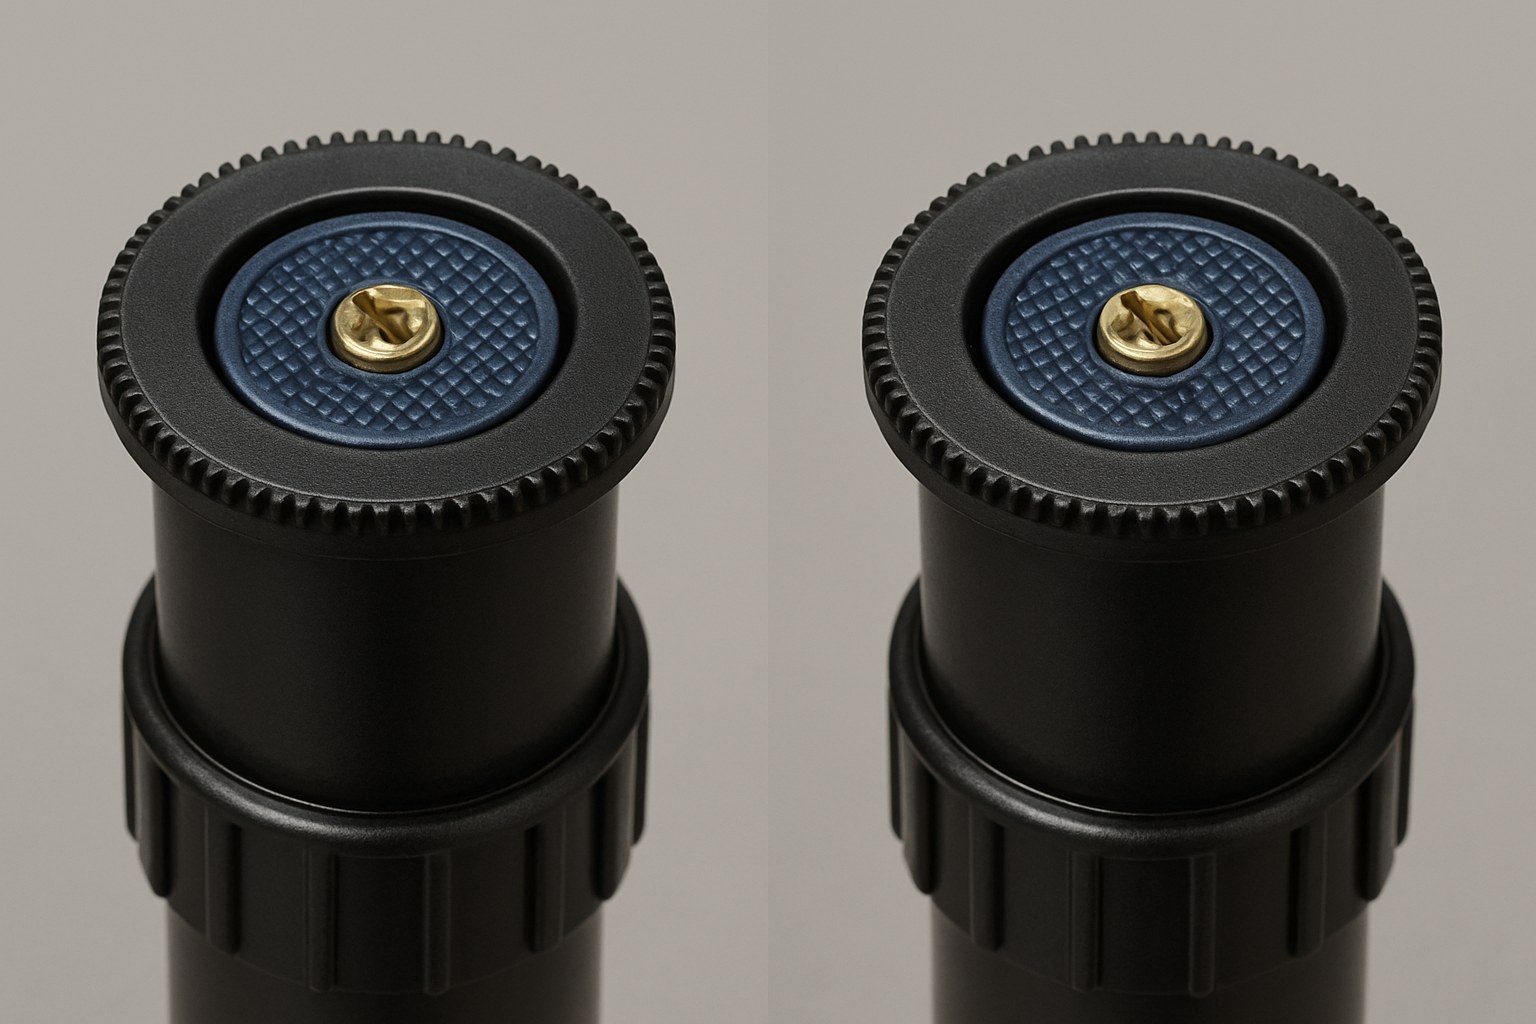 and a fixed-spray sprinkler head)
Step 2: How to Adjust an Adjustable Sprinkler Head
If you've identified an adjustable head, realigning the spray is often a quick fix. You'll just need a flathead screwdriver or a specific sprinkler adjustment tool.
Here’s how to do it:
- Hold the Riser Steady: Kneel beside the sprinkler head and grip the pop-up portion (the riser) firmly with one hand. It's important to keep it from turning while you make adjustments, as you could damage the pipe fitting below.
- Adjust the Spray Arc (Width): Locate the adjustment screw on top. Turning this screw changes the spray distance. For the arc (the side-to-side sweep), you’ll typically adjust it by rotating the entire head turret. Some models have a separate arc adjustment slot.
- Rotate the Head: With the riser held steady, gently turn the top part of the sprinkler head (the turret) by hand. Point the nozzle in the general direction you want the spray to start.
- Fine-Tune the Alignment: Now, you'll set the "left stop" or the starting point of the spray arc. Twist the turret all the way to the right until it stops, then rotate it back to the left to your desired starting point. This sets the left edge of your watering zone. You can then adjust the arc to cover the correct area.
- Test Your Work: Go back to your irrigation controller and run that specific zone manually for about 30 seconds. Watch where the water goes. If it's perfect, great! If it’s still a little off, turn the water off and make small adjustments until it’s just right.
If you've adjusted the head and the spray is still erratic or weak, the problem might be a clogged nozzle.
Step 3: Cleaning or Replacing a Clogged Nozzle
A tiny bit of debris is all it takes to throw off your sprinkler's performance. Cleaning the nozzle is an easy but crucial maintenance step.
- Expose the Nozzle: With the water off, pull the sprinkler riser up from its housing. Most pop-up heads will lock in the "up" position if you pull and twist them slightly.
- Unscrew the Nozzle: Grip the riser and use your other hand to unscrew the nozzle at the top. It should come off by hand, but if it's tight, you can use adjustable pliers very gently to loosen it.
- Clean and Inspect: Rinse the nozzle under running water. Use a small piece of wire or a paperclip to carefully poke out any debris stuck in the tiny spray hole. While you have it out, inspect it for any small cracks or visible damage. Plastic can become brittle over time.
- Replace if Necessary: If the nozzle is cracked, it's time for a replacement. Take the old nozzle to your local hardware or irrigation supply store to find an identical match. Getting the right model is essential for proper water flow and coverage.
- Reassemble and Test: Screw the clean (or new) nozzle back on hand-tight. Push the riser back down into the sprinkler body, then run a manual test to see if the spray pattern has improved.
Step 4: Straightening a Tilted or Obstructed Sprinkler Head
If your sprinkler head is fixed, or if your adjustable head is leaning like the Tower of Pisa, you’ll need to do a little digging to set it straight. This is also the solution for sprinklers being blocked by their surroundings.
You'll need a small steel trowel or shovel for this.
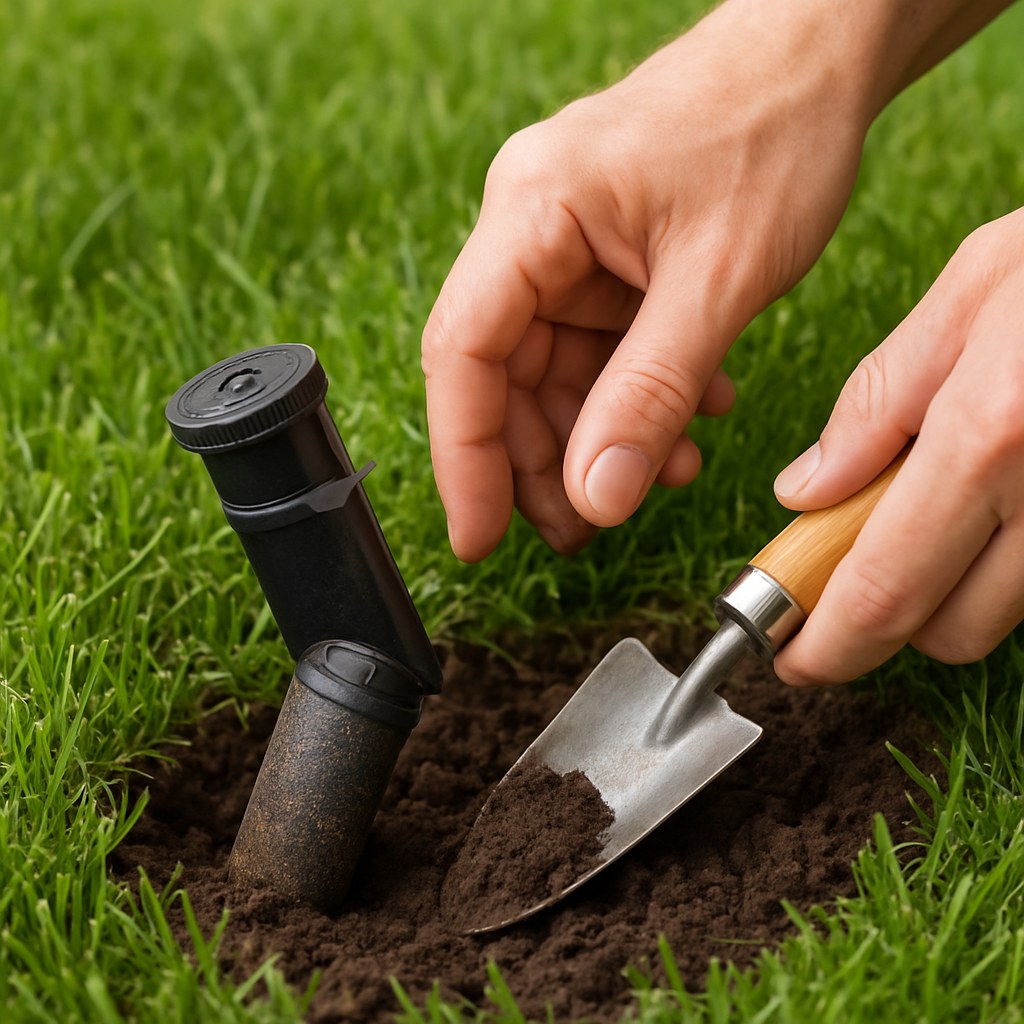
- Dig Around the Head: Carefully dig a small circle around the sprinkler head, about 6-8 inches deep, to expose the sprinkler body and the fitting it's connected to. Be careful not to damage the underlying water line.
- Reposition the Head: Grasp the sprinkler body and gently wiggle it until it's sitting perfectly upright (perpendicular to the ground).
- Pack the Soil: Once it’s straight, firmly pack the soil back into the hole around the sprinkler body. This will hold it securely in its new, upright position. Make sure the top of the head is flush with the soil level to avoid hitting it with the lawnmower.
- Clear Any Obstructions: While you're there, trim any overgrown grass or plants that might be blocking the spray path. Remove any rocks, mulch, or yard decorations that are too close to the sprinkler head.
- Test It: Run the system for a minute to ensure the head is now spraying correctly and evenly across your lawn.
When a DIY Fix Isn't Enough: Calling a Professional
You've adjusted, cleaned, and straightened your sprinkler head, but it’s still not behaving. What now? While most sprinkler issues are simple fixes, some problems run deeper. It might be time to call for help if:
- The internal gears of a rotor head are broken.
- You suspect a leak in the underground pipe.
- The water pressure seems too high or too low across the entire zone.
- You simply can't get the spray pattern right after trying all the steps above.
Hiring a professional landscape or irrigation specialist typically costs between $75 and $250 for a repair visit, depending on the complexity of the issue. While it's an added expense, it can save you a lot of time and frustration if the problem is more than a simple adjustment.
Keep Your Lawn Green and Your Water Bill Low with Casa
Fixing a wayward sprinkler head is a satisfying DIY task that makes a real difference for your lawn's health and your wallet. By keeping your irrigation system in top shape, you ensure every drop of water counts.
For more easy-to-follow home maintenance guides, expert advice, and a direct line to trusted professionals for those bigger jobs, download the Casa app today! Casa is your all-in-one partner for managing and maintaining your home, empowering you to tackle any project with confidence. Stop wasting water and start enjoying a healthier lawn.


