The good news is that squeaky floors are very common and usually not a sign of a major structural issue. The sound is almost always caused by friction—wood rubbing against wood, or a floorboard moving against a nail or the subfloor. At Casa, we help homeowners understand these common issues, and this is one you can often solve yourself with the right approach.
This guide will walk you through how to locate the source of the squeak, identify your floor type, and apply the right fix to bring some quiet back to your home.
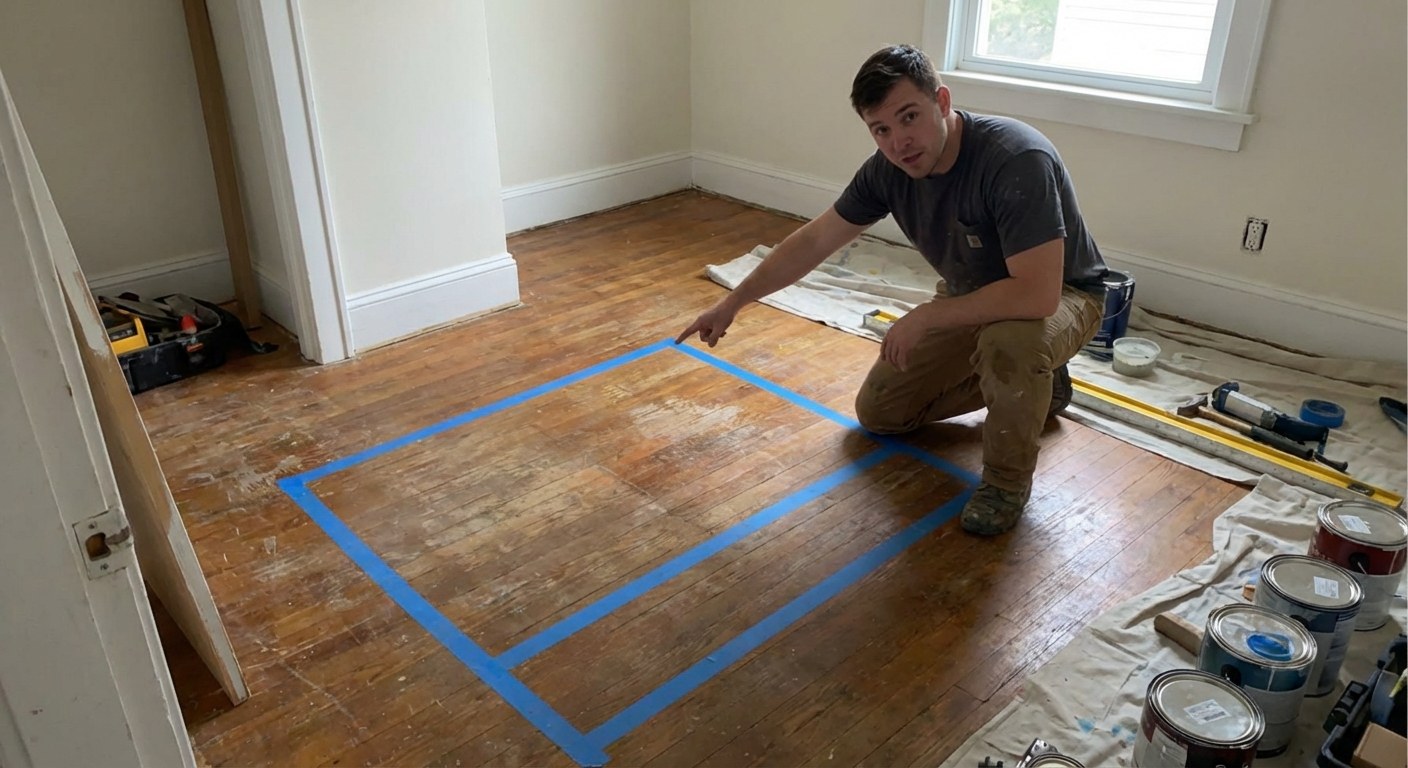
Step 1: Locate and Identify the Squeak
Before you can fix the problem, you need to pinpoint exactly where it’s coming from and understand what kind of flooring you have.
- Find the Spot: Walk slowly across the room until you find the exact board or area that squeaks. Have a helper walk while you listen, if needed.
- Mark It: Use a small piece of painter's tape to mark each noisy spot. This helps you keep track of all the areas that need attention.
- Identify Your Floor Type: The method for fixing a squeak depends heavily on whether your floor is "floating" or "fixed."
- Floating Floors: These are typically laminate or luxury vinyl plank (LVP) floors that click together and sit on top of a subfloor without being nailed or glued down. Look for a small, uniform gap (about 1/4 inch) between the edge of the floor and the baseboards. You will not see any visible nails or staples.
- Fixed Floors: This usually refers to solid hardwood or engineered wood floors that are nailed or stapled directly to the subfloor below.
Once you’ve identified your floor type, you can choose the correct repair method.
Fixing a Squeak in a Floating Floor
If you have a floating laminate or vinyl floor, the squeak is likely caused by friction between the tongue-and-groove joints of two planks. This is often an easy fix.
What to Try Yourself: The Powder Method
This simple technique lubricates the joints to stop them from rubbing together.
Tools & Materials:
- Unscented talcum powder or powdered graphite
- A clean, dry cloth
- A rubber mallet
- A vacuum
Instructions:
- Lightly sprinkle the talcum powder along the seams of the squeaky boards you marked.
- Place the cloth over the powder to prevent it from puffing into the air.
- Gently tap along the seam with the rubber mallet. This vibrates the boards and helps the powder work its way down into the joint.
- Remove the cloth and carefully vacuum up any excess powder.
- Walk on the area to see if the squeak is gone.
This method often solves the problem immediately. If the squeak persists, it could mean the subfloor underneath is uneven, which is a more complex issue.
Fixing a Squeak in a Fixed Wood Floor
For traditional hardwood floors, the squeak usually comes from a gap between the floorboards and the underlying subfloor or the floor joists (the large beams that support the floor). The goal is to close that gap.
How you do this depends on whether you can get underneath the floor.
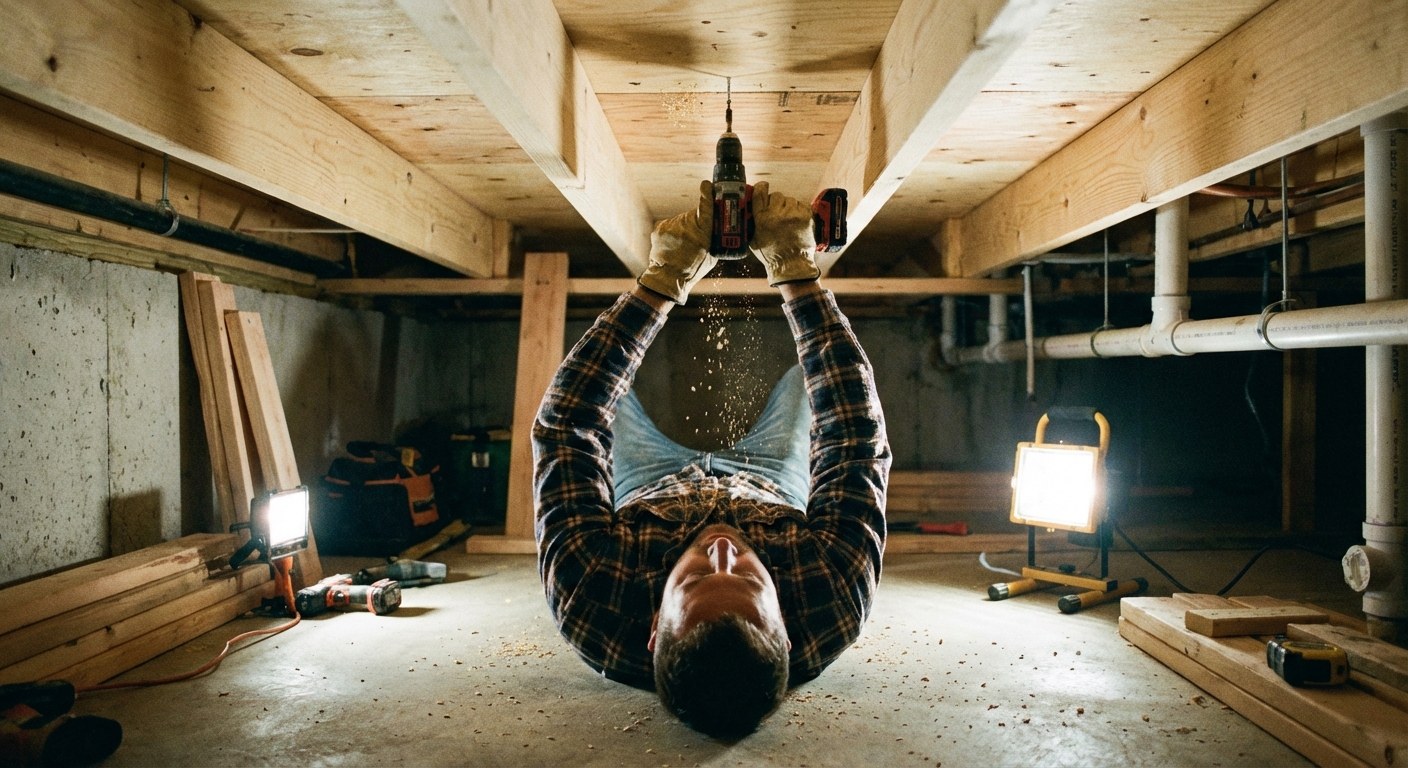
Option 1: From Below (If You Have Access)
If the squeaky floor is above an unfinished basement or crawlspace, this is the most effective and invisible way to fix it.
Tools & Materials:
- A helper
- Safety glasses
- A drill with a pilot bit
- Wood screws (long enough to go through the subfloor and about 1 inch into the hardwood, but not through it)
Instructions:
- Go into the basement or crawlspace while your helper walks on the floor above to make it squeak.
- From below, watch for any movement between the subfloor (the plywood or OSB layer) and the floor joist directly under the squeak.
- Once you’ve found the spot, drill a pilot hole up through the subfloor and into the bottom of the hardwood plank above. Be careful not to drill all the way through the finished floor.
- Drive a wood screw into the pilot hole until it pulls the subfloor up snugly against the joist and floorboard. The squeak should stop.
- You can add a few more screws along the joist in the affected area for extra stability.
Option 2: From Above (If You Can't Get Below)
If you can't access the floor from below, you’ll have to work from the top. The key is to do it without leaving a visible screw head on your beautiful floor. For this, a special screw kit is highly recommended.
Tools & Materials:
- A stud finder
- Painter's tape
- A squeak-repair kit (like "Squeeeeek No More" or similar, which includes special scored screws and a depth-control fixture)
- A drill
- Matching wood filler
Instructions:
- Use the stud finder to locate the floor joists nearest to your marked squeaks. Mark the joist lines with painter's tape. Squeaks often happen where the subfloor has loosened from a joist.
- Using the fixture from the repair kit, drill one of the special screws through the hardwood and subfloor, directly into the joist.
- The fixture is designed to stop the screw at the right depth and snap the head off just below the surface of the wood. This leaves the threaded part of the screw pulling the flooring down tight, but with no head showing.
- Fill the very small remaining hole with a dab of matching wood filler. Wipe away any excess with a damp cloth.
- Repeat for any other squeaky spots along the joist.
When to Stop and Call a Professional
While many squeaks are a straightforward DIY fix, some situations are best left to a flooring specialist. It’s time to call a pro if:
- The simple fixes described here don't solve the problem.
- The squeaking is widespread across a very large area of your home.
- The floor feels excessively bouncy, spongy, or saggy when you walk on it.
- You are not comfortable using power tools or are worried about damaging your floors.
Typical Time and Cost
- DIY Fix: This is a very budget-friendly project. Talcum powder costs a few dollars. A high-quality floor squeak repair kit costs around $25–$40. Wood screws are also inexpensive. You can expect to spend about 20–60 minutes per area.
- Professional Repair: Hiring a flooring contractor for a simple squeak repair might cost anywhere from $200 to $500 for a service call and the first hour or two of work. If the problem is more extensive and requires removing floorboards or addressing subfloor issues, the cost can be higher.
A Quieter Home is Within Reach
A squeaky floor is a classic homeowner challenge, but it’s one you can often resolve with a little investigation and a simple repair. By identifying your floor type and choosing the right method, you can silence those creaks and restore peace and quiet to your home.
Dealing with home maintenance is about feeling prepared, not overwhelmed. For more guidance on repairs, project planning, and connecting with trusted pros when you need them, download the Casa app. We’re here to help you move forward with confidence.


