The good news is that you don’t have to live with it, and you certainly don’t need to spend a fortune to solve the problem. While hiring a professional landscaper is always an option, tackling weeds in cracks is one of the most satisfying and manageable DIY projects you can do.
In this guide, we’ll walk you through everything you need to know, just like we’re on the phone together. We'll help you figure out the best way to get rid of the weeds you have now and, more importantly, how to keep them from coming back.
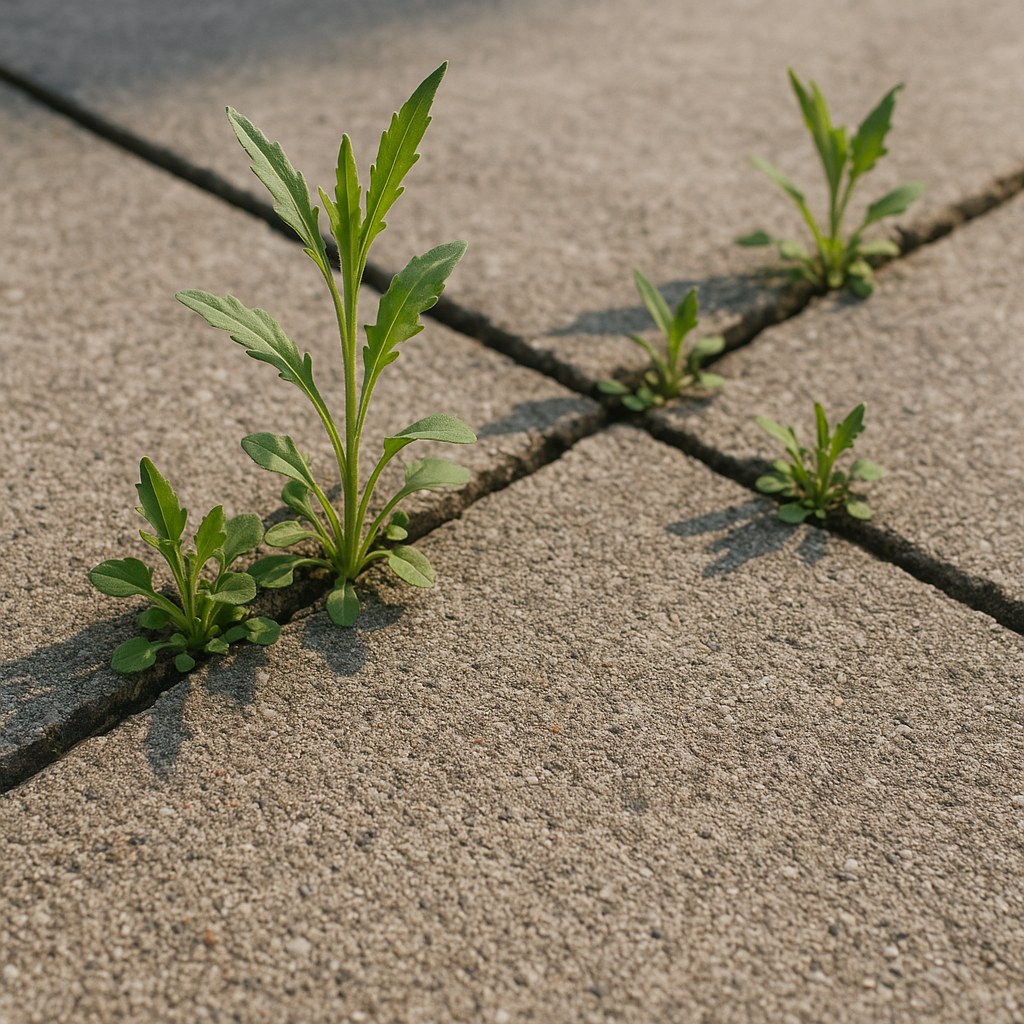
Why Do Weeds Love Cracks So Much?
Before we dive into the "how-to," it helps to understand why these cracks are prime real estate for weeds. Those tiny crevices in your concrete, asphalt, or between your pavers collect dust, dirt, and moisture. This creates the perfect little incubator for airborne seeds to land, germinate, and take root. They’re protected from the wind and foot traffic, giving them a safe space to thrive.
The key to winning the war on weeds is a two-part strategy: effective removal and smart prevention. Let’s get started.
Step 1: Assess the Situation – Where Are the Weeds?
First things first, let’s take a walk around your yard. The method you use will depend heavily on where the weeds are growing. Are they in a hard surface, or a more informal area?
- Hard Surfaces: This includes concrete driveways, asphalt paths, and paver stone patios or walkways. The main goal here is to kill the weed without damaging the surrounding hardscape.
- Informal Areas: This could be a gravel pathway, the cracks between landscape stones, or at the edge of a mulch bed. Here, you need to be more careful about protecting nearby soil and any desirable plants.
Got it? Great. Now we can choose the right approach for your specific problem.
Option A: Tackling Weeds in Hard Surfaces (Driveways, Patios, Sidewalks)
This is the most common place homeowners find rogue weeds. For these areas, we need to inspect the cracks themselves before we start pulling.
First, Check the Crack’s Size
Believe it or not, the size of the crack can tell you a lot. Grab a ruler and some work gloves.
- Measure the Width and Depth: Find the widest and deepest parts of the crack. Is it wider than 1/4 inch or deeper than 1/2 inch?
- Why it Matters: Very small, shallow cracks are usually just a cosmetic issue. However, larger cracks (wider than 1/4" or deeper than 1/2") can be a sign of a structural problem with your concrete or asphalt. The weeds are just a symptom of a bigger issue.
If you have these larger, "structural" cracks, your first step is to get the weeds out so you can see what you’re dealing with.
- How to Remove Weeds from Large Cracks: Use a sharp weeding tool (like a dandelion weeder or a hori-hori knife) to loosen the soil and roots inside the crack. Pull the weeds out slowly, trying to get as much of the root as possible. Once clear, use a stiff brush to sweep out any remaining debris.
- Inspect Again: Now that the crack is empty, take a close look. Is the concrete or asphalt inside the crack loose, crumbling, or falling apart? If so, the problem is beyond just weeds. You’ll want to contact a concrete or paving contractor to have the crack professionally repaired. Sealing it will not only fix the structural issue but will also permanently solve your weed problem in that spot.
For Small, 'Light' Cracks
If your cracks are narrow and shallow, you’re in luck! This is a much simpler fix. To figure out the best method, try this simple test:
Gently tug on one of the weeds. Does it pull out easily with most of its root system intact?
- If YES, You Can Manually Pull Them:
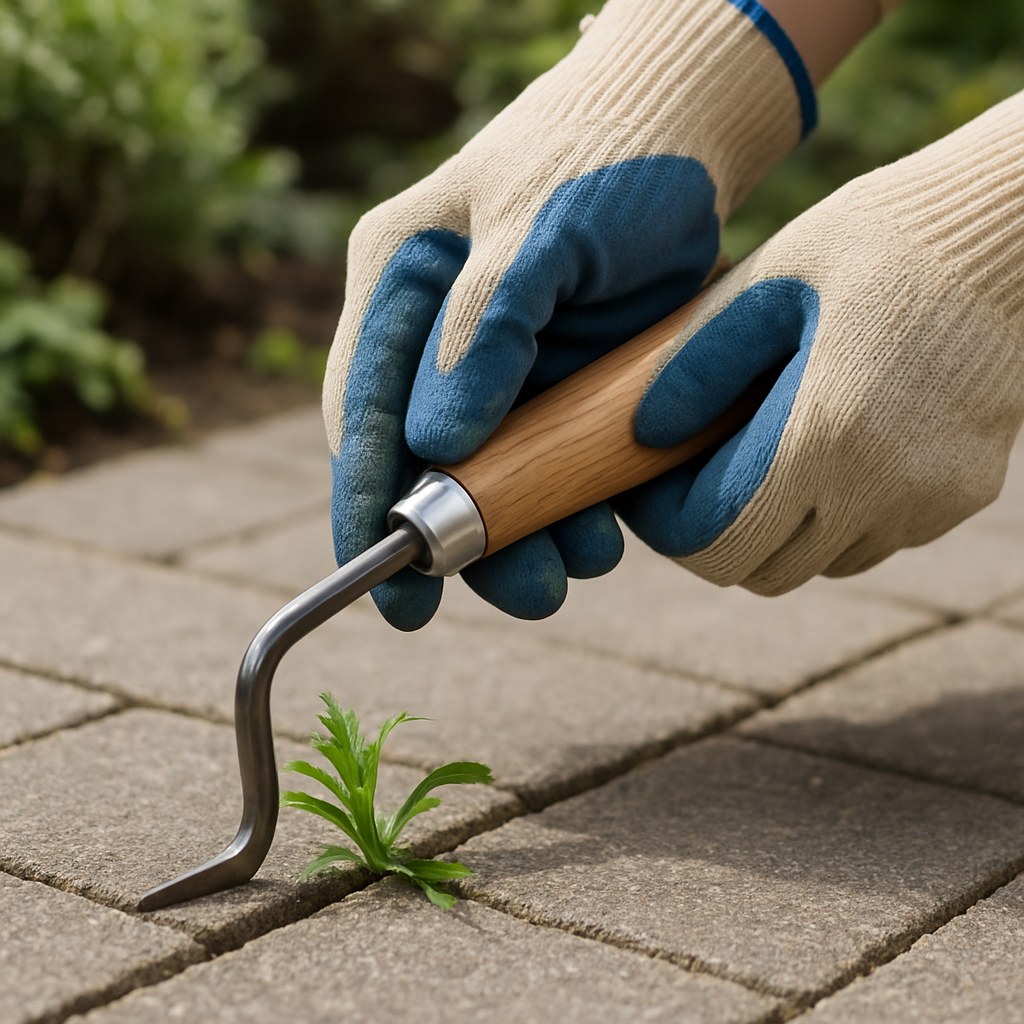
This is the most straightforward and eco-friendly method. Put on your gloves and grab a weeding tool.
- Work your way along the crack, using the tool to loosen the soil around each weed.
- Grasp the weed at its base and pull straight up with steady pressure. Wiggling it a bit can help free the roots.
- Toss the pulled weeds into a bucket for disposal (don’t leave them on the lawn, as they can re-root or drop seeds!).
- Once you’re done, give the entire area a good sweep with a stiff brush to clear out any leftover dirt and seeds.
- If NO, Use a Natural Herbicide:
If the weeds snap off at the surface, leaving the root behind, you’ll need a different approach. The roots are too established, and they’ll just grow back if you don’t kill them. A great, non-toxic option is horticultural vinegar.
What is Horticultural Vinegar? It’s much stronger than the vinegar in your kitchen pantry. It typically has an acetic acid concentration of 20-30%, compared to the 5% in household vinegar. This high acidity is fantastic at burning down plant foliage.
How to Apply It Safely and Effectively:
- Safety First: Put on work gloves and safety glasses. Horticultural vinegar is a strong acid and can irritate your skin and eyes.
- Check the Weather: Plan this for a dry, sunny day with no rain in the forecast for at least 24 hours. The sun and heat will help the vinegar work its magic.
- Prepare Your Sprayer: Fill a pump sprayer or a spray bottle with the horticultural vinegar. Set the nozzle to a narrow stream, not a wide mist. This gives you more control and prevents overspray onto your lawn or garden beds.
- Spray Carefully: Hold the nozzle about 6 inches from the weed and spray the leaves until they are wet, but not dripping. The goal is to coat the plant.
- Be Patient: Now, you wait. Within 48 hours, the weeds should be brown, dry, and shriveled.
- Clean Up: Once the weeds are dead, use a stiff brush to scrub them out of the cracks. Sweep up the dead debris and dispose of it.
Option B: Removing Weeds in Informal Areas (Gravel Paths, Mulch Beds)
When weeds pop up in gravel or between decorative stones, the strategy is slightly different because you’re dealing with a loose surface and potentially nearby plants you want to keep.
- Survey the Area: Before you do anything, look closely. Are there any desired plants, flowers, or lawn grass within 6 inches of the weeds?
- If YES (Desired Plants Are Nearby): You must remove the weeds manually. Spraying, even with a natural herbicide, is too risky as it can easily harm or kill your other plants. Use a weeding tool to carefully loosen and pull the weeds, making sure to get the entire root.
- If NO (The Coast is Clear): If there are no other plants nearby, you can safely use the horticultural vinegar method described above. Spray the weeds, wait 48 hours for them to die, and then come back for cleanup.
- Cleanup for Informal Areas: Instead of a brush, a rake is more effective here. Rake the dead weeds and any other organic debris out of the gravel or mulch.
The Final Step: How to Prevent Weeds from Coming Back
You’ve done the hard work of removing the weeds. Now, let’s make sure you don’t have to do it all over again next month. Prevention is everything.
- For Hardscapes (Concrete/Asphalt): Seal the Cracks. This is the single most effective long-term solution. After the cracks are clean and dry, fill them with a concrete or asphalt crack filler from your local hardware store. This physically blocks seeds from ever finding a home.
- For Pavers: Use Polymeric Sand. If your weeds are coming up between pavers, the solution is polymeric sand. This special sand is swept into the joints and then lightly misted with water. It hardens to form a durable yet flexible barrier that locks pavers in place and blocks weed growth.
- For Informal Areas: Add More Material. For gravel or mulch paths, the best defense is a thick top layer. After weeding, add a fresh layer of gravel or mulch (at least 2-3 inches deep). This blocks sunlight from reaching any seeds in the soil below, preventing them from sprouting.
- Keep it Clean: Regularly sweep your driveway, patio, and sidewalks. This removes the dirt and seeds that accumulate in cracks before they have a chance to take root.

What Does It Cost?
One of the best parts about this project is how affordable it is.
- DIY Costs: A good weeding tool costs between $10-$20, and a gallon of horticultural vinegar is typically $20-$30. For under $50, you can solve most common weed problems.
- Professional Costs: According to Forbes, a single professional weed control treatment can cost between $65 and $150. If you have structural cracks that need repair, that will be a more significant investment, but it’s crucial for protecting the value and safety of your home.
When to Call for Help
If you’ve tried these methods and the weeds are stubbornly persistent, or if the job feels too overwhelming, it might be time to call a professional landscaper. And as mentioned, if you find deep, crumbling cracks in your hardscapes, a paving contractor is your best bet.
Take Back Your Yard
Dealing with weeds in cracks is a universal homeowner headache, but with the right approach, it’s a problem you can solve for good. By correctly identifying your situation, choosing the right removal method, and focusing on prevention, you can keep your driveways, patios, and paths looking clean and pristine.
For more easy-to-follow home maintenance guides and instant access to a network of trusted professionals for those bigger jobs, download the Casa app today! We’re here to help you tackle any project, big or small, and keep your home in top shape.


