The best part? You don’t always need to call a locksmith. Installing a smart lock is a surprisingly straightforward DIY project that most homeowners can tackle in under an hour.
Here at Casa, we believe in empowering you to manage your home with confidence. So, let's walk through this together. We’ll cover everything from choosing the right lock to the final tap on your smartphone that confirms a successful installation.
Before You Begin: Is Your Door Ready for a Smart Lock?
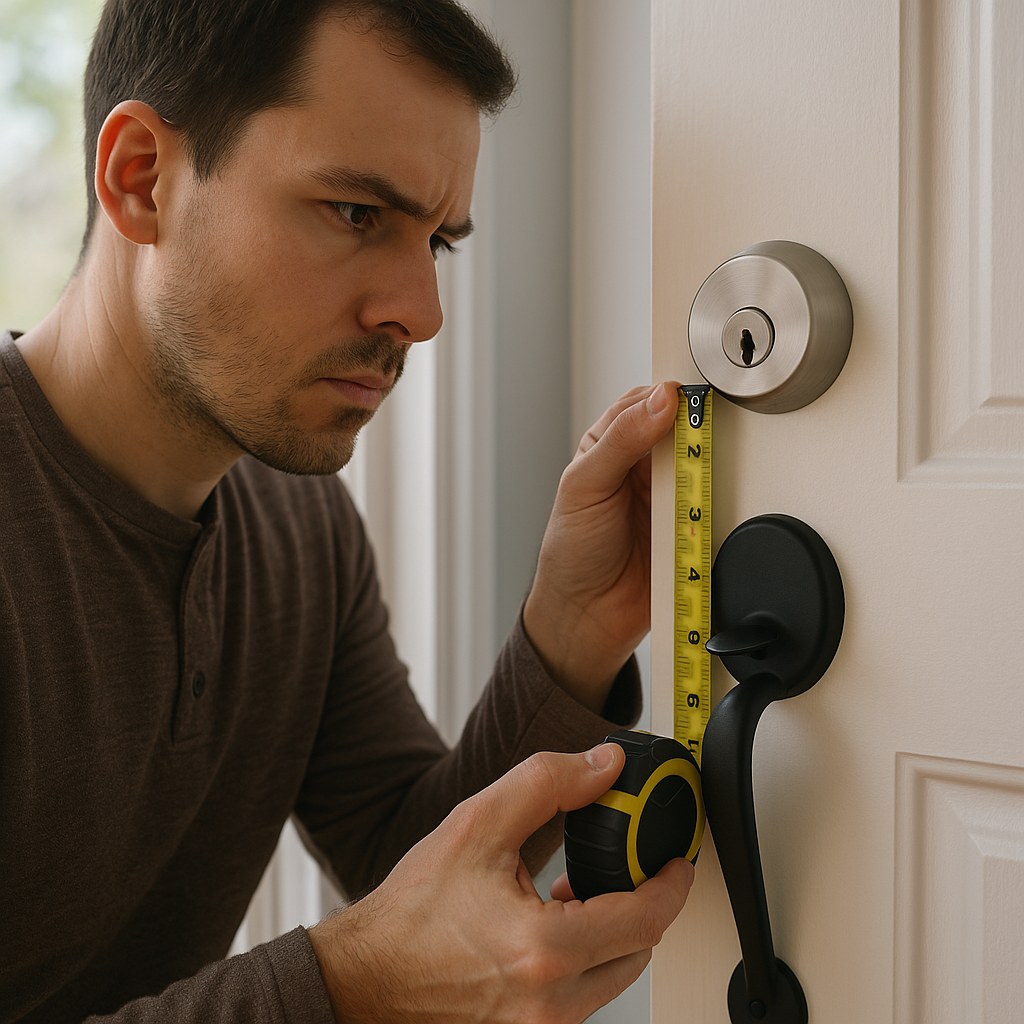
Before you even open the box, the most important step is to check for compatibility. A few minutes of measuring now can save you a lot of headaches later. Most smart locks are designed to fit standard doors, but it's always best to be sure.
There are two main types of smart locks you'll encounter:
- Full Replacement Locks: These replace your entire existing deadbolt mechanism, including the exterior keypad/keyhole and the interior thumb-turn. They offer a complete, integrated system.
- Retrofit Locks: These are simpler to install as they only replace the interior thumb-turn of your existing deadbolt. You get to keep your original keys and exterior hardware, which is great for renters or anyone who wants a less invasive installation.
Let’s figure out which path is right for you.
Step 1: Confirm Your Door Setup
First, take a good look at your current lock. Is it a standard, single-cylinder deadbolt? This is the most common type, with a keyhole on the outside and a thumb-turn on the inside. Most smart locks are designed for these.
If you’re considering a retrofit model, you need to verify that your existing deadbolt is compatible. Here’s a quick checklist:
- Look at the interior side: Can you see two screws holding the thumb-turn in place? This is a good sign.
- Check the operation: Does the deadbolt operate smoothly with a single key from the outside and the thumb-turn from the inside? If your lock is sticky or hard to turn, you should fix that issue or replace the deadbolt entirely before adding a smart component.
- Measure the bore hole: Use a tape measure to check the diameter of the hole drilled through your door for the lock. The standard size is 2 1/8 inches.
If your deadbolt doesn't meet these criteria, you'll likely need to opt for a full replacement smart lock or call a locksmith to install a compatible deadbolt first.
If you've chosen a full replacement lock, the main thing to consider is power. The vast majority are battery-powered, making them perfect for a DIY install. However, if your chosen model requires a hardwired power source, this is a job best left to a professional locksmith or electrician. Our guide will focus on the much more common battery-powered installation.
Tools You'll Need for the Job
You won't need a massive toolbox for this project. In most cases, all you need is:
- A Phillips screwdriver
- A tape measure
- AA batteries (most locks include a starter set, but it’s good to have fresh ones)
If your new lock requires modifications to the door, you may also need:
- A hole saw (check the lock's instructions for the correct size)
- A wood chisel
- A vacuum or brush for cleanup
How to Install Your Smart Lock: A Step-by-Step Guide
Alright, you've confirmed your door is compatible and you have your tools ready. Let's get this lock installed! We'll cover the process for a full replacement first. If you have a retrofit model, you can skip to that section.
Part 1: Removing Your Old Deadbolt (Full Replacement)
First, we need to take off the old lock. It’s a simple process.
- Steady the Lock: Place one hand on the interior part of the lock to hold it steady.
- Remove Interior Screws: Use your Phillips screwdriver to remove the two screws on the interior thumb-turn piece (the escutcheon). Keep these screws handy in case you ever want to reinstall the old lock.
- Remove the Interior Side: Gently pull the interior piece straight away from the door.
- Remove the Exterior Side: The exterior part of the lock is now loose. Carefully pull it out from the outside of the door. Be sure to support it so it doesn’t fall and scratch your door’s finish.
- Remove the Latch: Now, look at the edge of your door. You’ll see a small plate (the latch plate) with two screws. Remove these screws.
- Slide Out the Latch: The bolt mechanism, or latch, can now be slid straight out of the edge of the door.
And that’s it! You’ve successfully removed the old lock and are ready for the upgrade.
Part 2: Modifying the Door (If Necessary)
Take the template included with your new smart lock and hold it up to your door. Does everything line up? In many cases, it will be a perfect fit.
However, if your new lock is a different size, you may need to make some adjustments.
- Widen the Bore Hole: If the main hole is too small, center the drill template over it and tape it securely. Use a hole saw of the size specified in the instructions to carefully widen the hole.
- Adjust the Strike Plate Recess: The strike plate is the metal piece on the door frame that the bolt slides into. If the new one is larger, you may need to use a wood chisel to carefully enlarge the recessed area (the mortise) so the new plate sits flush with the frame.
After any drilling or chiseling, be sure to vacuum up all the wood chips to ensure a clean, smooth surface for mounting your new lock.
Part 3: Installing the New Smart Lock (Full Replacement)
It’s time for the exciting part! Let’s get the new hardware on the door.
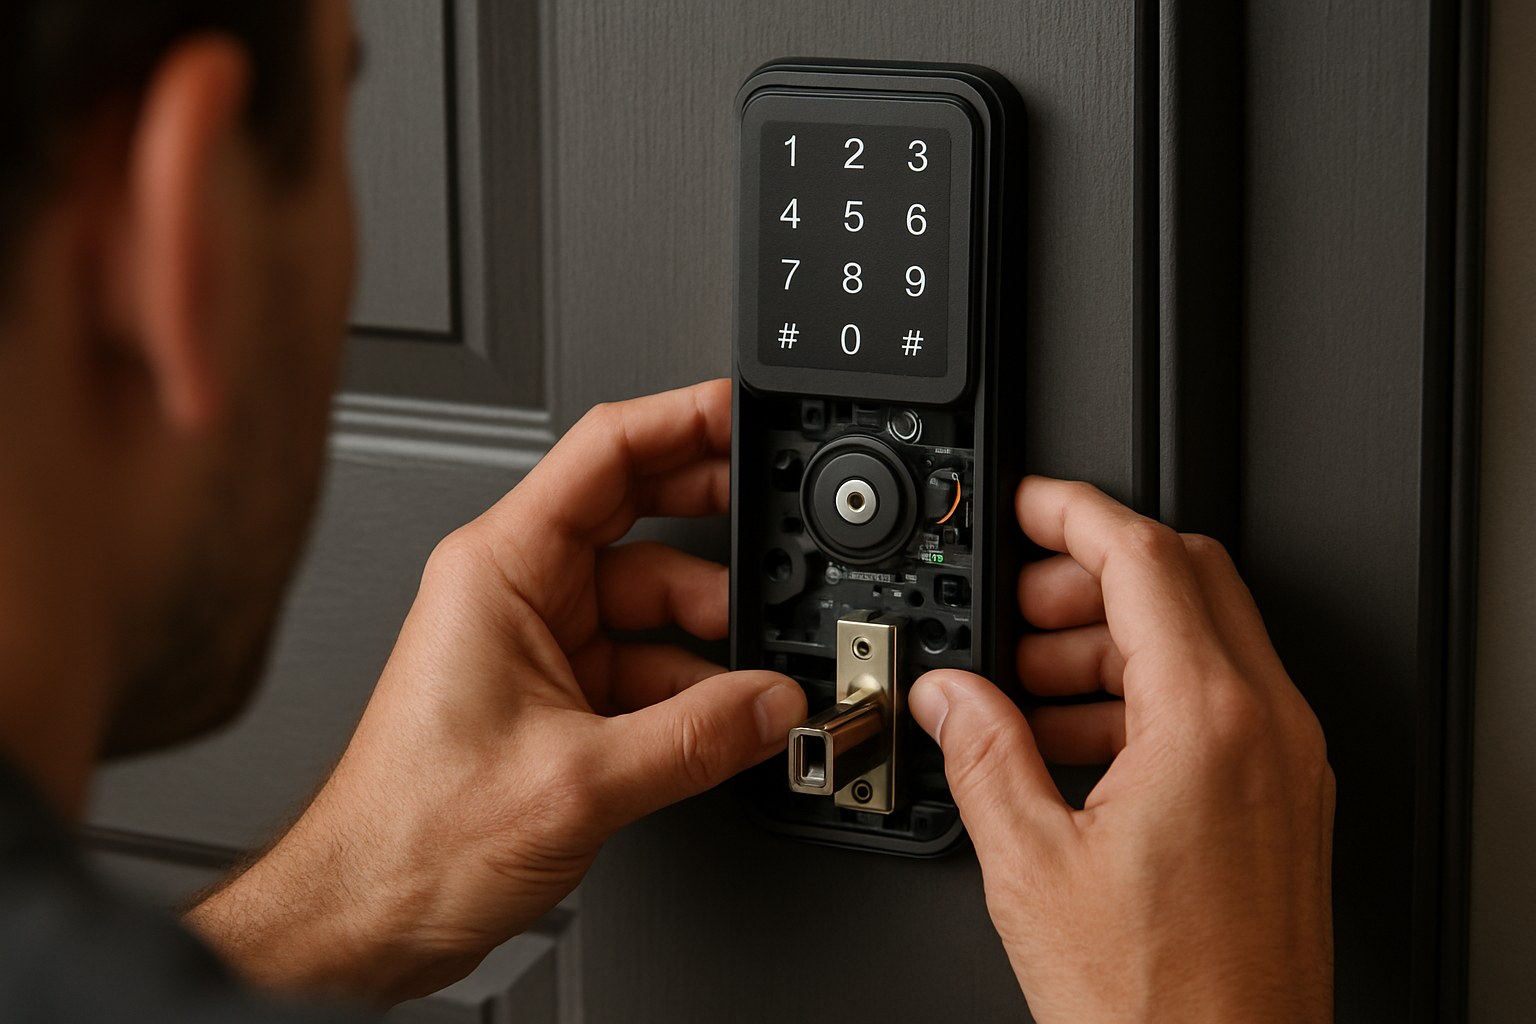
- Install the New Latch: Slide the new latch into the hole on the edge of the door. Make sure the side marked “TOP” is facing up and the angled part of the bolt is facing the direction the door closes. Secure it with the provided screws.
- Position the Exterior Keypad: Take the exterior piece (the keypad or keyhole) and feed its data cable through the door, underneath the latch. Position the keypad so it sits flush against the outside of your door.
- Place the Interior Mounting Plate: From the inside, take the metal mounting plate and slide it over the data cable. Align it with the holes on the exterior keypad and insert the long mounting screws.
- Tighten the Screws: Tighten the mounting screws evenly, alternating between them to ensure the lock is straight and snug against the door, but don't overtighten.
- Connect the Cable: Gently plug the data cable into the port on the back of the interior housing. The connection should be firm.
- Attach the Interior Housing: Slide the main interior unit onto the mounting plate until it clicks securely into place.
- Install the Batteries: Remove the battery cover, insert the AA batteries according to the direction markings, and replace the cover. The lock will likely make a sound or show a light to indicate it has power.
You've just installed the physical lock! Now for the final setup.
Part 4: Installing a Retrofit Smart Lock
If you have a retrofit model, your job is even easier. You've already confirmed your deadbolt is compatible, so let’s get it on.
- Remove the Thumb-Turn: Use a Phillips screwdriver to remove the two screws holding the interior thumb-turn in place.
- Leave the Tailpiece: Pull the thumb-turn assembly off. This will expose the metal bar (the tailpiece) that operates the lock. Leave this in place.
- Attach the Adapter: Your kit will come with several adapters. Find the one that fits your lock’s tailpiece and slide it on.
- Secure the Mounting Plate: Align the new mounting plate over the hole and secure it using the provided screws.
- Attach the Smart Lock Unit: Press the main interior unit onto the mounting plate until it clicks into place.
- Insert Batteries and Connect: Install the batteries as directed, replace the cover, and follow the manufacturer's instructions to connect the lock to your smartphone via Bluetooth or your home's Wi-Fi network.
Final Step: Setup and Testing
Whether you installed a full replacement or a retrofit, the final step is to make sure everything works perfectly.
Download the lock’s companion app on your smartphone and follow the on-screen instructions to pair it. The app will guide you through calibrating the lock so it knows when it's open or closed.
Now, test it out:
- Manual Test: Turn the thumb-turn or knob on the inside. Does the bolt extend and retract smoothly?
- App Test: While standing near the door, use the app to lock and unlock it. Does it respond quickly and correctly?
If both tests are successful, congratulations! You have officially installed your new smart lock.
How Much Does a Smart Lock Installation Cost?
One of the big motivators for a DIY project is saving money. Here's what you can expect:
- DIY Cost: The price of the smart lock itself, which can range from $100 to over $300, plus a few dollars for batteries. The installation itself is free!
- Professional Installation: Hiring a locksmith typically costs between $100 and $250 for labor, in addition to the cost of the lock.
By doing it yourself, you can save a significant amount and gain the satisfaction of a job well done.
What If It’s Not Working?
If the lock feels stiff or doesn't operate smoothly from the app, don’t panic. First, try loosening the mounting screws slightly, as over-tightening can cause the mechanism to bind. Check that the bolt aligns perfectly with the strike plate on the door frame. If the issue persists, the manufacturer's support line or a quick call to a local locksmith is your best bet.
Unlock a Smarter Home with Casa
Installing a smart lock is a fantastic weekend project that adds real value to your daily life. You've just boosted your home's security and made coming and going more convenient than ever.
Feeling confident? Ready to tackle your next home project? Download the Casa app today! Casa is your go-to partner for home maintenance, offering easy-to-follow DIY guides for hundreds of projects. And for those jobs that are bigger than you want to handle, we can connect you with trusted, vetted professionals in your area. Take control of your home with Casa.


