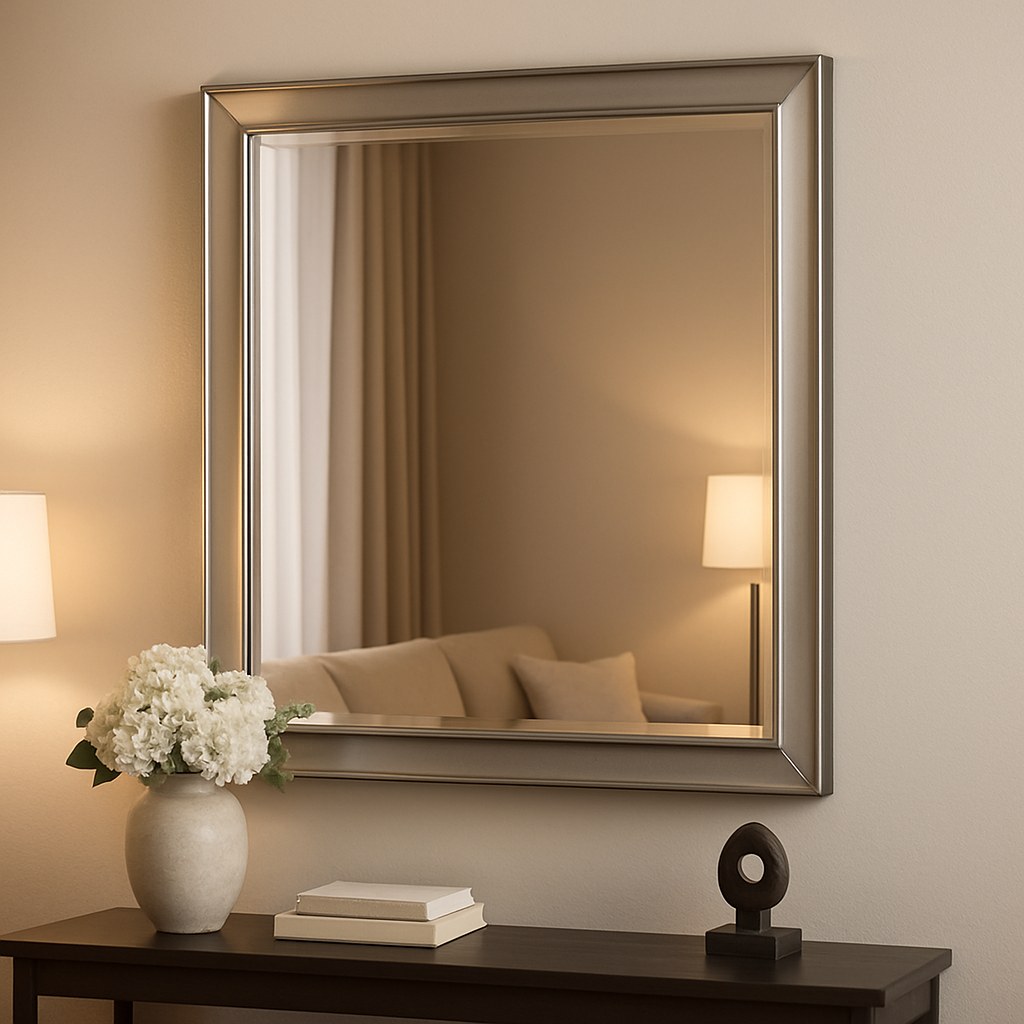
Don't worry, we've got you. Hanging a mirror is a totally achievable DIY project, as long as you have the right know-how. Think of me as your friendly expert on the other end of the line, here to walk you through it. We'll figure out what kind of walls you have, how heavy your mirror is, and exactly what hardware you need to get the job done safely and securely.
Let’s get that beautiful mirror on the wall where it belongs.
Step 1: The All-Important Prep Work
Before you even think about drilling, a little bit of prep work will save you a world of headaches later. This is the most crucial part of the process because it determines everything that comes next.
1. Weigh Your Mirror:
This is non-negotiable. The mirror's weight dictates the type of anchors and fasteners you’ll need. The easiest way to do this is to use a standard bathroom scale. First, weigh yourself. Then, pick up the mirror, step back on the scale, and note the new weight. The difference between the two numbers is the weight of your mirror.
- Lightweight: Under 10 pounds.
- Medium-weight: 10-25 pounds.
- Heavyweight: 25-50 pounds.
- Extra-heavy: Over 50 pounds. (For these, you should seriously consider professional help).
2. Measure and Mark Your Placement:
Use a measuring tape to find the dimensions of your mirror. Decide where you want it to hang. A good rule of thumb is to hang a mirror so its center is at eye level (about 60 inches from the floor). If it’s going above a piece of furniture like a console table or a headboard, leave about 6-8 inches of space between the bottom of the mirror and the top of the furniture.
Once you’ve found the perfect spot, hold the mirror against the wall and use a pencil to make a small, light mark at the top-center.
3. Identify Your Wall Type:
This is the other critical piece of the puzzle. Different walls require different hanging methods. Here are two simple tests:
- The Knock Test: Tap on the wall with your knuckle. If it sounds hollow, you have drywall or plaster over a wood-frame construction. If it makes a dull, solid thud, you’re likely dealing with masonry like concrete or brick. A sharp, glassy sound suggests tile.
- The Scratch Test: In an inconspicuous spot that the mirror will cover, try scratching the wall with a key or a screw. If it flakes or creates a powdery dust, it's drywall or plaster. If it barely makes a mark, it’s masonry or tile.
Now that you have your mirror’s weight and your wall type, you’re ready to choose your hanging strategy.
Step 2: Hanging on Drywall or Plaster Walls
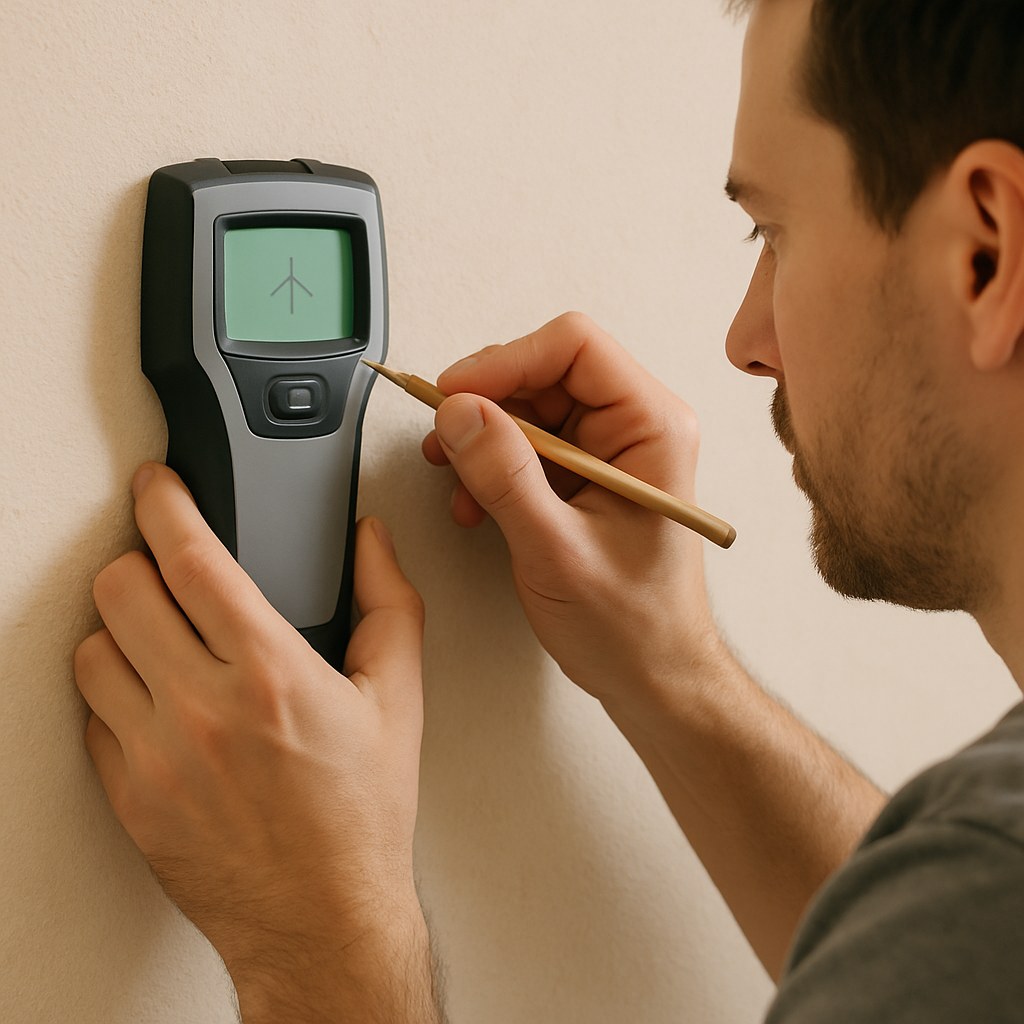
This is the most common type of wall in modern homes. The key here is to find the hidden wooden beams, called studs, that make up the wall's frame.
Option A: Mounting Directly into Studs (The Gold Standard)
A stud is the strongest part of your wall, and hanging your mirror from one is the most secure method possible.
- Locate the Studs: Use an electronic stud finder to scan the wall horizontally where you plan to hang the mirror. It will beep or light up when it detects a stud. Studs are typically 16 or 24 inches apart. Mark the center of each stud you find with your pencil.
- Align Your Mounting Points: Check the mounting brackets or wire on the back of your mirror. Can you align at least one of the mounting points with a stud you’ve marked? If so, you're in luck!
- Drill and Hang:
- Use a level to make sure your marks are even.
- Drill a pilot hole into the stud at each mark. The hole should be slightly smaller than the diameter of your screw. A 1/8-inch bit usually works well for a standard 3-inch wood screw.
- Drive the screws into the pilot holes, leaving them sticking out about 1/8-inch from the wall.
- Carefully lift the mirror and hang it on the screws. Check with your level one last time and tighten the screws if needed to make it perfectly even.
Option B: No Studs? No Problem. Use Drywall Anchors
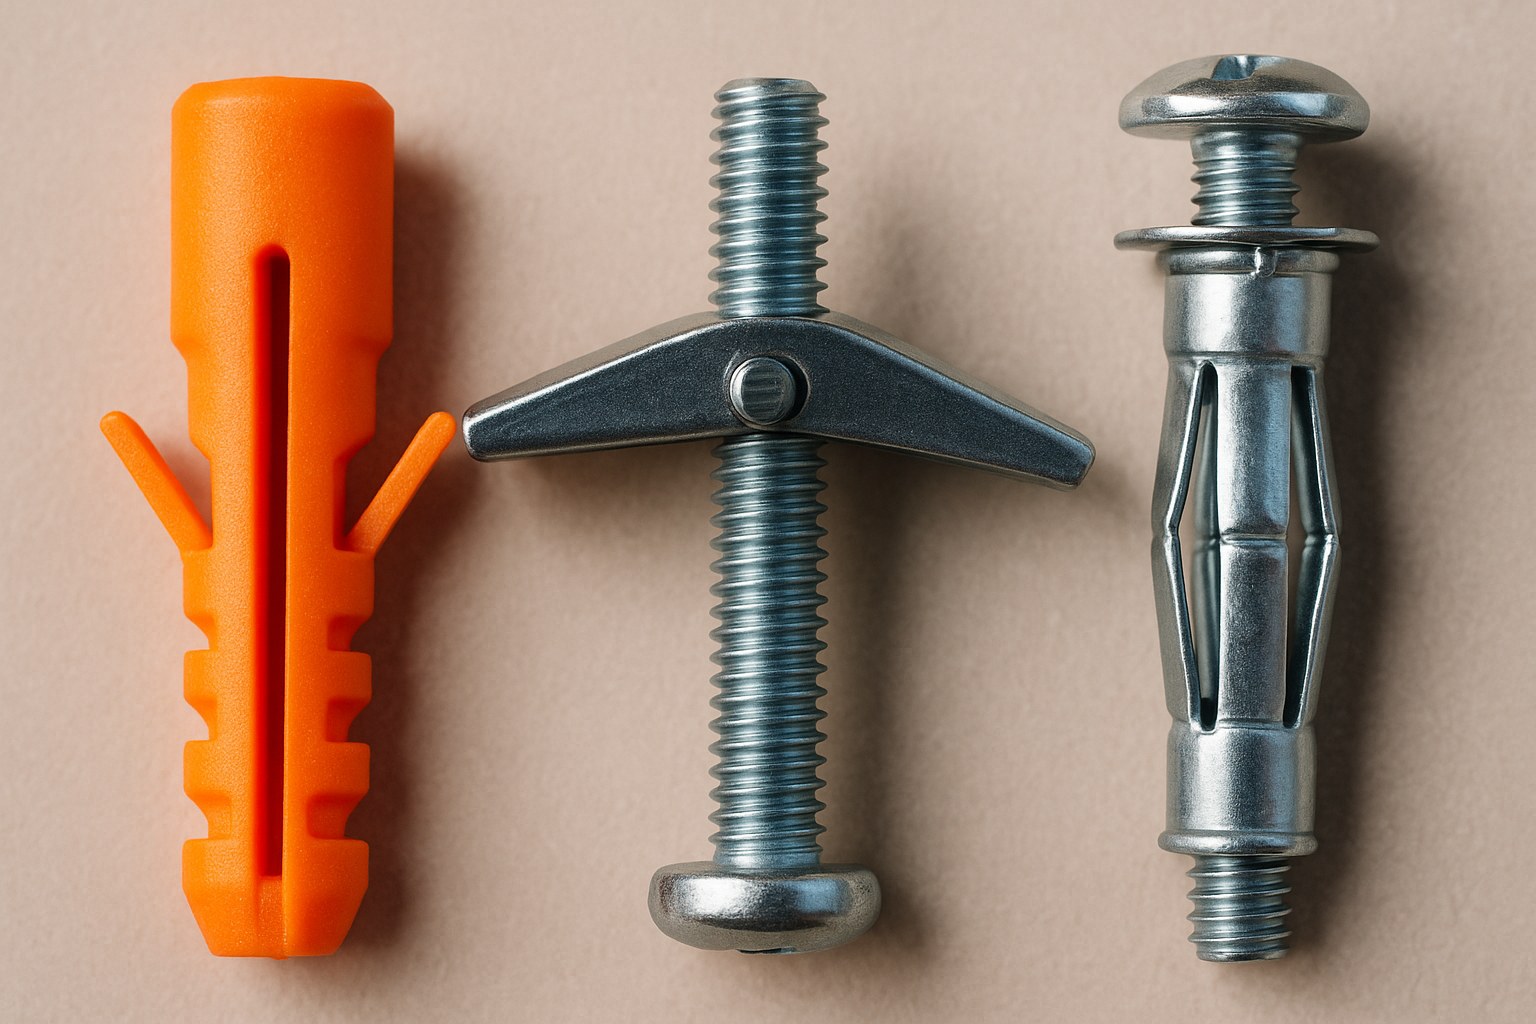
It’s very common for studs not to line up perfectly where you want your mirror. In this case, wall anchors are your new best friend. They are designed to expand behind the drywall, distributing the weight over a wider area.
For Lighter Mirrors (Under 20 lbs): Plastic Expansion Anchors
These are simple, effective, and perfect for lighter decorative items.
- Mark Your Holes: Hold the mirror up and mark exactly where the screws need to go. Use a level!
- Drill the Holes: Use a drill bit that matches the size of your plastic anchor (it's usually printed on the anchor or its packaging).
- Insert the Anchors: Gently tap the plastic anchors into the holes with a hammer until they are flush with the wall.
- Attach Hardware and Hang: Hold your mirror's mounting bracket over the anchor and drive the screw into it. The anchor will expand behind the drywall as you tighten the screw. Hang your mirror and you're done!
For Heavier Mirrors (20-50 lbs): Heavy-Duty Toggle Bolts
When you’re hanging something with significant weight, you need a more robust solution. Toggle bolts are incredibly strong.
- Drill the Holes: Toggle bolts require a much larger hole. The packaging will tell you what size drill bit to use (often 1/2-inch or larger).
- Prep the Bolt: Squeeze the spring-loaded "wings" of the toggle bolt together and push them through the hole in your wall. You'll hear a 'snap' as they open up on the other side.
- Tighten and Hang: Pull the bolt back toward you so the wings catch on the inside of the drywall. Start tightening the screw with a screwdriver. It will pull the mounting bracket snug against the wall.
- Once your brackets are secure, carefully lift and hang the mirror.
Step 3: Tackling Masonry and Tile Walls
Hanging a mirror on concrete, brick, or tile requires more muscle and specialized tools, but it's definitely doable. You'll need a hammer drill and masonry drill bits.
Hanging on Concrete or Brick
- Mark Your Spots: Use your level to mark your mounting points.
- Choose Your Anchor:
- For lighter mirrors (under 20 lbs): Use masonry screws with plastic sleeve anchors.
- For heavier mirrors (over 20 lbs): Use metal sleeve anchors for maximum holding power.
- Drill the Holes: Put on your safety glasses. Using a hammer drill and the correct-sized masonry bit, drill holes at your marked spots. Make sure the hole is deep enough for the entire anchor.
- Clean the Hole: Use a vacuum or a can of compressed air to clean all the dust out of the hole. This is essential for a secure fit.
- Insert the Anchor and Hang: Tap the anchor into the hole until it's flush. Attach your bracket, drive in the screw or tighten the nut, and hang your mirror.
Hanging on Tile
This is the trickiest surface because tile can crack easily.
- For very light mirrors (under 10 lbs): You can often use a special mirror adhesive or mastic. Clean the tile surface with rubbing alcohol, apply blobs of mastic to the back of the mirror, and press it firmly to the wall. Use painter's tape to hold it in place for at least 24 hours while the adhesive cures.
- For heavier mirrors on tile: We strongly recommend calling a professional. Drilling through tile without cracking it requires special diamond-tipped bits and a lot of experience. It's not worth risking a broken mirror or a shattered tile.
How Much Does it Cost? DIY vs. Pro
One of the great things about this project is how affordable it is to do yourself.
- DIY Cost: You can buy a pack of high-quality drywall anchors or toggle bolts for $5 - $15. A good stud finder might cost $20 - $30, but it’s a tool you’ll use for years.
- Professional Cost: Hiring a handyman to hang a mirror typically costs between $60 and $150, depending on the mirror's weight and your wall type, according to Thumbtack. For complex jobs like mounting on tile, the peace of mind can be well worth the price.
You’ve Got This!
Hanging a mirror is a project that delivers a huge visual reward for a relatively small amount of effort. By taking the time to weigh your mirror, understand your wall type, and choose the right hardware, you can hang it with total confidence.
And if you ever get stuck, remember that help is just a tap away. Download the Casa app for more step-by-step home maintenance guides, helpful tips, and to connect with trusted local professionals who can tackle any job, big or small. Now, go enjoy your beautifully transformed room


