Don’t worry. We’re here to walk you through it. Installing shelves securely is a totally achievable DIY project when you have the right plan and the right tools. Think of us as your expert on the other end of the line, guiding you step-by-step.
Whether you're mounting sleek floating shelves in the living room, sturdy bracket shelves in the garage, or a versatile adjustable system in your office, this guide will cover everything you need to know to get the job done right the first time.
First Things First: Why Planning Your Shelf Installation Matters
Before you even pick up a drill, a little bit of planning will save you a world of headaches. Jumping right into installation is the fastest way to end up with a wobbly shelf or one that’s not quite where you wanted it.
Let's start by laying the groundwork for a successful installation.
- Visualize Your Layout: Lay your shelves and brackets on the floor to get a feel for the spacing and overall look. This helps you visualize the final result before making any permanent marks on the wall.
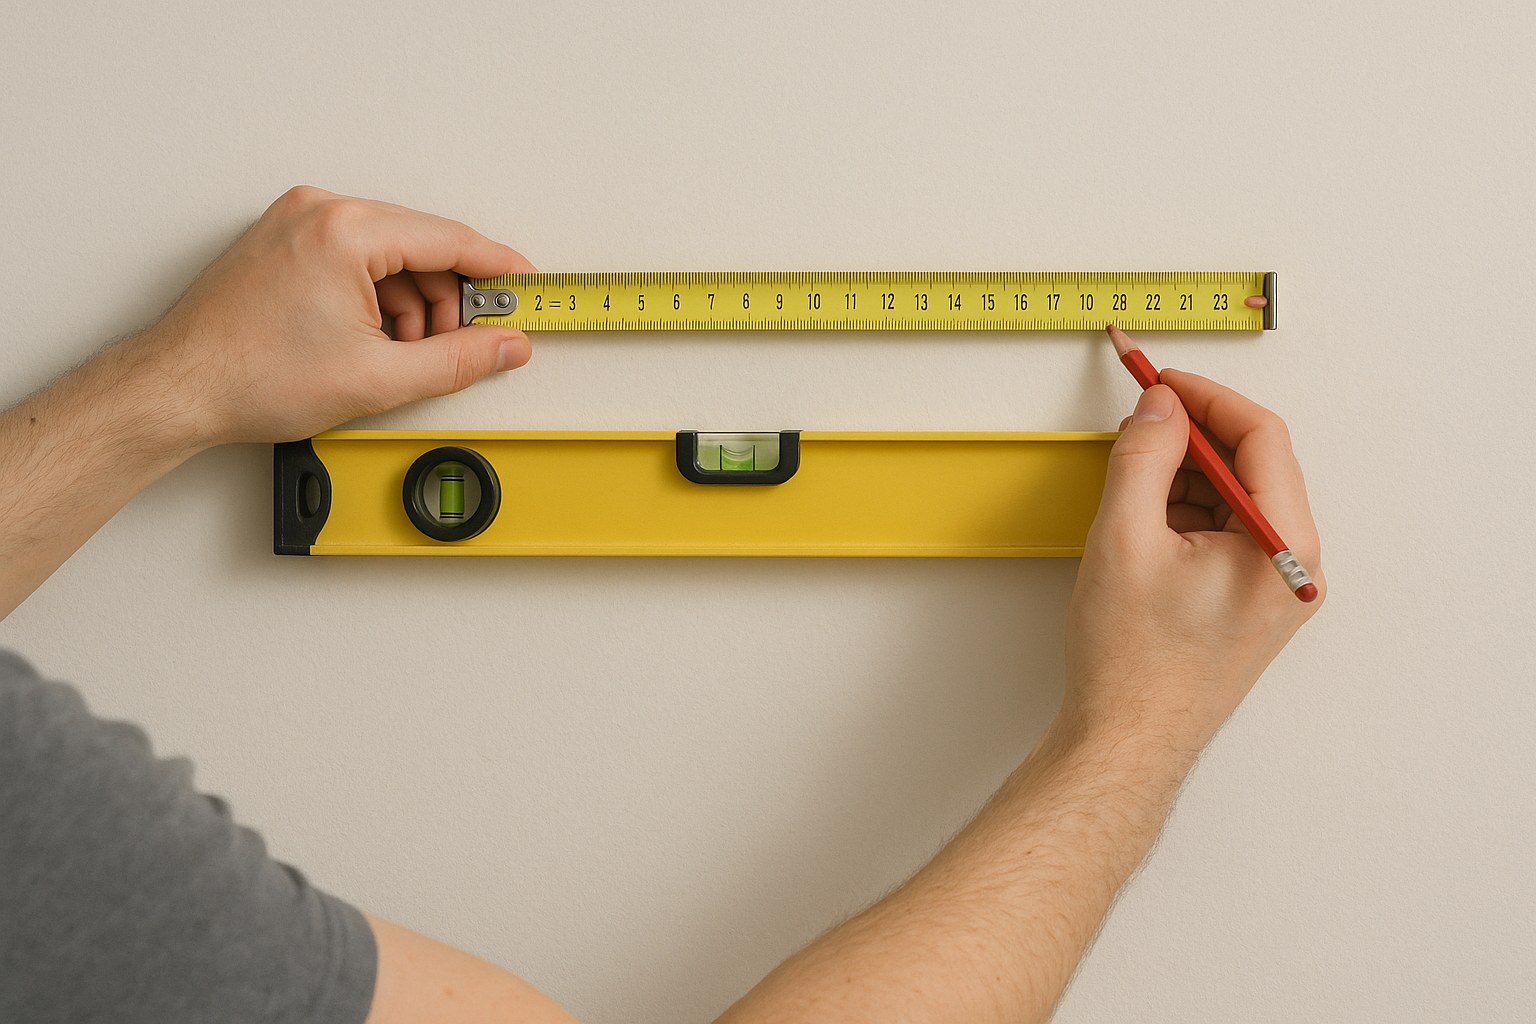
- Measure and Mark: Use a tape measure to determine your desired shelf height. A good rule of thumb is to place shelves at eye level (around 60 inches from the floor) or in a way that complements nearby furniture. Mark a light pencil line on the wall for your first shelf. If you're installing multiple shelves, measure the vertical distance between them and mark those spots, too.
- Get it Level: Once you have your height marks, hold a level against the wall at each mark and draw a short, perfectly horizontal line. This is the line your brackets or shelf will follow. Nothing looks worse than a crooked shelf!
- Consider the Weight: Think about what you plan to put on your shelves. A few paperbacks and a small plant? Or a collection of heavy cookbooks? Most standard shelf kits are rated for a certain weight, but if you plan on storing anything over 50-75 lbs, you’ll need to ensure you’re using heavy-duty brackets and mounting them directly into wall studs.
Understanding Your Walls: The Secret to a Secure Shelf
The single most important factor for a secure shelf is what you’re attaching it to. Your walls aren’t just solid surfaces; behind the drywall or plaster is a wooden frame made of studs.
Finding Wall Studs: Your Best Friend
Wall studs are the vertical wooden beams that make up your home's framework. They are, by far, the strongest and most reliable place to anchor a shelf.
- How to Find Them: The easiest way is with an electronic stud finder. Slowly slide it horizontally across your wall along your level pencil line. It will beep or light up when it detects a stud. Mark the center of each stud you find.
- No Stud Finder? No Problem: You can try the "tap test." Knock along the wall; the sound will change from a hollow echo (between studs) to a solid, dull thud (over a stud). You can also look for clues like the location of outlets and switches, as they are almost always attached to the side of a stud.
Ideally, your shelf brackets will line up perfectly with two or more studs. But what if they don't?
When Studs Aren’t an Option: All About Wall Anchors
It’s common for studs not to be exactly where you need them. In this case, you’ll need to use wall anchors. These are special fasteners that expand behind the drywall, creating a secure hold in the hollow space.
- For Drywall or Plaster: Do NOT just drive a screw into plain drywall. It will pull out under even the lightest load. You need anchors.
- Toggle Bolts: These are among the strongest. They have spring-loaded "wings" that open up behind the wall. You'll need to drill a larger hole for these, but the holding power is excellent.
- Hollow-Wall Anchors (Molly Bolts): These are metal sleeves that expand and grip the back of the drywall as you tighten the screw. They are great for medium-duty loads.
- For Masonry Walls (Brick or Concrete): If you're drilling into brick or concrete, you'll need a hammer drill and a masonry bit. After drilling your hole, you’ll insert a masonry sleeve or anchor, which expands to grip the solid material.
Always check the weight rating on the anchor packaging to ensure it can support your shelf and its contents.
How to Install Your Shelves: A Step-by-Step Guide
Now that you've planned your layout and understand your walls, it's time to get to the main event. We'll break it down by the three most common shelf types.
1. How to Install Bracket-Supported Shelves
This is the classic shelf design, with visible brackets supporting the shelf board from underneath.
-
If Mounting to Studs (Recommended):
- Hold your first bracket against the wall, aligning it with your level line and centering it over a stud mark.
- Mark the screw hole locations with a pencil.
- Drill 1/8-inch pilot holes into the stud at your marks. This prevents the wood from splitting.
- Drive 2-inch wood screws through the bracket and into the stud until snug. Don’t overtighten.
- Repeat for the second bracket, using your level to ensure it's perfectly aligned with the first.
- Place the shelf board on top and secure it to the brackets if your kit includes smaller screws for this purpose.
-
If Mounting with Drywall Anchors:
- Position your brackets on your level line and mark the hole locations.
- Drill holes appropriately sized for your chosen anchors (toggle bolts or hollow-wall anchors).
- Insert the anchors into the holes according to the package instructions.
- Hold the bracket in place and drive the screws into the anchors until firm.
- Place the shelf and check for level.
-
If Mounting on Masonry Walls:
- Put on your safety glasses!
- Hold the bracket in place and mark the holes.
- Using a hammer drill and masonry bit, drill holes about 1.5 inches deep.
- Clean the dust out of the holes and tap in your masonry anchors until they are flush with the wall.
- Fasten the brackets with the provided bolts, tightening until they are rock-solid.
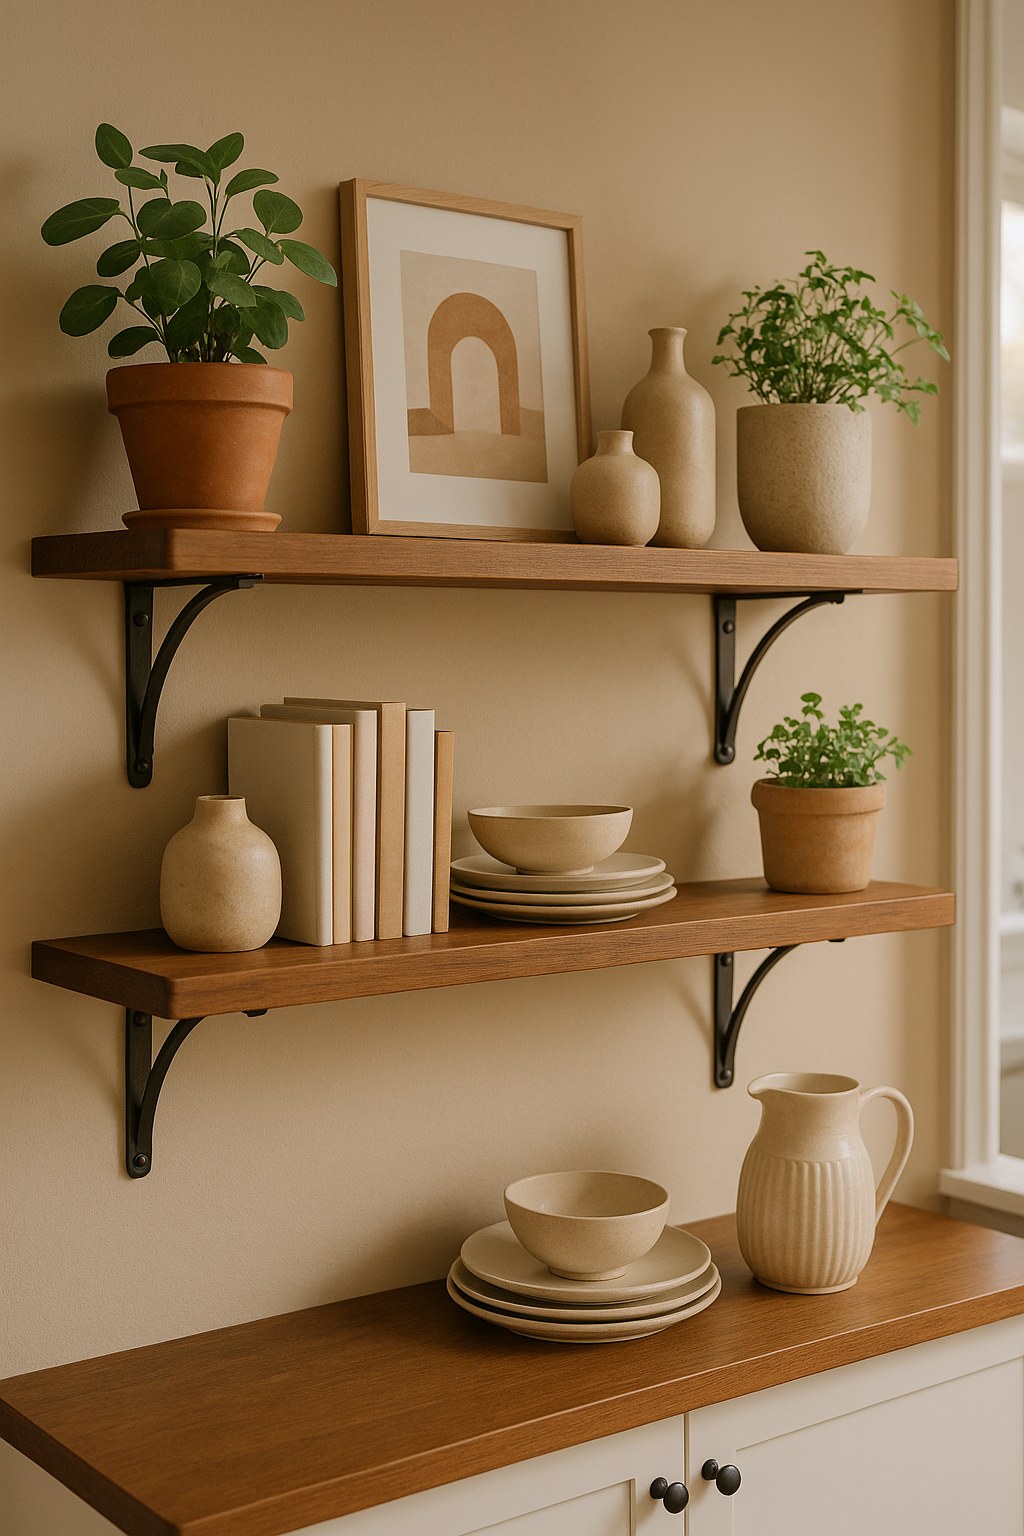
2. How to Install Floating Shelves
Floating shelves offer a clean, modern look with no visible hardware. They use a hidden metal bracket that attaches to the wall.
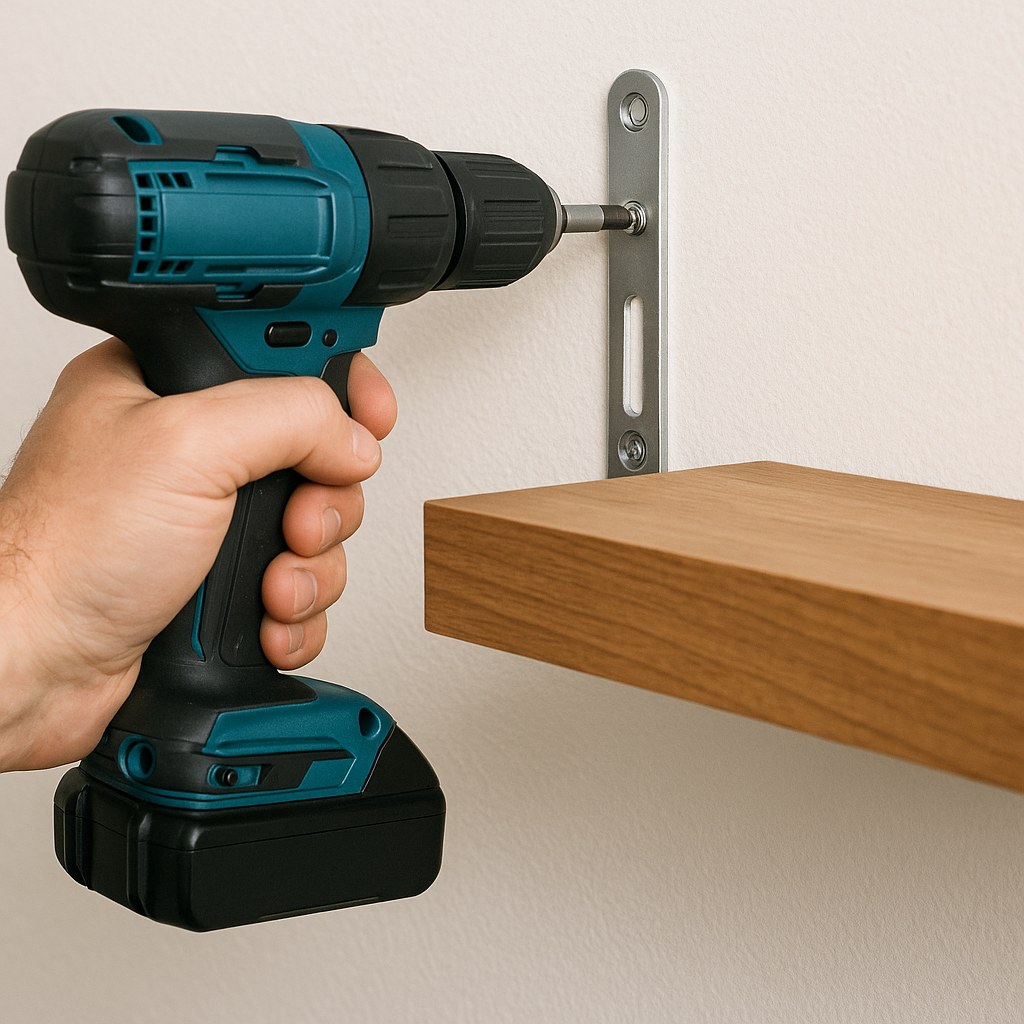
The process is similar to bracket shelves, but you're installing the hidden mounting plate first.
- Align the Bracket: Hold the metal mounting bracket against the wall on your level line. If possible, align its screw holes with your stud locations.
- Mark and Drill: Mark the hole locations. Drill pilot holes if you’re hitting studs, or drill the appropriate size holes for your anchors if you’re not. For masonry, use your hammer drill.
- Secure the Bracket: Fasten the bracket to the wall with the appropriate screws or bolts. Use your level one more time to make sure the bracket itself is perfectly horizontal before the final tightening.
- Slide on the Shelf: Slide the hollow shelf board onto the bracket posts. It should fit snugly and sit flush against the wall.
3. How to Install Adjustable Shelving Systems
These systems use vertical tracks screwed to the wall, allowing you to place shelf clips at any height. They're perfect for pantries, closets, and offices.
- Mount the First Track: Hold the first vertical track against the wall. Use your level to make sure it's perfectly plumb (vertically straight).
- Mark and Secure: Mark all the mounting holes. For each hole, either drill a pilot hole into a stud or install a wall anchor. Secure the track firmly with screws.
- Mount Additional Tracks: Measure the horizontal distance to where your next track should go (this depends on the length of your shelves). Mount the next track, ensuring the slots line up perfectly with the first track. A level held across the two tracks can help with alignment.
- Add Clips and Shelves: Insert the shelf clips into the track slots at your desired heights. Place the shelf boards on top and press down gently to set them.
Cost and When to Call a Handyman
A DIY shelf installation is incredibly cost-effective. Your main expenses are the shelves themselves and perhaps a few dollars for anchors.
- DIY Cost: $20 - $100+ (depending on the cost of the shelves).
- Hiring a Handyman: According to Angi, a handyman typically charges between $60 and $125 per hour. A simple shelf installation might take 1-2 hours, putting the labor cost around $100 - $250.
While this is a great project for beginners, there are times when calling a pro is the smart move. Consider hiring help if:
- You're mounting extremely heavy or custom-built shelves.
- Your walls are old, crumbling plaster.
- You’re not confident in your ability to find studs or use a drill safely.
- You suspect there might be plumbing or electrical wiring in the wall where you want to drill.
Ready to Get Organized?
You’ve got this! By taking the time to plan, understanding your walls, and using the right hardware, you can install beautiful, sturdy shelves that will last for years.
For more easy-to-follow DIY guides, personalized home maintenance reminders, and a direct line to trusted local pros for those bigger jobs, download the Casa app today. We’re here to help you manage your home with confidence, one project at a time.


