Whether you're upgrading to a more modern style, switching from a knob to a lever for better accessibility, or simply replacing a broken handle, we've got you covered. In this guide, I’ll walk you through every step of the process, just like I was on the phone with you. We'll figure out what kind of knob you have, how to remove it, and how to install your shiny new one perfectly.
Let's get those doors looking and working their best!
Before You Start: Choosing Your New Door Knob
Walking down the hardware aisle can be overwhelming. Knobs, levers, handlesets, deadbolts... where do you even begin? Choosing the right hardware isn't just about looks; it's about function. Let's break it down.
1. Style: Knob, Lever, or Handleset?
- Knobs: The classic, round choice. They're traditional and work in almost any setting.
- Levers: A more modern option that's also great for accessibility. They're easier to open with an elbow or full hands, making them compliant with ADA (Americans with Disabilities Act) guidelines.
- Handlesets: These are typically for exterior front doors and feature a handle and a separate deadbolt. They make a grand statement but are a bit more involved to install.
2. Function: Where is the Door?
- Passage Knobs: These don't lock. They're perfect for interior doors that don't need privacy, like closets or hallways.
- Privacy Knobs: These have a push-button or turn-lock on the interior side to prevent entry. They're ideal for bedrooms and bathrooms. They can typically be unlocked from the outside with a small pin in case of an emergency.
- Keyed Entry Knobs: These have a key cylinder on the exterior and a turn-lock on the interior. You'll use these for any door that needs to be secured, like your front door or a door leading to the garage.
3. Measurement: Make Sure It Fits!
Before you buy, grab a tape measure. There are two key measurements:
- Backset: This is the distance from the edge of the door to the center of the hole for the door knob. The most common backset sizes are 2-3/8 inches and 2-3/4 inches. Most new knobs are adjustable, but it's always good to check.
- Door Thickness: Most interior doors are 1-3/8 inches thick, and exterior doors are 1-3/4 inches thick. Your new knob's packaging will tell you what door thickness it's designed for.
Step 1: Identify Your Existing Door Knob Type
Okay, let's figure out what we're working with. There are two main types of door knobs, and the replacement process is quite different for each.
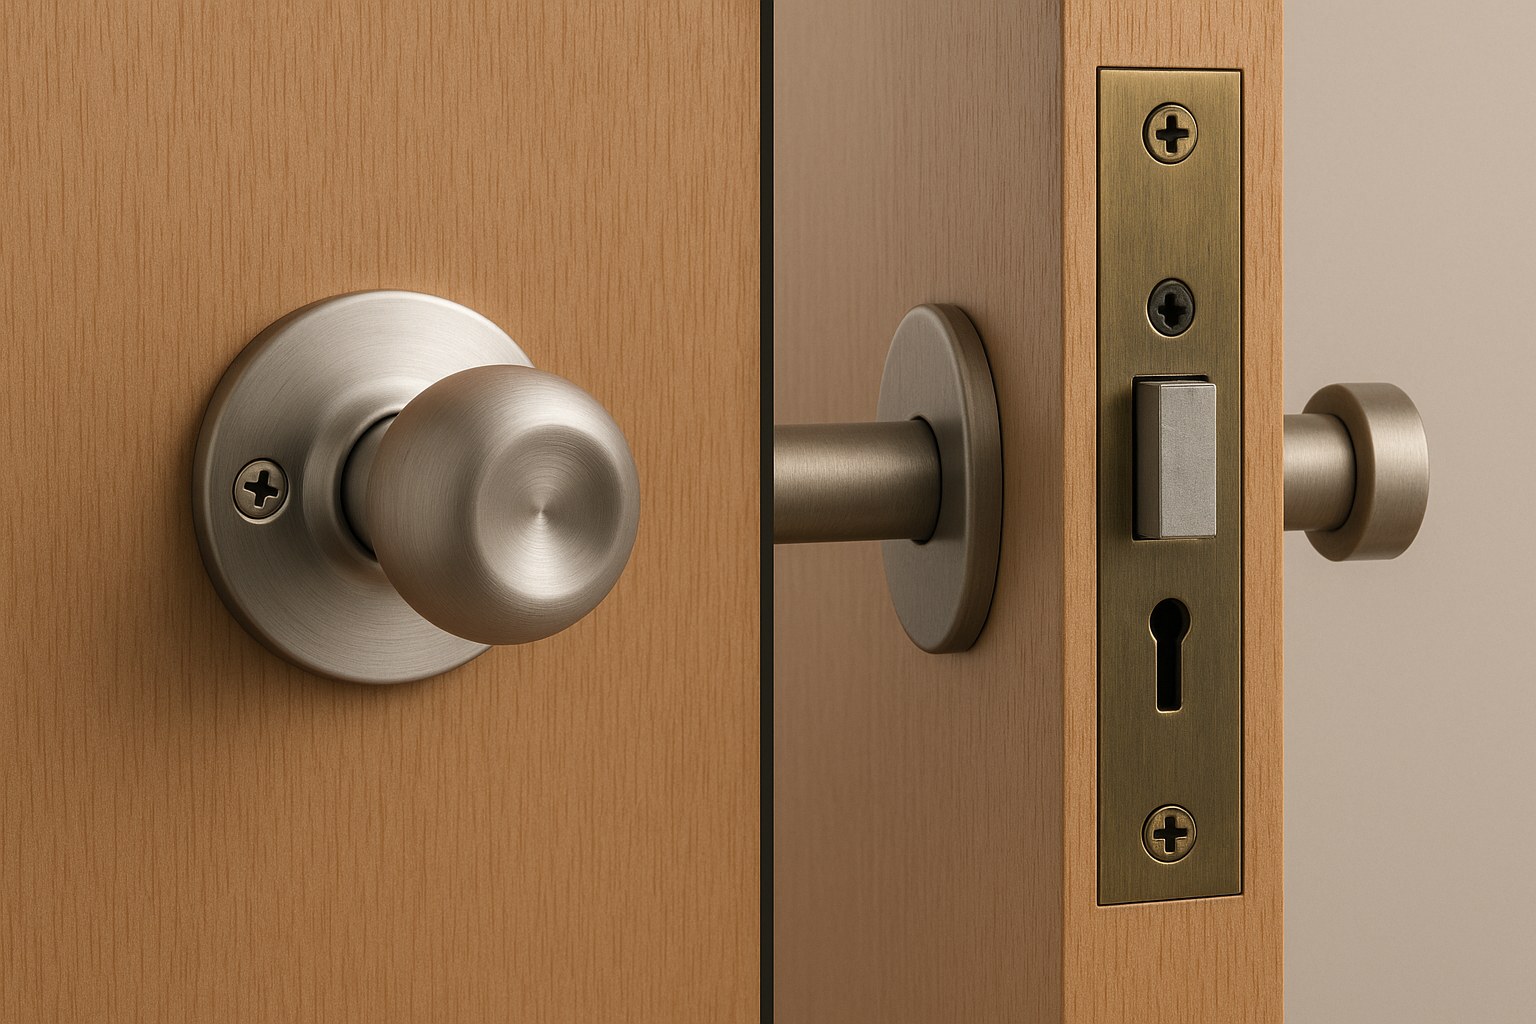
- Cylindrical Knobs: These are the most common type in modern homes. The easiest way to spot one is by looking for two visible screws on the interior side of the knob (the side inside the room). The locking mechanism is contained within the knob itself.
- Mortise Locks: These are more common in older homes (typically pre-1950s). They have a large, rectangular box that fits into a pocket (a "mortise") cut into the edge of the door. You won't see any mounting screws on the interior knob; instead, you'll see a metal faceplate on the door's edge with the latch and a deadbolt.
Take a look at your door. See two screws on the inside? You've got a cylindrical knob. No screws and a big rectangular plate on the door's edge? That's a mortise lock.
Step 2: How to Replace a Cylindrical Door Knob (The Common Kind)
If you've got a cylindrical knob, you're in luck. This is a straightforward 15-minute job. All you'll need is a Phillips head screwdriver.
Removing the Old Knob
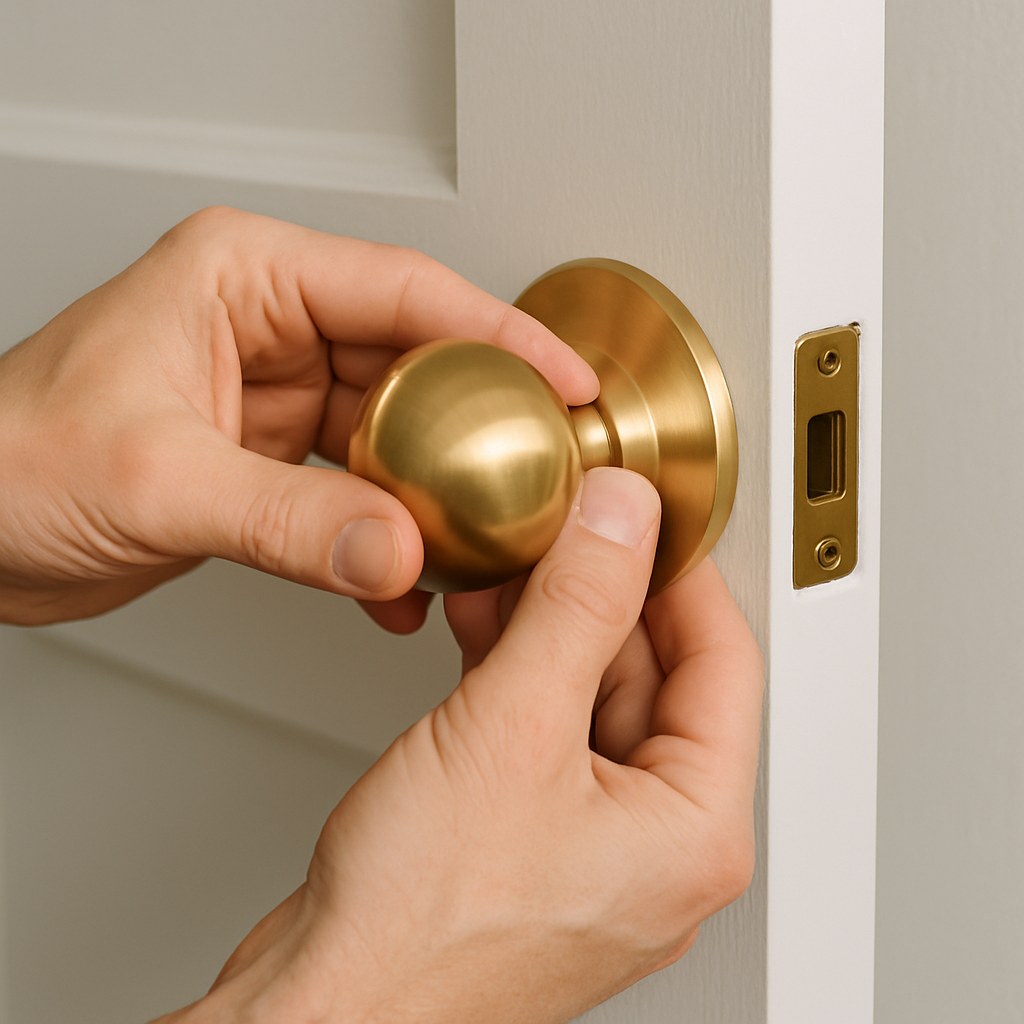
- Unscrew the Interior Handle: Find the two screws on the interior knob's faceplate. Turn them counter-clockwise with your screwdriver until they're completely loose.
- Pull the Knobs Apart: Hold onto both the interior and exterior knobs and gently pull them straight out, away from the door. They should slide right off.
- Remove the Latch Plate: Now look at the edge of the door. You'll see a small plate held in by two smaller screws. Unscrew these.
- Slide Out the Latch Bolt: Once the screws are out, the entire latch mechanism will slide straight out of the hole in the door's edge.
That's it! The old knob is gone. It's a good idea to put all the old hardware in a bag or small box so you don't lose any pieces.
Installing the New Knob or Lever
- Insert the New Latch: Take the new latch bolt and slide it into the hole on the edge of the door. Make sure the curved or angled side of the latch is facing the direction the door closes (toward the door frame and strike plate).
- Secure the Latch Plate: Use the two small screws provided to fasten the new latch plate to the door's edge.
- Install the Exterior Handle: Take the exterior half of your new knob or lever (the one with the long spindle) and slide it through the square hole in the latch mechanism. If it's a lever, make sure the handle is pointing away from the door's edge (downward).
- Attach the Interior Handle: Align the interior half of the knob with the mounting posts from the exterior side. It should slide right on.
- Tighten the Screws: Insert the two long mounting screws and tighten them with your screwdriver until they are snug. Don't overtighten, as this can cause the knob to bind. Just make sure it feels solid and doesn't wobble.
Step 3: How to Replace a Mortise Lock (The Old-School Kind)
If you have a mortise lock, the process is a bit more involved. It's still manageable, but take your time.
Removing the Old Mortise Lock
- Loosen the Set Screw: Look at the base of the interior door knob. You should find a tiny set screw. Loosen it with a screwdriver.
- Remove the Knobs and Plates: Once the set screw is loose, you should be able to pull the interior knob off. Then, unscrew the faceplates on both sides of the door. The exterior knob and spindle should now pull out.
- Remove the Mortise Body: Go to the edge of the door and unscrew the main faceplate of the mortise lock. The entire lock body should now slide out of the pocket in the door.
Installing the New Mortise Lock
When replacing a mortise lock, it's crucial that the new lock body is the exact same size as the old one. If it doesn't fit the existing pocket perfectly, you'll need to call a professional locksmith to resize the mortise.
- Insert the New Lock Body: Carefully slide the new mortise lock body into the pocket in the door.
- Secure the Faceplate: Fasten the new faceplate on the door's edge with its screws.
- Install the Knobs: Insert the new exterior knob and spindle through the lock body. Attach the interior knob and tighten its set screw.
- Secure the Trim: Attach the new interior and exterior faceplates (trim) with their mounting screws.
Step 4: Test Your New Hardware
Don't close the door just yet! With the door open, test the knob a few times.
- For Non-Keyed Knobs/Levers: Turn the handle or press the lever. Does the latch retract smoothly? Does it spring back into place when you let go?
- For Keyed Knobs/Levers:
- First, test it unlocked. The handle should turn freely and retract the latch.
- Now, lock it using the key or interior thumb-turn. The exterior handle should not turn. The interior handle should still be able to retract the latch (a safety feature).
- Unlock it with the key and make sure it operates smoothly again.
Once you're confident it's working, close the door gently and test that it latches securely into the strike plate on the door frame. If it all works, you're done!
How Much Does It Cost to Replace a Door Knob?
One of the best parts of this project is how affordable it is.
- DIY Cost: The only cost is the hardware itself. A basic interior passage knob can cost as little as $15-$30. A stylish keyed entry lever might be in the $50-$100 range.
- Professional Cost: If you'd rather hire a pro, a locksmith typically charges for the service call plus labor. According to Thumbtack, you can expect to pay anywhere from $100 to $300 for a professional to replace a single door knob.
By doing it yourself, you can save a significant amount of money and gain a valuable home maintenance skill.
When to Call a Pro
If you've followed the steps and the knob still isn't working right, or if you're trying to replace a mortise lock and the new one doesn't fit, it might be time to call for backup. A professional locksmith can solve complex issues quickly and ensure your door is secure.
Upgrade Your Home, One Knob at a Time
Replacing a door knob is a small change that makes a big difference. It’s a project that builds confidence and instantly improves your space.
For more easy-to-follow DIY guides, expert tips, and a direct line to trusted professionals for those bigger jobs, download the Casa app today! Casa is your go-to partner for all things home maintenance, helping you care for your home with confidence.


