Whether your faucet is leaking, covered in rust, or simply outdated, replacing it is one of the most impactful and manageable DIY projects you can tackle. A new faucet can instantly upgrade the look of your kitchen or bathroom, and doing it yourself can save you a significant amount of money.
While calling a plumber is always an option, this is a job you can definitely handle on your own with the right tools and guidance. We’re here to walk you through it, step-by-step, just like a friendly expert on the phone. This guide covers standard deck-mounted faucets (the kind that sit on the sink or countertop). If your faucet is mounted directly to the wall, we recommend calling a professional, as it’s a more complex job.
Ready to silence that drip for good and give your sink a fresh new look? Let's get started.
Getting Started: Tools, Materials, and Preparation
Before you dive under the sink, a little preparation goes a long way. Having everything you need on hand will make the process smoother and prevent you from having to make a last-minute trip to the hardware store.
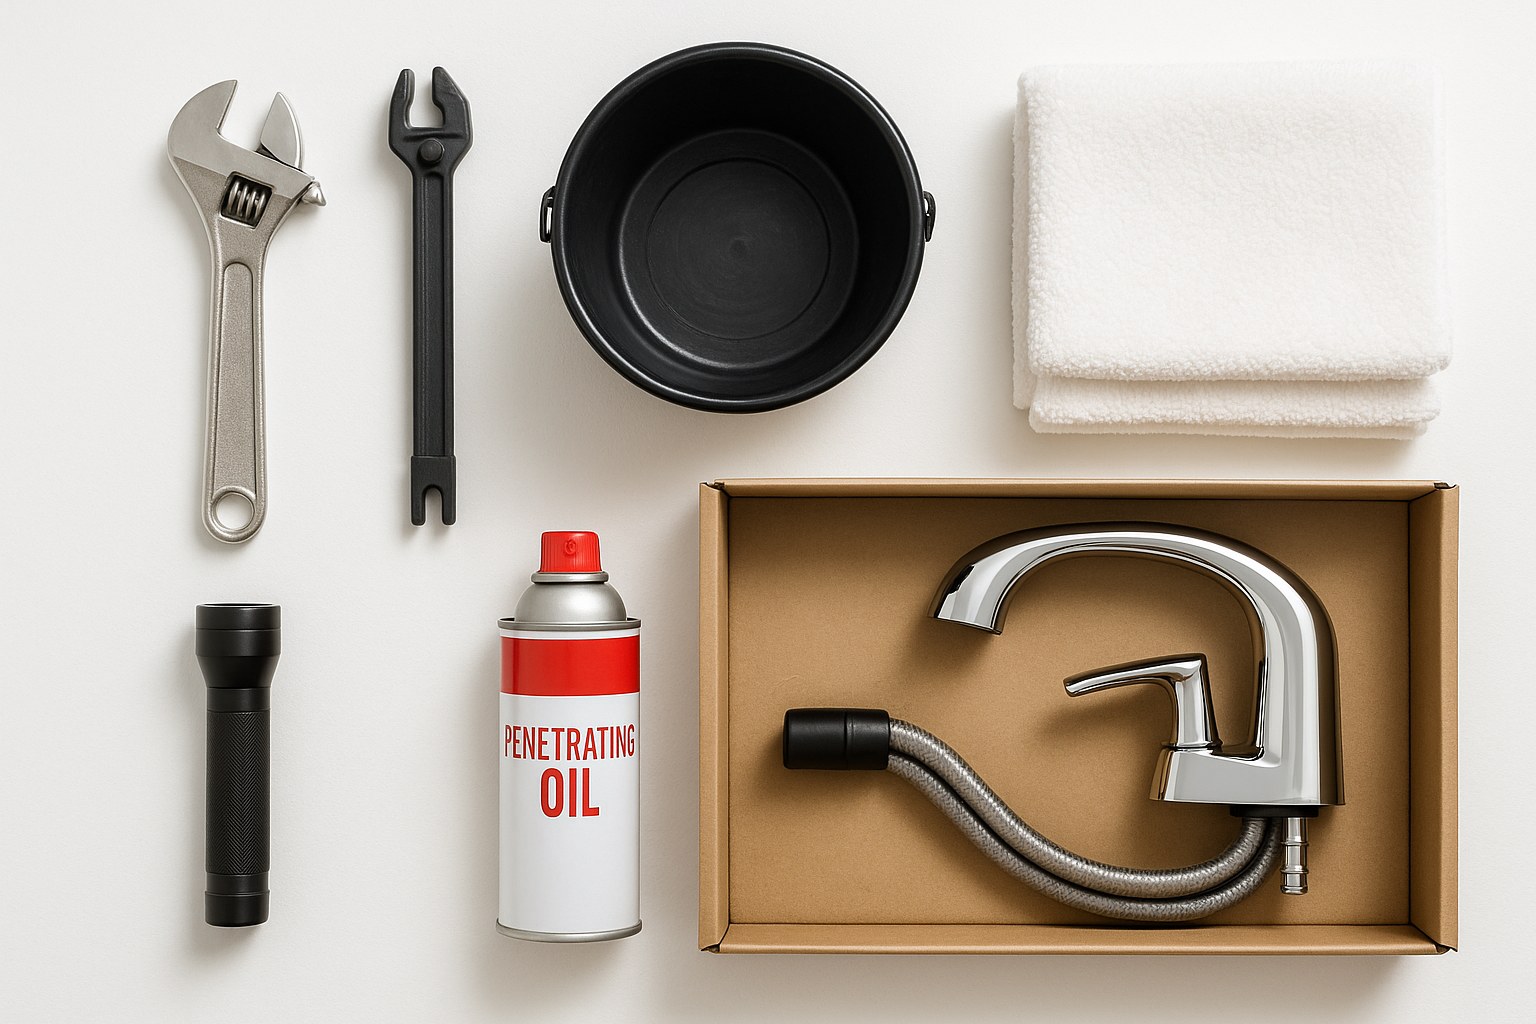
Here’s what you’ll need:
- New Faucet: Make sure it’s compatible with your sink’s hole configuration (e.g., single-hole, three-hole).
- Adjustable Wrench: For loosening and tightening supply lines and mounting nuts. A basin wrench is also highly recommended for reaching tight spots.
- Bucket and Towels: To catch any residual water and protect your cabinet.
- Flashlight or Headlamp: It’s dark under there!
- Penetrating Oil (like WD-40): For stubborn, rusted-on nuts.
- Microfiber Cloth: For cleaning the sink surface.
- Silicone Sealant or Plumber's Putty: Often included with the new faucet, but good to have on hand.
- Escutcheon Plate (if needed): A deck plate used to cover unused holes if you're switching from a three-hole faucet to a single-hole model.
Pro Tip: Before you disconnect anything, use your phone to snap a few pictures of the plumbing configuration under your sink. This can be a lifesaver if you forget how the supply lines were connected.
Step 1: Removing the Old Sink Faucet
First things first, we need to get that old faucet out of the way. This is often the most challenging part of the job, especially if the faucet has been there for a long time and corrosion has set in.
- Clear Everything Out: Start by emptying the cabinet under the sink to give yourself plenty of room to work.
- Turn Off the Water: This is the most crucial step! Locate the two shut-off valves under the sink—one for hot water and one for cold. Turn them clockwise until they are fully closed. If you don't have shut-off valves under your sink, you'll need to turn off the main water supply to your house.
- Release Water Pressure: Turn on the old faucet handles to drain any remaining water from the lines. It will trickle for a moment and then stop. Leave the handles in the "on" position.
- Prepare for Drips: Place your bucket and a towel directly under the water supply lines to catch any drips. It's also a good idea to put another towel in the sink basin to protect it from dropped tools and to prevent small parts from falling down the drain.
- Disconnect the Water Supply Lines: Using your adjustable wrench, loosen the compression nuts that connect the hot and cold supply lines to the faucet's tailpieces. These are the lines running from the shut-off valves up to the faucet itself. Once loosened, you should be able to unscrew them by hand.
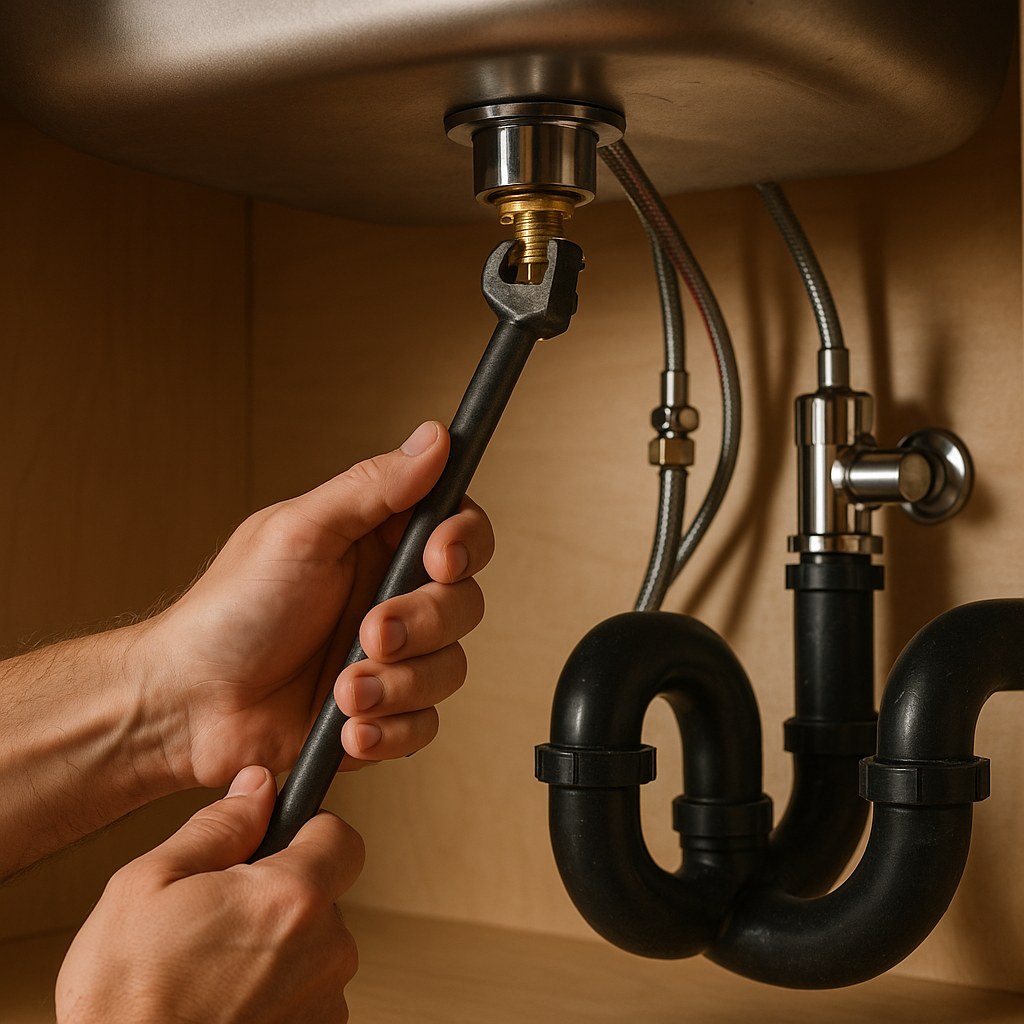
- Unscrew the Mounting Nuts: Now for the tricky part. Look up behind the sink basin to find the mounting nuts that hold the faucet in place. They can be plastic or brass and are often hard to reach. If they’re stuck, spray them with penetrating oil and wait about five to ten minutes for it to work its magic. Use your adjustable wrench or a basin wrench to loosen and remove them.
- Lift Out the Old Faucet: With the nuts removed, you should be able to lift the old faucet handles and spout straight up and out of the sink holes.
Congratulations, the hardest part is over!
Step 2: Installing Your Brand New Faucet
Now for the rewarding part—installing your shiny new faucet. Always check the manufacturer's instructions included with your new faucet, but these general steps apply to most models.
-
Clean the Surface: Use a microfiber cloth and a mild cleaner to thoroughly clean the sink deck where the old faucet was sitting. Scrape away any old putty or grime to ensure a clean, flat surface for a perfect seal.
-
Installing an Escutcheon Plate (If Necessary): Are you switching from a faucet with separate handles to a single-handle model? If so, you’ll have extra holes to cover. This is where an escutcheon plate (deck plate) comes in.
- Run a thin bead of silicone sealant around the bottom edge of the plate.
- Carefully position the plate over the holes and press it down firmly.
- Wipe away any excess sealant immediately.
-
Mount the New Faucet:
- Place the rubber or plastic gasket (usually included) over the bottom of the new faucet body.
- Carefully insert the faucet’s tailpieces and mounting posts down through the hole(s) in the sink or the escutcheon plate.
- From under the sink, slide on any washers and hand-thread the new mounting nuts onto the faucet.
- Before you tighten everything down, have someone look from above to make sure the faucet is centered and straight.
- Use your wrench to give the mounting nuts another quarter-turn to secure them. Be careful not to over-tighten, as this can damage the sink or the faucet.
Step 3: Connecting the Water and Checking Your Work
You're in the home stretch! It's time to connect the water and check for leaks.
- Connect the Supply Lines: Attach the hot and cold water supply lines to the corresponding tailpieces on the new faucet. By convention, the hot line is on the left and the cold is on the right. Tighten the compression nuts by hand, then give them another quarter-turn with your wrench.
- Turn the Water Back On (Slowly!): This is a moment of truth. Slowly turn the shut-off valves counter-clockwise to restore the water supply. Turning them on slowly prevents a sudden surge of pressure that could shock the system.
- Inspect for Leaks: With the water on, use your flashlight to carefully inspect every connection point under the sink. Look for even the smallest drip from the shut-off valves, the supply line connections, and around the base of the faucet.
- Flush the Lines: Remove the aerator from the tip of the new faucet spout (it usually unscrews by hand). Remove the towel from your sink basin, then turn the faucet on and let both hot and cold water run for a couple of minutes. This flushes out any debris that may have been knocked loose in the lines during installation.
- Final Check: Turn off the water and do one last check for leaks underneath the sink. If everything is dry, screw the aerator back on.
You did it! You’ve successfully replaced your sink faucet.
Cost Breakdown: DIY vs. Hiring a Plumber
One of the biggest benefits of tackling this project yourself is the savings. Let's break it down:
-
DIY Cost:
- New Faucet: $50 - $400+, depending on style and brand.
- Tools & Materials: $20 - $50 (if you don't already own a wrench and other basics).
- Total DIY: $70 - $450+
-
Professional Installation Cost:
- According to Forbes Home, the average labor cost to have a plumber install a faucet is between $150 and $350. This is in addition to the cost of the faucet itself.
By spending an hour or two on this project, you can easily save yourself a couple of hundred dollars.

Take Control of Your Home Maintenance with Casa
Fixing a leaky faucet is a fantastic confidence-booster and a great introduction to the world of DIY home repair. By following these steps, you can solve a common household problem, save money, and give your space an instant facelift.
Feeling empowered? There's more you can do! For more easy-to-follow guides, personalized maintenance reminders, and a direct line to trusted professionals for those jobs you'd rather not handle, download the Casa app today. Casa is your partner in homeownership, making it simple to manage, maintain, and love your home.