A deck is the heart of your outdoor living space, but years of sun, rain, and foot traffic can take their toll. Wobbly, cracked, or rotting deck boards aren't just an eyesore—they can be a serious safety hazard. The good news is that replacing worn-out boards is a project many homeowners can tackle themselves, instantly boosting their home's curb appeal and restoring peace of mind.
Whether you're dealing with a few problem spots or planning a full resurfacing, this guide is your go-to resource. We'll walk you through everything, step-by-step, just like a friendly expert on the phone. We'll cover how to inspect your deck's structure, remove old boards attached with nails, screws, or hidden fasteners, and install new wood or composite decking like a pro.
Let's get that deck back in shape!
Is It Time to Replace Your Deck Boards?
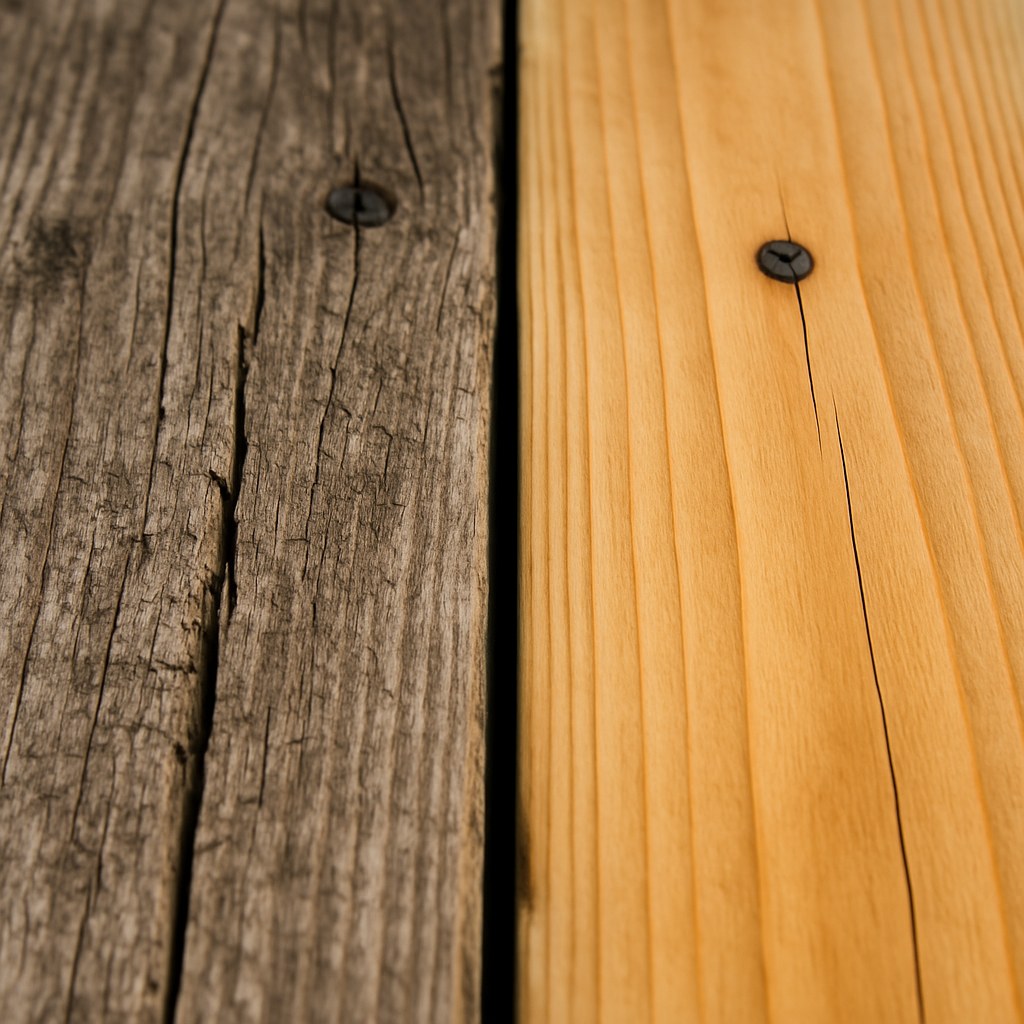
Before you start pulling up boards, let's confirm you're on the right track. If you notice any of the following signs, it's a clear signal that your deck boards need attention:
- Spongy or Wobbly Boards: When you walk across the deck, do certain boards feel soft or give way under your feet? This often indicates rot or a loss of structural integrity.
- Visible Cracks and Splintering: Large cracks or severe splintering can be painful for bare feet and are signs that the wood is drying out and weakening.
- Rotting Wood: Look for discolored, soft, or crumbly spots. You can test for rot by pressing a screwdriver into the wood; if it sinks in easily, you've got rot.
- Persistent Creaks: While some noise is normal, loud or excessive creaking can mean boards have come loose from the joists below.
- Popped Fasteners: Nails or screws that have worked their way up are a tripping hazard and show that the boards are no longer securely fastened.
If any of these sound familiar, it’s time to roll up your sleeves.

The Most Important First Step: A Full Deck Inspection
Hold on! Before you grab that pry bar, we need to do the single most important thing: inspect the deck's foundation. The deck boards are just the surface; the real strength comes from the joists and beams underneath. Putting beautiful new boards on a rotten structure is a recipe for disaster.
Think of it like this: you wouldn't put a new roof on a house with a crumbling foundation.
Here’s how to perform a thorough inspection:
- Gear Up: Put on your safety glasses and work gloves.
- Walk the Deck: Methodically walk across every part of the deck. Press down firmly on each board, feeling for any spongy or bouncy spots. Make a mental note of these areas.
- Get Underneath: Head under the deck with a flashlight. Carefully inspect every visible joist (the smaller boards that the deck boards rest on) and beam (the larger boards that support the joists).
- Look for Damage: You're looking for the same red flags as on the surface: deep cracks, signs of rot (dark, soft wood), or termite damage. Probe any suspicious spots with a screwdriver.
When to Stop and Call a Professional
This is a critical checkpoint. If you find that any joist or beam is rotten, cracked, or loose, your project has just changed from a simple board replacement to a structural repair.
DO NOT PROCEED. Structural work requires professional expertise to ensure the deck is safe. This is the moment to put down the tools and call a licensed deck contractor. If your deck boards are arranged in a complex pattern like herringbone or have a picture-frame border, it's also wise to consult a professional to ensure the repair matches the original craftsmanship.
Gather Your Tools and Materials
Assuming your deck's structure is sound, it's time to get everything you need for the job.
Tools:
- Safety glasses and work gloves
- Tape measure
- Flat pry bar
- Hammer or mallet
- Impact driver or power drill
- Drill bit set (including a bit matching your new screws)
- Screw extractor bit (a lifesaver for stripped screws)
- Deck board removal tool (if you have hidden fasteners)
Materials:
- Replacement deck boards (wood or composite)
- Deck screws (use coated screws rated for exterior use)
- Hidden fasteners and starter clips (for composite boards)
- 1/8-inch spacers (or a 16d nail) for even gaps
- Exterior wood sealer (for wood boards)
- Butyl joist tape (highly recommended for all decks)
Step 1: Removing the Old Deck Boards
How your boards are attached determines how you'll take them up. Take a close look to see if you have nails, screws, or no visible fasteners at all.
How to Remove Nailed Boards
This is the most labor-intensive method but straightforward.
- Wedge your flat pry bar into the gap next to the board you want to remove, right over a joist.
- Tap the end of the pry bar with a hammer to drive it under the board.
- Gently pry upward to lift the board slightly. Move down the board, prying up at each joist to lift it evenly and prevent it from cracking.
- Once the board is up, use the claw of your hammer to pull out any remaining nails.
How to Remove Screwed Boards
This is much faster if the screws are in good shape.
- Set your impact driver or drill to the "reverse" setting.
- Simply back out all the screws along the board.
- If you encounter a stripped screw head, switch to a screw extractor bit. It will bite into the damaged head and allow you to remove it.
- Once all screws are out, lift the board away.
How to Remove Boards with Hidden Fasteners
This method requires a special tool, often specific to the brand of decking.
- Insert the prongs of the hidden fastener removal tool into the gap between the boards, directly over a joist.
- Twist the tool to engage and loosen the clip holding the board down.
- Repeat this process at every joist until the board can be lifted out.
After removing the old boards, take a moment to sweep the exposed joists clean of any dirt, leaves, or wood splinters.
Step 2: Prepping the Joists for New Boards
With the joists exposed, now is the perfect time for an extra layer of protection. We highly recommend applying butyl joist tape along the top of every joist. This self-adhesive waterproof membrane prevents moisture from sitting between the new deck board and the joist, which is the number one cause of joist rot. It’s an inexpensive step that can add years to the life of your deck's structure.
Step 3: Installing the New Deck Boards
The installation process differs significantly between traditional wood and modern composite boards. Follow the path that matches your material.

How to Install New Wood Deck Boards
- Seal the Boards: Before you install, apply a coat of exterior wood sealer to all six sides of each new board (top, bottom, edges, and ends). This is crucial for preventing moisture absorption and rot. Let it dry completely.
- Set the First Board: Place your first board on the joists, leaving a 1/8-inch gap between the board and your house's siding for water drainage.
- Fasten the Board: Drive two deck screws through the face of the board into each joist it crosses. Position the screws about 3/4-inch from each edge of the board.
- Use Spacers: Place 1/8-inch spacers (or the shaft of a 16d nail) between the first board and the next one. This ensures a consistent gap for drainage and expansion.
- Continue Installing: Lay the next board, press it snugly against the spacers, and fasten it down. Repeat this process for all remaining boards.
How to Install New Composite Deck Boards
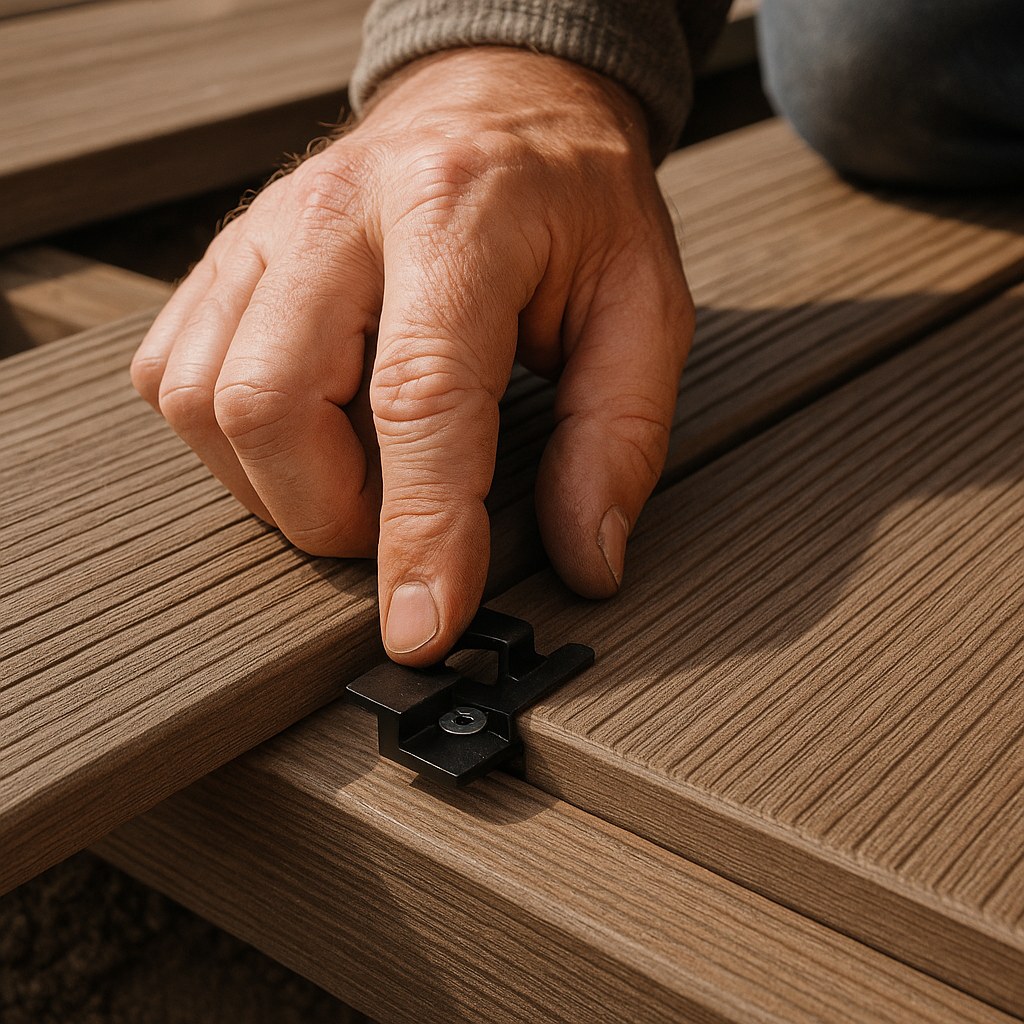
Composite decking uses a system of hidden fasteners for a clean, screw-free surface.
- Set the First Board: Place the first board against the house. Secure it by driving screws through starter clips placed at every joist along the edge closest to the house.
- Install Hidden Fasteners: Slide a hidden fastener clip into the groove on the outer edge of the first board, positioning one at every joist.
- Set the Next Board: Slide the groove of the next deck board firmly into the clips you just installed.
- Tighten and Repeat: Drive the screw provided with the clip into the joist at a 45-degree angle. This will tighten the board and the clip at the same time. Repeat this process—placing clips, sliding the next board on, and tightening—until your deck is covered.
Cost to Replace Deck Boards: DIY vs. Pro
One of the biggest motivators for a DIY project is cost savings. According to Forbes, hiring a professional to replace deck boards can cost anywhere from $10 to $45 per square foot, including labor and materials.
By doing it yourself, you only pay for materials, which can cut the cost by more than half.
- Pressure-Treated Wood: $2 - $5 per linear foot
- Composite Decking: $4 - $12 per linear foot
For a 200-square-foot deck, a professional replacement could cost $2,000-$9,000, while a DIY replacement might cost $800-$2,500 in materials, depending on your choice of decking.
A Deck You Can Be Proud Of
Replacing old deck boards is a transformative project that enhances your home's safety, value, and your enjoyment of the outdoors. By following these steps, you can confidently tackle this repair and achieve professional-looking results.
Feeling a bit in over your head, or did your inspection reveal a bigger problem? That's what we're here for. Download the Casa app today to connect with vetted, local deck contractors who can handle everything from simple repairs to full rebuilds. With Casa, expert help and easy-to-follow DIY guides are always right at your fingertips.