The good news? Replacing it is a very manageable DIY project that you can likely tackle in under an hour. It’s a great way to save some money and get the satisfaction of fixing something yourself.
I’m here to walk you through it, just like I would over the phone. We’ll cover everything from identifying what kind of doorbell you have to safely wiring up the new one. Let’s get that chime ringing again!
Why Did My Doorbell Stop Working? Common Causes
Before we grab our tools, let's quickly diagnose the issue. If you're experiencing any of these symptoms, a faulty chime box is a likely culprit:
- Complete Silence: You press the doorbell button, and nothing happens. No buzz, no hum, no chime.
- Inconsistent Chime: The doorbell works sometimes, or the sound is distorted, weak, or cuts out mid-chime.
- A Buzzing or Humming Sound: A constant low buzz from the chime box often indicates an electrical issue within the unit or a stuck button.
- Loose or Disconnected Wires: Over time, vibrations can loosen the small wires connected to the terminals inside the chime box.
- Smart Doorbell Issues: Many modern smart doorbells require a specific amount of power that older mechanical chimes can't provide, leading to unresponsive features or a total failure to operate.
If any of these sound familiar, you’re in the right place. Let’s get started on the replacement.
Getting Started: Safety First and Tools You’ll Need
Anytime you’re working with electrical wiring, safety is the absolute top priority. Even though doorbells use low voltage, it’s essential to cut the power completely before you begin.
Here’s a list of tools and materials you should gather before you start:
- New Doorbell Chime Box: Make sure it’s compatible with your system (wired or wireless) and your doorbell button (especially if it’s a smart doorbell).
- Phillips Screwdriver
- Non-Contact Voltage Tester: This is a crucial safety tool to verify the power is off.
- Masking Tape & a Marker: For labeling wires.
- Wire Strippers (optional): In case you need to expose fresh copper wire.
- Drill with a Small Bit Set (optional): If new mounting holes are needed.
- Drywall Saw (optional): If the new chime box is larger than the old one.
- Safety Glasses
Step-by-Step Guide to Replacing Your Doorbell Chime
First things first, we need to figure out what kind of doorbell system you have. The vast majority of homes have a wired system, but wireless plug-in models are also common.
- Wired Chime Box: This is a plastic box, usually mounted on a wall in a central location like a hallway or entryway. It's hardwired into your home's electrical system via a transformer.
- Wireless Chime Box: This is a simpler device that plugs directly into a standard wall outlet. It receives a wireless signal from the doorbell button.
For Wireless (Plug-in) Doorbell Chimes
If you have a wireless chime, you’re in luck! This is about as simple as it gets.
- Unplug the Old: Simply remove the old chime box from the electrical outlet.
- Plug in the New: Plug your new wireless chime box into the outlet.
- Pair the Devices: Follow the manufacturer's instructions to pair the new chime with your existing doorbell button. This usually involves pressing a button on the chime until an LED light blinks, then pressing the doorbell button to create the connection.
- Test It: Once you hear a confirmation tone, press the doorbell button to make sure it’s working. That’s it!
For Wired Doorbell Chime Boxes
This process is a bit more involved, but don’t worry. We’ll break it down into simple, easy-to-follow steps.
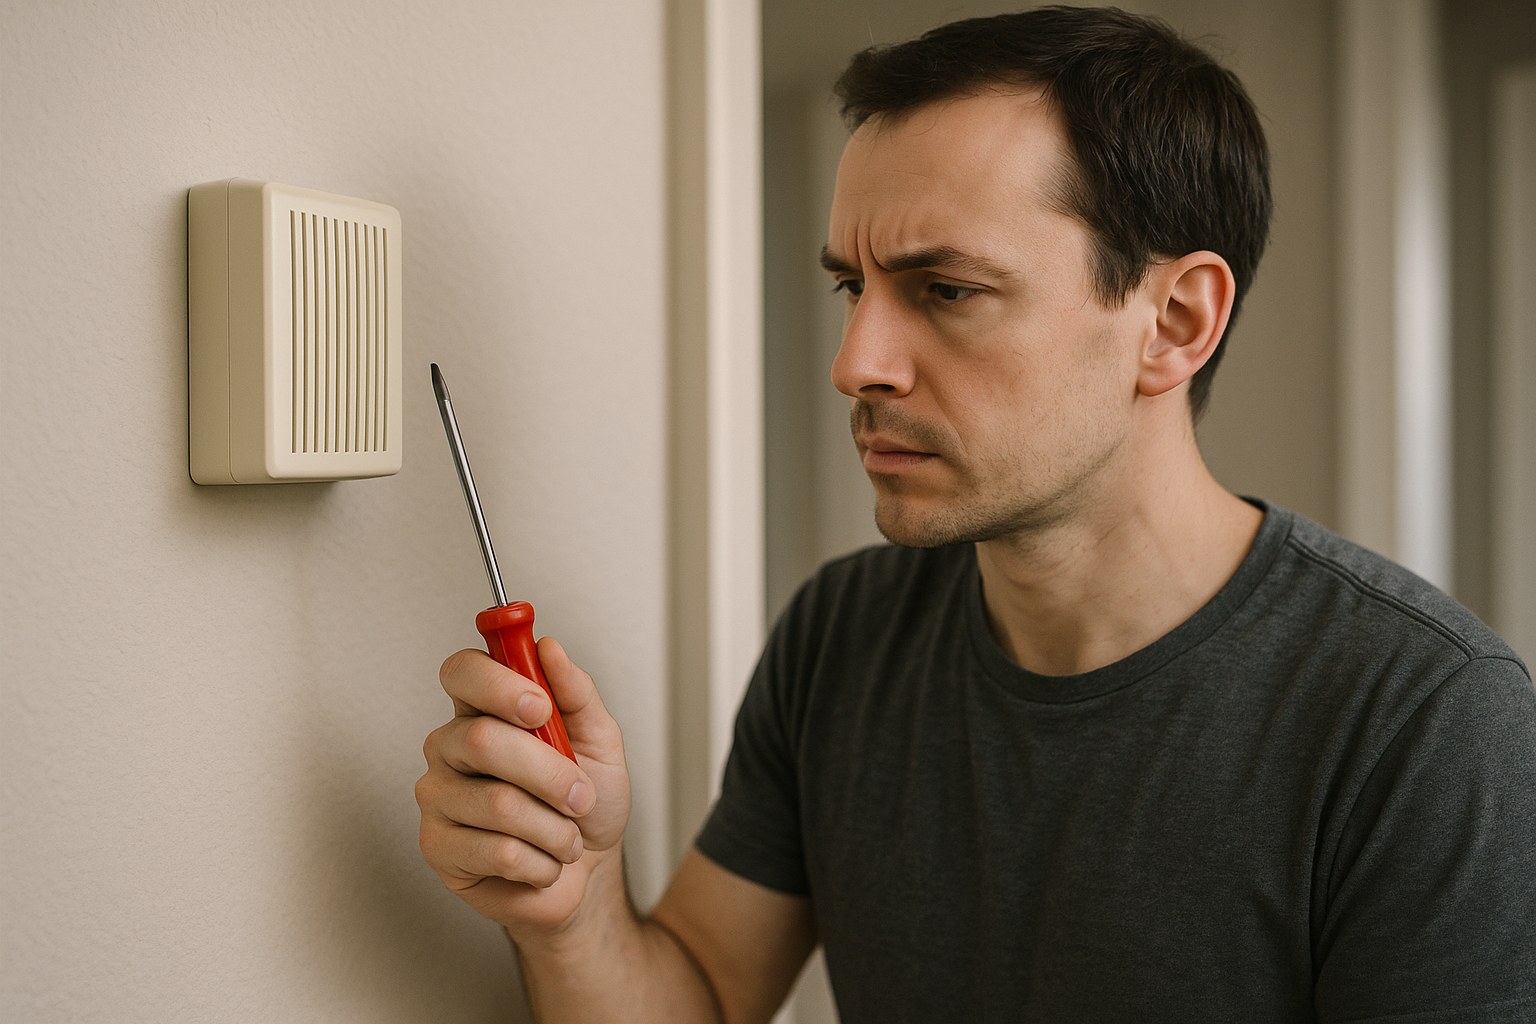
Step 1: Turn Off the Power & Remove the Old Chime
This is the most important step for your safety.
- Locate Your Circuit Breaker: Go to your home's main electrical panel (often in the garage, basement, or a utility closet).
- Turn Off the Breaker: Find the breaker that controls the doorbell. It might be labeled "Doorbell," "Low Voltage," or something more general like "Hallway" or "Entry." Flip it to the "OFF" position.
- Confirm the Power is Off: Press the doorbell button. It should be completely silent. For a final, crucial check, remove the cover from your old chime box and touch the tip of your non-contact voltage tester to each of the terminal screws where wires are connected. The tester should not light up or beep. If it does, you’ve turned off the wrong breaker. Go back and find the right one before proceeding.
- Take a Photo: Before you disconnect anything, take a clear photo of the current wiring setup with your phone. This will be an invaluable reference later.
- Disconnect and Remove: Use your Phillips screwdriver to loosen the terminal screws and detach the wires. Then, unscrew the mounting screws holding the chime box to the wall and gently pull it away.
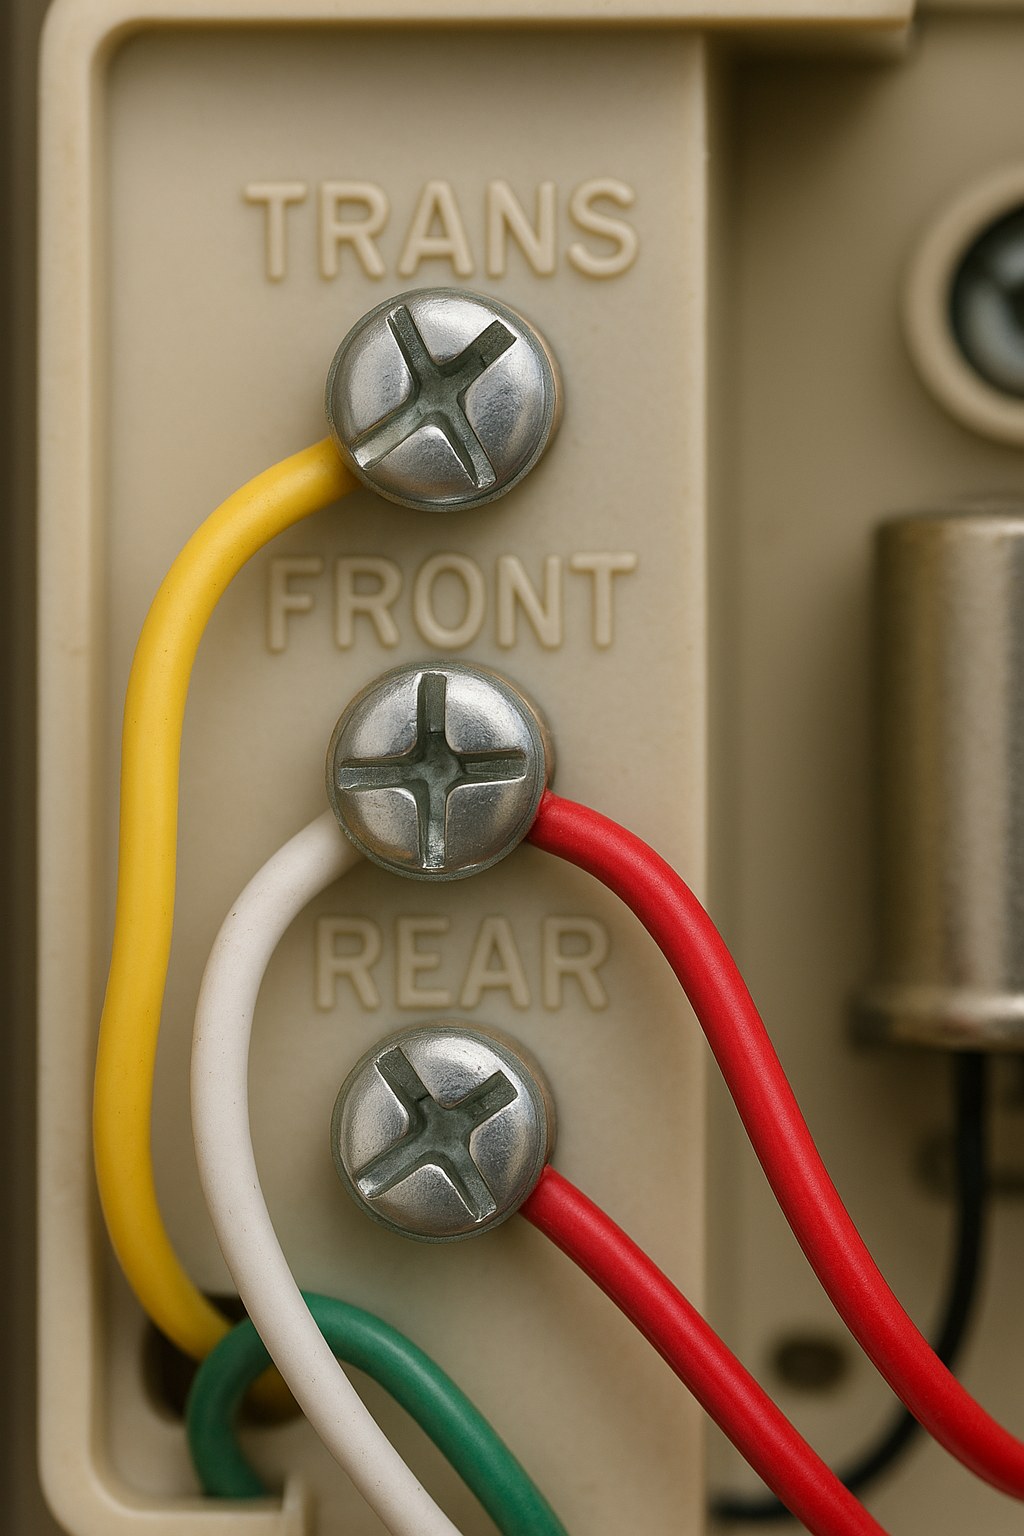
Step 2: Label Your Wires
If you only have one doorbell button, you’ll likely see two wires. One comes from the transformer (usually labeled "TRANS") and the other from the front door button (labeled "FRONT").
If you have multiple doorbell buttons (e.g., front and back doors), you’ll have more wires.
- Identify the Wires: Using your photo as a guide, identify which wire went to which terminal.
- Label Them: Wrap a small piece of masking tape around the end of each wire and label it clearly ("TRANS," "FRONT," "REAR," etc.). This simple step will prevent a lot of confusion when wiring the new unit.
- Inspect the Wires: While you’re at it, check the ends of the wires. If they look corroded or frayed, use a wire stripper to trim the end and expose about a half-inch of fresh, shiny copper wire.
Step 3: Mount the New Chime Box
- Check the Fit: Hold the base of your new chime box over the opening in the wall. If it's the same size or larger, you're good to go. If the new box is larger, you may need to enlarge the hole. To do this, trace its outline with a pencil and carefully cut along the line with a drywall saw.
- Mount the Base: Feed the labeled wires through the opening in the new chime’s base plate. Hold it level against the wall and use a pencil to mark where the mounting screws will go. If you're not drilling into a stud, you may need to insert plastic wall anchors for a secure fit.
- Secure It: Screw the base plate firmly to the wall.
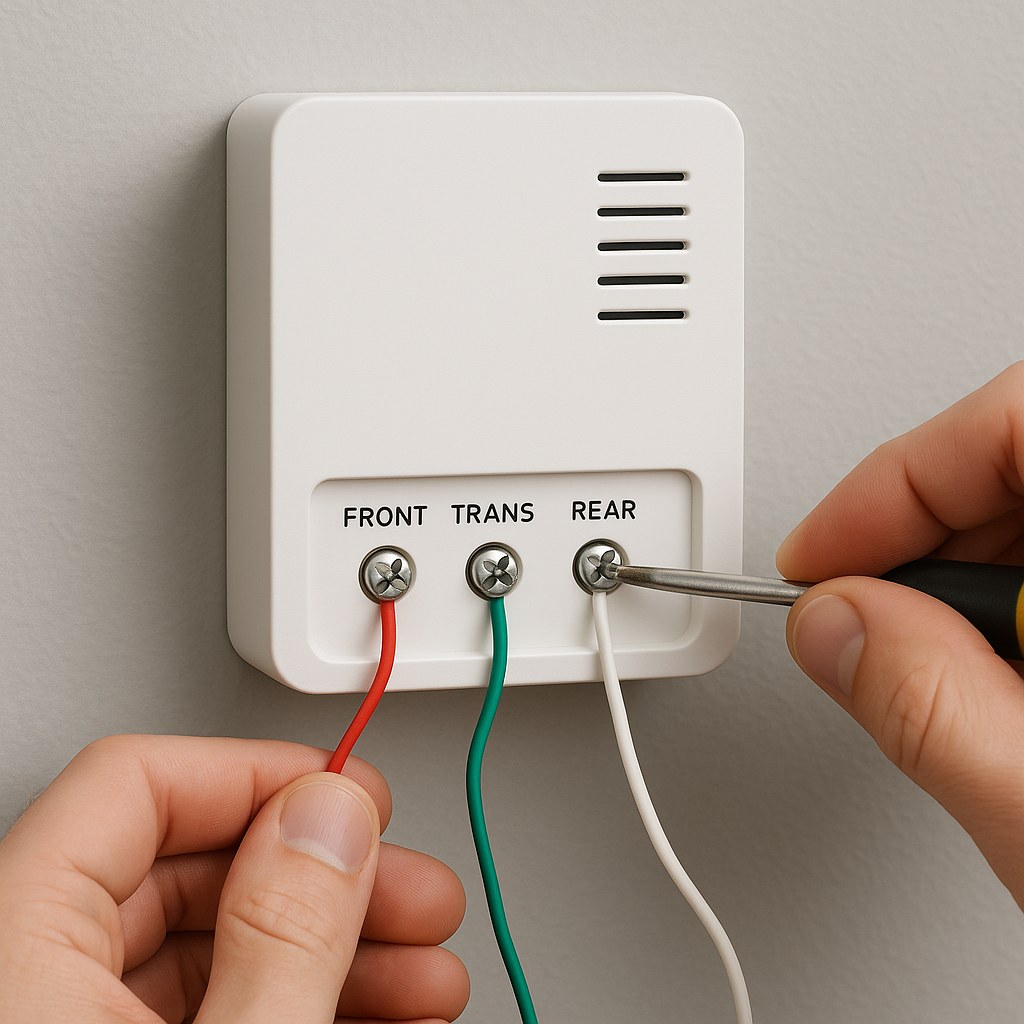
Step 4: Connect the Wires and Test It Out
Now it's time to use those labels you made.
- Connect the Wires: Refer to the diagram in your new chime's manual. Connect each wire to its corresponding terminal. The "TRANS" wire goes to the transformer terminal, the "FRONT" wire to the front doorbell terminal, and so on. Loop the copper wire clockwise around the screw and tighten it down firmly.
- Attach the Cover: Snap the decorative cover onto the base.
- Restore Power: Go back to your circuit breaker and flip it back to the "ON" position.
- The Moment of Truth: Go press your doorbell button. You should hear a clear, crisp chime!
What If It Still Doesn't Work? Troubleshooting
If you’ve followed all the steps and your doorbell is still silent, don’t panic. Here are a few things to check:
- Wiring Connections: Double-check that all wires are connected to the correct terminals and that the screws are tight.
- The Doorbell Button: Sometimes the button outside is the culprit. The small internal components can wear out over time.
- The Transformer: The transformer is a small box that steps down your home's 120-volt electricity to the low voltage (usually 16-24 volts) that doorbells use. They are often located near the circuit breaker, in an attic, or a crawlspace. If it has failed, neither the button nor the chime will work.
If you suspect the issue is with the transformer or you're simply not comfortable troubleshooting further, it's time to call a professional.
Cost to Replace a Doorbell Chime Box
- DIY Cost: The biggest expense is the chime itself. A basic mechanical chime can cost as little as $20-$40. Fancier electronic chimes with multiple sounds or smart home compatibility can range from $50 to $150.
- Professional Installation: According to HomeGuide, hiring an electrician to replace a doorbell chime typically costs between $100 and $250, including the parts and labor.
Time to Enjoy the Silence—Until a Visitor Arrives!
Congratulations! You’ve successfully replaced your doorbell chime box, restored a key function of your home, and saved yourself a service call fee. It’s a project that builds confidence and leaves you with a tangible result every time a guest arrives.
Feeling empowered to take on more home projects? That's what Casa is all about. Download the Casa app today to get access to more easy-to-follow DIY guides, create a maintenance schedule for your home, and connect with trusted, vetted professionals for the jobs you need a helping hand with. We’re here to make homeownership simpler, one project at a time.


