The key is to understand what the bulge is telling you. Most often, the culprit is moisture from a slow leak. Less frequently, it can indicate a structural problem.
This guide will walk you through how to inspect the area safely, understand the cause, and determine whether this is a repair you can handle yourself or one that requires a professional.
What a Wall Bulge Usually Indicates
A bulge rarely appears for no reason. It's a symptom of an underlying issue. Here are the common signs to look for and what they typically mean:
- Damp, Soft, or Spongy Feel: If the bulge feels soft or wet to the touch, the cause is almost certainly water. This could be from a leaky pipe, a failing window seal, or a problem with your roof or siding.
- Discoloration or Stains: Yellow or brown rings around the bulge are classic signs of water damage. You might also spot darker areas, which could indicate the early stages of mold growth.
- Musty Odor: A persistent damp, earthy smell around the area is a strong indicator of hidden moisture and potential mold within the wall cavity.
- Firm Bulge with Cracks: If the bulge is hard and dry, and especially if you see hairline cracks spreading from it, the issue could be related to the house settling or a problem with the wall framing.
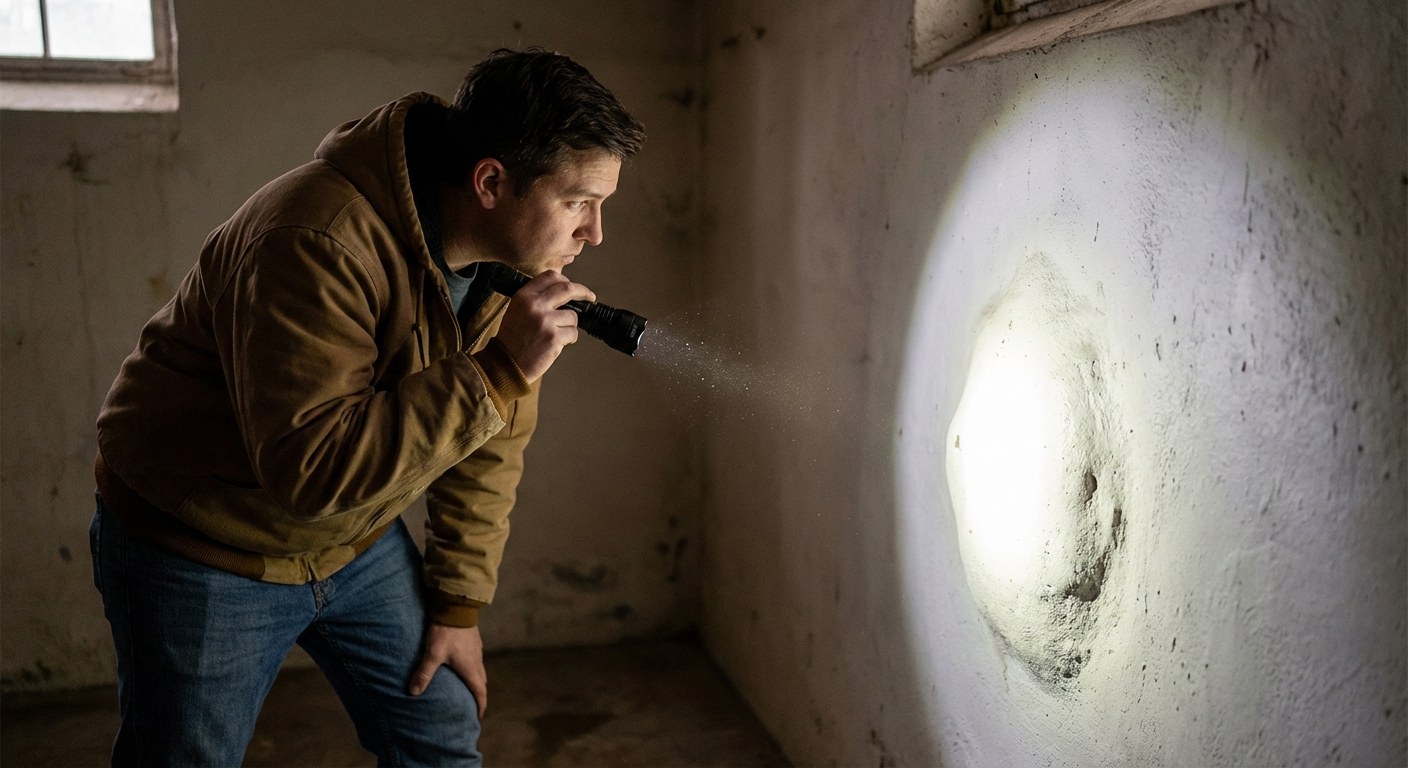
Step 1: Safely Inspect the Bulging Wall
Your first job is to investigate the area to determine if moisture is present. This will guide all of your next steps.
What you’ll need: Safety glasses, N95 mask, flashlight.
- Prepare the Area: Move any furniture or decorations away from the wall to give yourself a clear workspace.
- Put on Safety Gear: Wear safety glasses and a mask. If mold is present, you don’t want to inhale the spores.
- Feel for Moisture: Run your palm lightly over the bulge. Does it feel damp, cool, or different from the surrounding wall?
- Check for Softness: Gently press the center of the bulge with your knuckle. A spongy or soft feel points directly to water-damaged drywall.
- Use a Flashlight: Shine a flashlight at a low angle across the wall's surface. This technique, called "raking light," makes it easier to see subtle discoloration, texture changes, and water stains you might miss otherwise.
- Look for the Source: Scan the areas above and around the bulge. Do you see any plumbing fixtures, like in a bathroom on the floor above? Is it below a window, an air conditioning unit, or near the roofline? The location provides clues.
After this inspection, you should be able to answer the key question: Is the wall bulge damp, soft, or stained?
If the Bulge Is Damp: Address the Moisture
If you’ve found any sign of moisture, your priority is to stop the water source before you even think about repairing the wall.
- Find and Stop the Leak: If you see an obvious drip from a pipe or valve, turn off the nearest water shut-off valve (turn it clockwise). If the leak seems to be coming from outside, like around a window, you can cover the exterior of the window with a plastic tarp as a temporary fix until a permanent repair can be made.
- Dry the Area Completely: Place a bucket under any active drip to protect your floors. Use a cloth to wipe down the wall surface. Aim a box fan directly at the damp area and let it run for at least 24-48 hours. The drywall must be bone dry before you can properly assess the damage.
When to Stop and Call a Professional:
If you cannot find the source of the leak or if it’s coming from inside a wall, it’s time to call for help. A plumber can trace and repair leaking pipes, while a roofer or general contractor can address issues with the roof, siding, or windows.
If the Bulge is Dry: Assess the Structure
If your inspection found the bulge to be completely dry and firm, the cause is likely not an active leak. It could be an old, dried-out water issue or a structural problem.
- Measure the Bulge: Use a tape measure to determine the width and height of the affected area.
- Look for Cracks: Carefully inspect the bulge and the surrounding wall for cracks, especially long ones that run toward the ceiling or corners.
- Check for Framing Issues: Look down the length of the wall from one end. Does the wall itself appear to be bowing or sagging?
When to Stop and Call a Professional:
If the bulge is dry but larger than a dinner plate (about 10 inches), or if it is accompanied by significant cracks or bowed wall framing, do not attempt a repair. These are potential signs of structural stress, foundation settling, or termite damage. Contact a licensed general contractor or a structural engineer to assess the situation.
Safe to Try Yourself: Repairing a Small Drywall Bulge
You should only attempt this repair if you have confirmed the following:
- You have stopped the source of the moisture.
- The wall is completely dry.
- The damaged area is smaller than a dinner plate.
- There are no signs of structural issues or widespread mold.
This repair requires some patience and attention to detail, but it is a very manageable DIY project.
Safety First: Before you cut into any wall, shut off power to all outlets and switches on that wall at your home's electrical panel.
What you’ll need:
- Drop cloth
- Utility knife
- Putty knife
- Drywall patch kit or a small piece of scrap drywall
- Drywall screws
- Joint compound (mud)
- Drywall tape
- Fine-grit sandpaper
- Primer and paint
Step-by-Step Repair:
- Cut and Remove: Use a utility knife to cut away the bulging, damaged portion of the drywall. Keep cutting until you reach solid, dry material. It’s best to cut a clean square or rectangle, extending the opening to the center of the nearest wall studs on each side.
- Install the Patch: Measure the opening and cut your drywall patch to the exact same size. Fit the patch into the hole and secure it to the studs with a few drywall screws.
- Tape and Mud: Apply a thin layer of joint compound over the seams of the patch with a putty knife. Press drywall tape firmly into the compound, covering the seams. Smooth it flat.
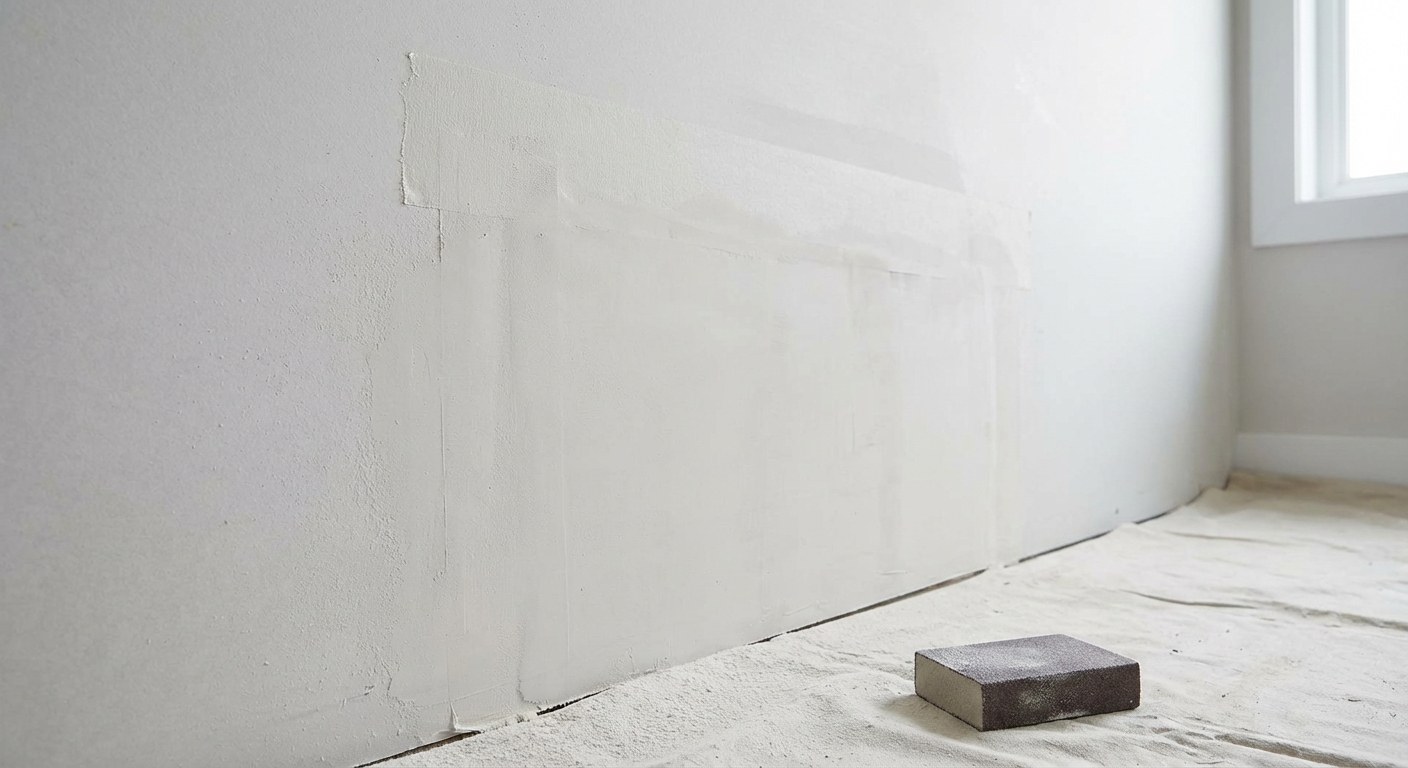
- Apply Finish Coats: Spread a second, wider coat of joint compound over the tape, feathering the edges to blend it with the existing wall. Let it dry completely. Lightly sand it smooth. You may need to apply one final, thin skim coat to get a perfectly flat surface.
- Prime and Paint: Once the final coat is dry and sanded smooth, wipe away all dust. Apply a coat of primer over the patched area. When the primer is dry, paint the patch to match the rest of your wall. Keeping a record of your paint colors in an app like Casa can make this step much simpler.
Typical Time and Cost
- DIY Repair: Expect to spend $25 to $75 on materials. The work itself will take a few hours, but you'll need to spread it out over a couple of days to allow for the drying time of the joint compound between coats.
- Professional Help:
- Plumber/Roofer (to fix the leak): Typically $150 - $500, but this can vary widely depending on the location and complexity of the leak.
- Drywall Contractor (to repair the wall): For a small to medium patch, you can expect to pay $200 - $600.
- General Contractor (for structural issues): A consultation alone can cost $300 - $700. The cost of repairs will depend entirely on the findings.
A Bulge Is a Problem You Can Solve
Seeing a change in your home like a bulging wall can be jarring, but it's a problem with a clear path forward. By methodically inspecting the area, identifying the cause, and knowing your limits, you can address the issue confidently. Whether it ends up being a simple DIY patch or a call to a trusted professional, you are now prepared to make a good decision.
Managing home repairs, from tracking symptoms to finding the right pro, is easier when you have a plan. Download the Casa app to get organized and feel prepared for whatever your home sends your way.


