Whether it’s the ghost of last night’s popcorn coming back to haunt you or a more serious electrical issue, we’re here to walk you through it. Think of us as your calm, expert friend on the phone. We'll help you safely assess the situation, figure out what’s wrong, and decide on the next steps to get your kitchen back to normal.
Why Is My Microwave Smoking? The Common Culprits
Before we dive into the fix, let's understand what could be causing the smoke and burning smell. The problem usually falls into one of two categories:
- Food-Related Issues: This is the most common and least scary reason. Old food splatters, grease, or forgotten crumbs can overheat and burn, creating a lot of smoke and a terrible smell. Using non-microwave-safe containers can also cause plastic or other materials to melt and burn.
- Electrical or Component Failure: This is the more serious category. A malfunction in the microwave's internal components, like the magnetron (the part that creates microwaves), the diode, or the wiring, can cause them to short out and burn. A faulty power cord or wall outlet can also be the source.
Our step-by-step guide will help you determine which category your problem falls into, starting with the most important step: ensuring your safety.
Step 1: Immediate Safety Actions
When you see smoke, act fast. Your priority is to prevent a fire and make the area safe.
- Stop the Microwave: Immediately press the Stop/Cancel button. Do not open the door yet.
- Unplug the Unit: Carefully unplug the microwave's power cord from the electrical outlet. This cuts off the electricity, which is the source of power for any potential electrical fire.
- Keep the Door Closed: This is crucial. A closed microwave will contain any potential flames and smother them by cutting off their oxygen supply. Most small fires inside a microwave will extinguish themselves within seconds once the power is off.
- Assess the Situation: If you see flames inside the microwave or if smoke continues to pour out heavily after it's been unplugged, do not try to handle it yourself. Leave your home immediately, close the door behind you, and call 911. Your safety is not worth the risk.
- Ventilate the Room: Once you're sure there are no active flames, open nearby windows to air out the smoke and smell.
- Wait and Cool Down: Give the microwave at least 10-15 minutes to cool down completely before you attempt to open the door and inspect it.
Once the smoke has cleared and the unit is cool, you can move on to finding the source of the problem.
Step 2: Investigate the Interior for Clues
Now it’s time to play detective. What you find inside the microwave will tell you a lot about what went wrong.
Grab a flashlight for a better view and open the door.
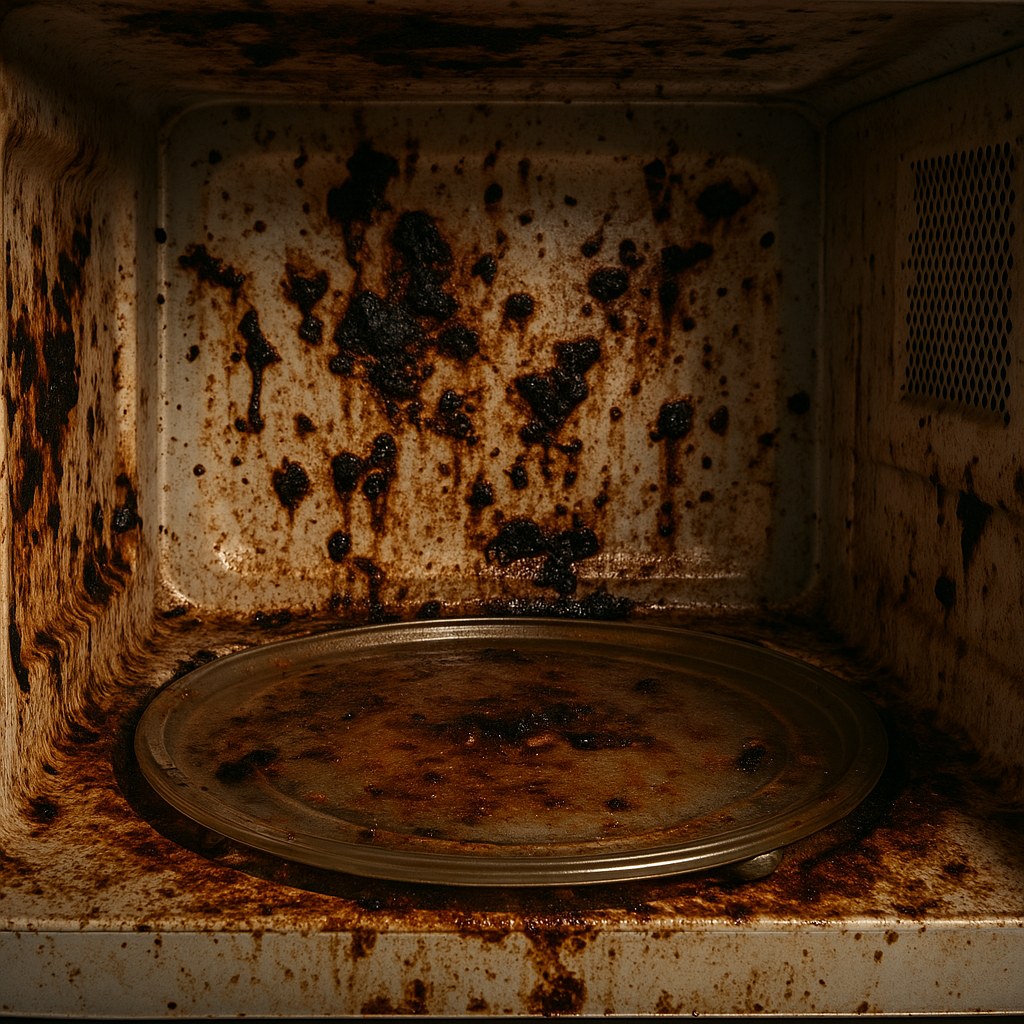
- Look for Burnt Food: Scan the interior—the walls, ceiling, and the glass turntable—for any charred food residue, grease splatters, or liquid spills. Often, a small bit of cheese or sauce that splattered onto the ceiling can burn during subsequent uses, causing a surprising amount of smoke.
- Check the Waveguide Cover: Locate the small, often rectangular panel on one of the interior walls. This is the waveguide cover, and it protects the microwave's electronic components. It’s a magnet for grease. If it's covered in grime, it can overheat and scorch, which is a common source of burning smells.
- Inspect for Physical Damage: Look for any signs of melted plastic, especially around the turntable hub or the door's interior lining. Check for charred spots or black marks on the interior walls that aren't food-related. This could indicate an electrical arc or a failing component.
If the only thing you see is burnt residue and the microwave's interior seems otherwise intact, you’re likely dealing with a cleaning issue. If you see melted or charred components, skip the next section and move to Step 4.
Step 3: The Deep Clean and Water Test
If your investigation points to old food as the culprit, a thorough cleaning is in order. This isn't just a simple wipe-down; you need to degrease and deodorize.
The easiest and most effective way to do this is with a steam clean:
- Prepare the Cleaning Solution: In a microwave-safe bowl, mix one cup of water with two tablespoons of white vinegar. The vinegar is a fantastic natural degreaser and deodorizer. A few slices of lemon work well, too.
- Steam the Interior: Place the bowl inside the microwave and run it on high for 5 minutes. The mixture will boil, creating steam that will loosen all the tough, burnt-on grime.
- Let It Sit: Once the timer goes off, leave the door closed for another 2-3 minutes. This allows the steam to continue working its magic.
- Wipe It Down: Carefully remove the hot bowl (use an oven mitt!). With a sponge or soft cloth, wipe down the entire interior, including the ceiling, walls, and door. The gunk should come off easily.
- Clean the Removable Parts: Take out the glass turntable and the turntable ring. Wash them in the sink with warm, soapy water, then dry them completely before putting them back.
- Perform a Final Water Test: Once everything is clean and reassembled, it’s time for a final check. Place a fresh cup of water in the microwave and run it for 30-60 seconds. Watch and sniff carefully. If there’s no smoke and no burning smell, congratulations! You’ve likely solved the problem.
If the smoke or smell returns during the water test, there’s an underlying issue. Unplug the microwave immediately and proceed to the next step.
Step 4: Checking for Electrical Faults
If cleaning didn't solve the issue, or if you initially saw signs of physical damage, it's time to consider an electrical problem.
Inspect the Power Cord and Outlet
A faulty power connection can cause overheating and burning. Unplug the microwave and examine the power cord closely. Look for any melted spots, cracks in the insulation, or frayed wires. Check the prongs on the plug for any discoloration or pitting.
Next, look at the electrical outlet itself. Do you see any scorch marks, blackening, or signs of melting around the faceplate? If you see any damage to either the cord or the outlet, do not use it again. The problem is with your home's wiring, not the microwave. You'll need to call a licensed electrician to repair it safely.

Repair or Replace: Making the Call
If the power cord and outlet look fine but the microwave is still smoking, you’re dealing with an internal failure. At this point, you have to decide whether to repair or replace the unit.
According to Forbes Home, the average cost of a professional microwave repair is around $150, with a typical range between $100 and $250. When a brand new countertop microwave can cost as little as $70, a repair often isn't financially practical unless you have a high-end or built-in model.
Here’s how to decide:
- Check the Warranty: Before anything else, check if your microwave is still under warranty. Find the model and serial number (usually on a label inside the door frame) and check the manufacturer’s website. If it’s covered, you can get a repair or replacement for free.
- For Countertop Models: If the warranty has expired, replacement is almost always the cheaper and safer option. Internal repairs can be complex, and a new, reliable unit provides peace of mind.
- For Built-in or Over-the-Range Models: These units are more expensive and integrated into your cabinetry, making replacement more complicated. In this case, it’s worth getting a quote from a qualified appliance repair technician. They can diagnose the exact issue and help you weigh the cost of repair against a full replacement.
Don't Let Home Maintenance Smoke You Out
A smoking microwave can certainly be a stressful experience, but by following these safety and diagnostic steps, you can handle the situation like a pro. Remember the key takeaways: safety first, clean thoroughly to rule out burnt food, and never take risks with suspected electrical damage.
Feeling overwhelmed? You don’t have to manage these things alone. Download the Casa app today to get access to more easy-to-follow DIY guides, keep track of your appliance warranties, and get connected with vetted, trusted professionals like electricians and appliance repair technicians right in your area. Casa is your partner in confident homeownership, helping you tackle any challenge your home throws at you.


