The good news is that this problem doesn't automatically mean your appliance has failed. More often than not, a refrigerator that isn’t cooling properly is suffering from a simple issue that you can diagnose and resolve yourself in under an hour.
This guide will walk you through the most common causes of a warm refrigerator or freezer. We’ll cover simple checks and fixes you can safely try before deciding if you need to call a professional.
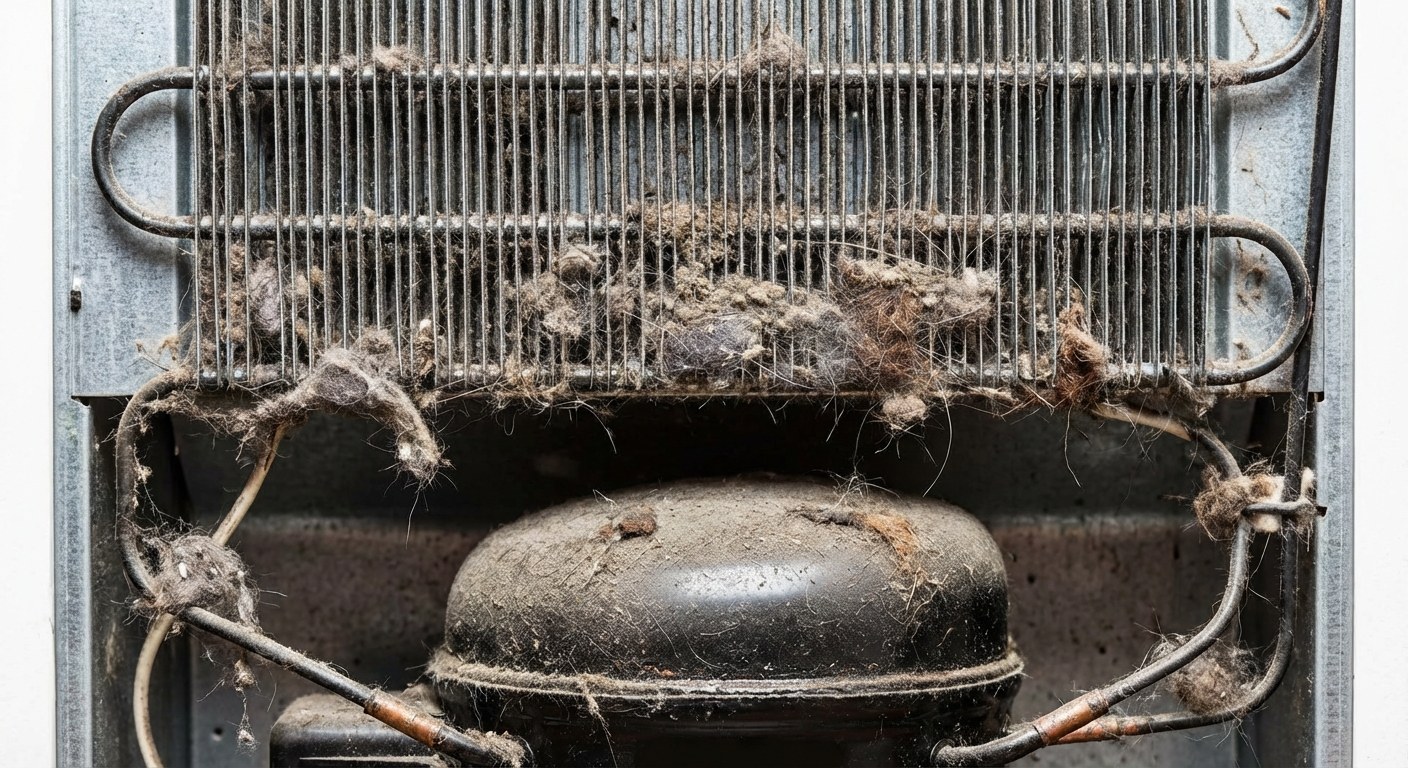 Image Alt: Dusty and dirty condenser coils on the back of a refrigerator.
What a Warm Refrigerator Usually Means
Before you start troubleshooting, it helps to understand what might be happening. A refrigerator works by moving heat from the inside to the outside, and anything that interferes with that process can cause temperatures to rise.
Here are the most common culprits:
- Incorrect Temperature Settings: The dials may have been bumped accidentally.
- Dirty Condenser Coils: These coils, usually on the back or bottom of the fridge, release heat. If they’re covered in dust or pet hair, they can’t do their job effectively.
- Blocked Air Vents: Cold air circulates between the freezer and refrigerator compartments through vents. If these are blocked by food containers, the air can’t flow properly.
- Poor Door Seals: Worn or dirty gaskets (the flexible seals around the door) let cold air escape and warm air seep in.
- Overcrowding: A refrigerator that is packed too tightly can also restrict airflow, creating warm spots.
A Step-by-Step Troubleshooting Guide
Let’s work through these potential issues one by one, starting with the simplest. For these steps, you will need a basic appliance or digital thermometer.
Step 1: Get an Accurate Temperature Reading
First, confirm that there is actually a problem. The ideal temperature for your refrigerator is at or below 40°F (4°C), and for your freezer, it should be 0°F (-18°C).
- Place a thermometer in the center of the refrigerator. Leave it there for at least five minutes.
- Check the reading. Is it above 40°F?
- Move the thermometer to the freezer and repeat the process. Is it above 5°F (-15°C)?
If either compartment is warmer than these thresholds, it’s time to investigate further.
Step 2: Check the Simple Fixes
These next steps resolve the vast majority of cooling issues and require no special tools.
Adjust the Temperature Controls
It’s possible the temperature dial was accidentally changed. Look for the control dial or digital display inside your refrigerator. Most models have separate controls for the fridge and freezer.
- Action: Set both the refrigerator and freezer controls to their mid-point or "recommended" setting. If you’ve recently added a large amount of groceries, you can set it one notch colder temporarily.
- Wait: It can take up to 24 hours for the temperature to fully stabilize after an adjustment. Check back with your thermometer the next day.
Check for Blocked Vents and Overcrowding
Your refrigerator relies on the free circulation of cold air.
- Action: Look for the air vents inside the refrigerator and freezer compartments (usually on the back or side walls). Make sure no food containers are pressed directly against them. Rearrange items to allow at least an inch of space around the vents. Avoid packing the compartments so full that air cannot move from top to bottom.
- Wait: Give the appliance a few hours to see if improving airflow resolves the issue.
Inspect the Door Seals
The rubber gasket around the door is essential for keeping cold air in.
- The Dollar Bill Test: Close the door on a dollar bill. If you can pull the bill out with no resistance, the seal in that spot is too loose. Test this in several places around both the refrigerator and freezer doors.
- Action: If the seal is weak, first clean the entire gasket with warm, soapy water to remove any grime that might be preventing it from sealing. For any stubborn spots, applying a very thin layer of petroleum jelly to the gasket can sometimes improve the seal.
If the gasket is visibly cracked or torn, it will likely need to be replaced.
Step 3: Clean the Condenser Coils
This is one of the most important maintenance tasks for your refrigerator, and it's a very common cause of cooling problems.
This is safe to do yourself.
- Unplug the refrigerator. This is a critical safety step.
- Locate the coils. Carefully pull the refrigerator away from the wall. The coils are a large, grid-like component on the back, or they may be located underneath the unit behind a front grille.
- Clean the coils. Use a vacuum with a brush attachment to gently remove all dust, debris, and pet hair from the coils.
- Restore power. Plug the refrigerator back in and push it back into place, making sure to leave a couple of inches of clearance for airflow.
- Wait: It may take a few hours for the temperature to drop. Check it again with your thermometer.
Keeping a log of when you last cleaned the coils can be helpful. The Casa app is a simple way to track home maintenance tasks like this so you don't forget.
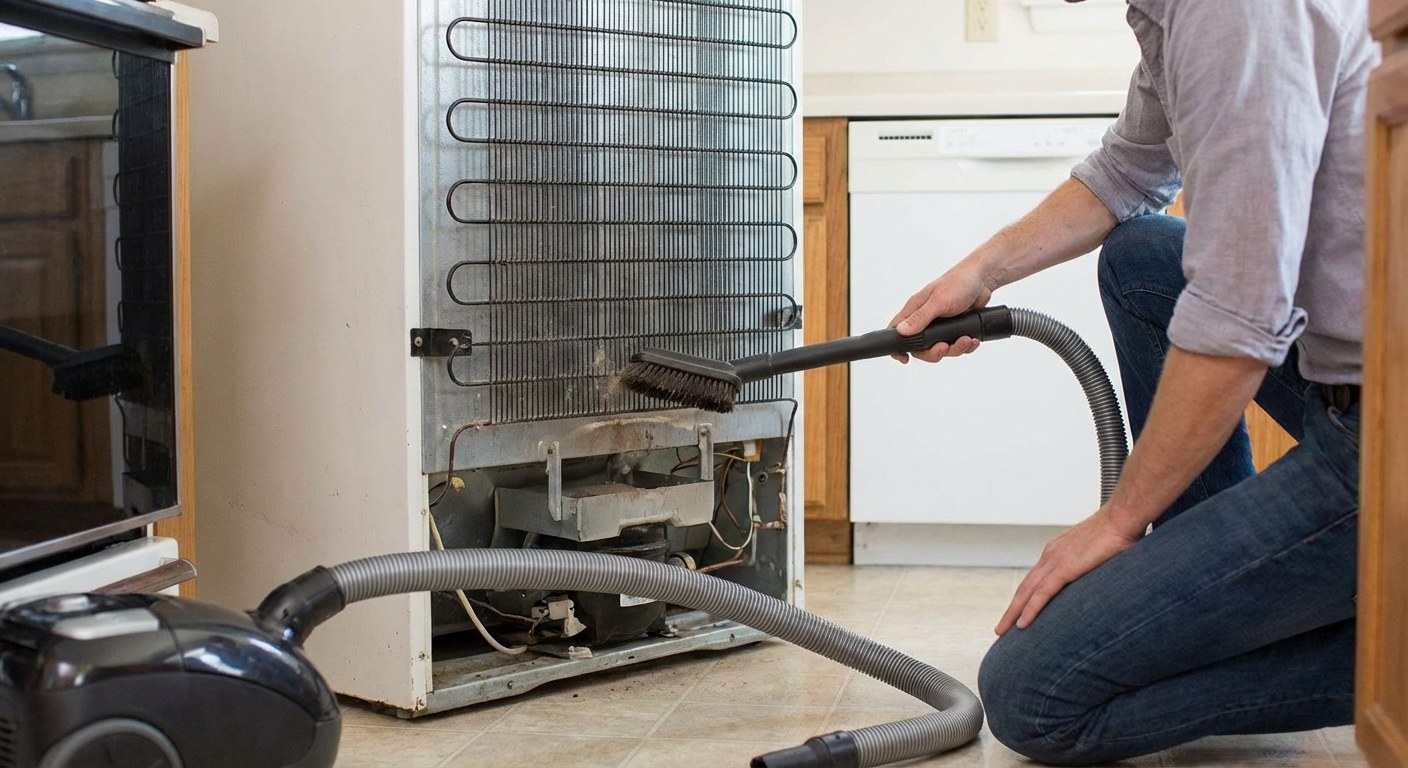 Image Alt: A homeowner carefully cleaning the condenser coils on their refrigerator with a vacuum.
When to Stop and Call a Professional
If you’ve tried all the steps above and your refrigerator is still not cooling properly, the problem is likely more complex.
It's time to call an appliance repair technician if:
- None of the troubleshooting steps have worked after 24 hours.
- You hear the refrigerator running constantly but it never gets cold.
- The freezer has a thick layer of frost built up on the back interior wall, which can signal a problem with the defrost system.
- You notice the fan inside the freezer isn't spinning.
- The door gaskets are torn and need to be replaced.
These symptoms often point to issues with the compressor, evaporator fan, or defrost components, which require professional service.
Typical Time and Cost
- DIY Fixes: The steps above should take between 15 and 30 minutes of active time. The cost is typically $0, unless you need to purchase a thermometer.
- Professional Repair: A service call from an appliance technician usually costs between $100 and $200, which often includes the initial diagnosis. The total cost of a repair can range from $150 to over $500, depending on the parts and labor required. Always ask for an estimate before agreeing to a repair.
Your Refrigerator Is Back on Track
Dealing with a warm refrigerator can be unsettling, but by following a logical process, you can often find and fix the source of the trouble yourself. By checking the settings, clearing the vents, cleaning the seals, and vacuuming the coils, you’ve covered the most common causes and are now well-prepared to decide on your next step.
Keeping track of your home's needs doesn't have to be another chore. Download the Casa app to stay organized, manage maintenance, and feel prepared for whatever comes next.


