
Mar 8, 2026
How to Fix a Crack in Your Foundation
Finding a crack in your foundation can be scary, but most are simple to fix. Learn how to inspect the damage, seal leaks, and know when to call a pro.
Spotting a crack in your foundation wall or basement floor can stop a homeowner in their tracks. It immediately conjures up images of structural failure, massive repair bills, and a house sinking into the earth.
Looking for more guidance? Take a look at our Repairs overview.
Here is the reassuring reality: concrete cracks. It’s what concrete does. As houses settle into the soil during their first few years, or as seasons change the moisture levels in the ground, small hairline cracks often appear. The vast majority of these are non-structural and manageable. They aren't signs that your house is falling down; they are simply maintenance items to be addressed to keep moisture out.
However, because your foundation supports everything else, you do need to take it seriously. This guide will help you calmly inspect the damage, determine if it’s a simple DIY repair, or if it’s one of the rare cases that requires a professional engineer.
What the Symptoms Usually Mean
Before you rush to the hardware store, look at the crack closely. The characteristics of the crack tell the story of what is happening to your home.
- Vertical or diagonal hairline cracks: These are usually caused by normal settling or concrete shrinkage as it cures. They are typically safe to repair yourself.
- Horizontal cracks: These can indicate that soil pressure is pushing against your wall from the outside. This is more serious.
- "Stair-step" cracks in blocks or bricks: These often happen near corners and usually mean settling. Small ones are manageable; wide ones need a pro.
- Dampness or water stains: If the area around the crack is dark, wet, or has white powdery residue (efflorescence), water is intruding. Sealing this is a priority to prevent mold.
Step 1: Inspect and Assess the Damage
Difficulty: Easy Time: 20 minutes
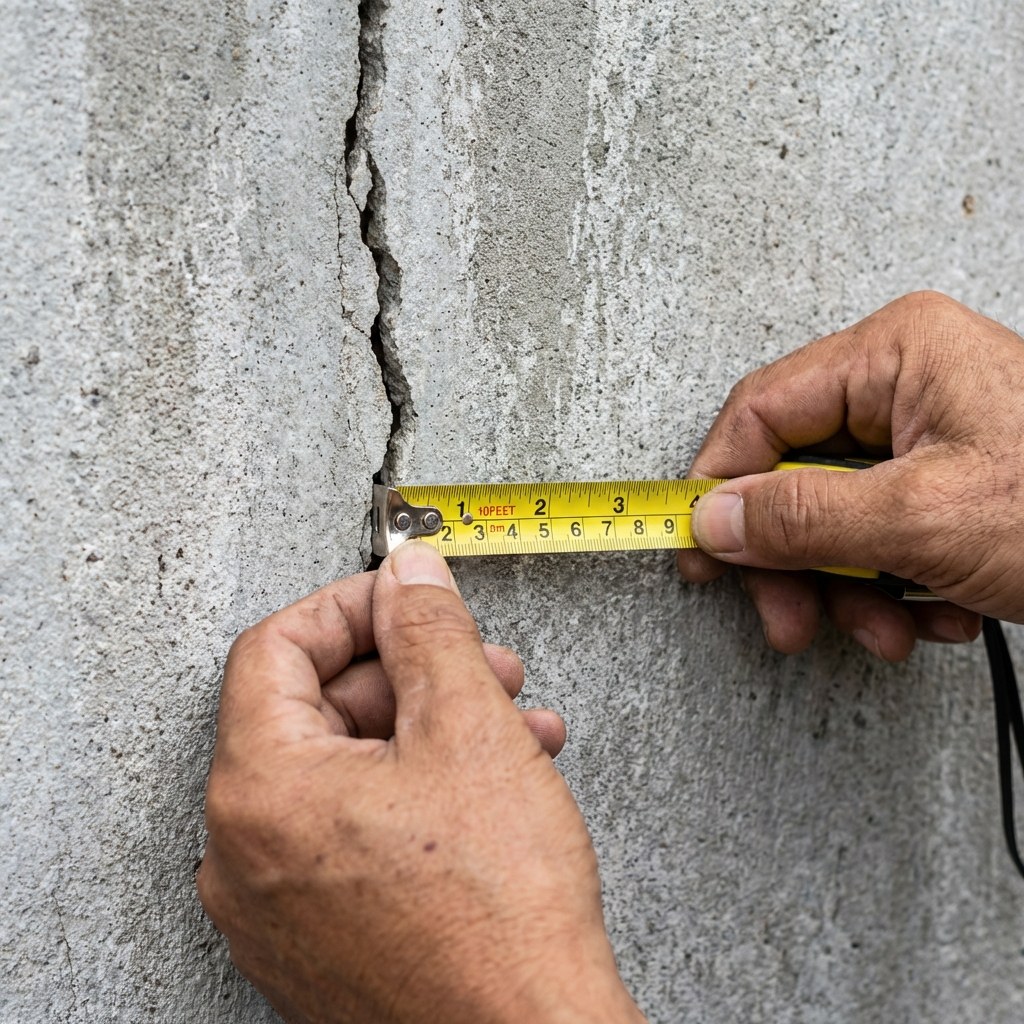
Your first job is to play detective. You need to measure the crack and check for movement.
- Clean the area: Put on safety glasses and gloves. Use a stiff brush to sweep away loose debris or paint so you can see the bare concrete.
- Measure the width: Place a tape measure across the widest part of the crack.
- Check for offset: Press a level (or even a flat ruler) against the wall across the crack. Is one side jutting out further than the other?
- Check for moisture: Is the concrete damp to the touch?
The Safety Check: If you see any of the following, stop and call a foundation contractor or structural engineer. These are signs of structural movement that DIY fillers cannot fix:
- The crack is wider than 1/4 inch.
- The crack is horizontal (running sideways across a wall).
- One side of the wall sticks out further than the other (offset).
- The crack is actively moving or widening over time.
If the crack is vertical, hairline (less than 1/4 inch), and the wall is flat, you are likely safe to proceed with a repair.
Step 2: Determine if it's "Wet" or "Dry"
How you fix the crack depends on whether water is actively coming through it.
- For dry cracks: You can use a cosmetic patch or standard epoxy.
- For wet/leaking cracks: You need materials specifically designed to stop water, like hydraulic cement or specialized injection epoxies.
The Foil Test: To be sure, dry the area with a fan for 20 minutes. Tape a 12-inch square of aluminum foil over the crack and wait 24 hours (or at least a few minutes if it's raining heavily). Peel it back. If the underside of the foil is wet, water is seeping through.
Scenario A: Repairing a Leaking Floor Crack
If you have a crack in your basement floor slab that is letting water up, standard caulk won't hold. You need hydraulic cement, which expands as it dries to lock out water.
Difficulty: Moderate Time: 3 hours
- Widen the crack: It sounds counterintuitive, but you need to make the crack slightly bigger to give the cement a place to sit. Use a cold chisel and hammer to chip the crack into a "V" shape about 1/2 inch deep.
- Clean it out: Vacuum the debris thoroughly.
- Wet the area: Mist the crack with a spray bottle. Hydraulic cement bonds better to damp surfaces.
- Mix and apply: Mix the hydraulic cement to a putty consistency (work fast—it sets quickly!). Press it firmly into the groove with a putty knife.
- Smooth and cure: Smooth the top level with the floor. Keep it moist by covering it with a damp cloth for about an hour so it cures slowly without cracking.
Scenario B: Injecting Epoxy into a Wall Crack
For vertical wall cracks (whether leaking or dry), an epoxy injection kit is the gold standard. It fills the crack from the inside out, bonding the wall back together.
Difficulty: Hard Time: 8 hours (mostly drying time)
- Install injection ports: Your kit will come with plastic ports. Glue them over the crack every 6–8 inches using the provided surface paste.
- Seal the surface: Spread the remaining paste over the entire length of the crack, covering everything except the holes in the ports. Let this harden for about 30 minutes. This creates a seal so the liquid epoxy doesn't just run down the wall.
- Inject the epoxy: Start at the lowest port. Inject the epoxy until you see it oozing out of the port above it.
- Cap and move up: Cap the port you just filled. Move the nozzle to the next port up and repeat. Do this until you reach the top.
- Finish: Let it cure for the time specified on your kit (usually around 6 hours). Afterward, you can knock the plastic ports off with a hammer and paint over the wall if desired.

Scenario C: Patching a Dry Cosmetic Crack
If the crack is on the floor or wall, is bone dry, and very thin, you likely just want to hide it.
Difficulty: Easy Time: 1 hour
- Clean the crack: Use a wire brush to remove loose concrete. Vacuum the dust.
- Apply patch: For floors, mix a concrete patch compound and press it in with a putty knife. Feather the edges so it blends with the floor.
- Finish: Let it cure for an hour. If it's rough, sand it down with medium-grit sandpaper.
When to Call a Professional
While the repairs above are very effective for minor settling, foundation work has high stakes. You should call a professional if:
- Water returns: If you patch a leak and water forces its way back in (or appears nearby), you may have a drainage issue outside your home that needs grading or gutter work.
- Cracks reappear: If a crack re-opens after you filled it, the house is still moving. You need a structural engineer.
- Multiple symptoms: If you have cracks and doors that stick, windows that won't close, or uneven floors, this is a systemic foundation issue.
Time and Cost
Handling this yourself is significantly cheaper than hiring a waterproofing company, provided the issue is minor.
- DIY Cost: $30–$100 depending on materials (Epoxy kits are usually around $50–$75).
- Professional Cost: $400–$800 per crack for basic injection repairs. Extensive structural repairs can run into the thousands.
- Time: Most DIY repairs take a single afternoon.
Final Thoughts
Seeing a crack in your foundation doesn't mean your home is unsafe. By measuring carefully and choosing the right repair method—whether it's hydraulic cement for leaks or epoxy for strength—you can secure your basement against moisture and pests.
Keeping track of when cracks appear and how they change is vital for long-term home health. The Casa app is a great place to log these maintenance checks, store photos of the cracks for comparison later, and keep a record of the repairs you've made.
Start with a good inspection, grab your safety gear, and tackle that crack with confidence.