
Feb 27, 2026
How to Fix a Dent in Your Drywall
Whether it's a doorknob accident or moving furniture gone wrong, wall dents happen. Learn how to assess the damage and fix it yourself with this step-by-step guide to drywall repair.
If you own a home long enough, a dent in the drywall is inevitable. Maybe a door swung open too hard, a piece of furniture bumped the hallway, or a kids' game got a little too rowdy indoors.
Looking for more guidance? Take a look at our Repairs overview.
It’s easy to look at a mar on a perfectly smooth wall and feel a spike of annoyance, but here is the reality: drywall is surprisingly forgiving. It is designed to be repaired, and most dents don't require calling a professional contractor. In fact, fixing a wall dent is one of the best "starter projects" for a new homeowner because the stakes are low, the materials are cheap, and the results are incredibly satisfying.
In this guide, we will help you figure out if you need a quick patch or a slightly more involved repair, and walk you through how to make that wall look new again.
Assessing the Damage
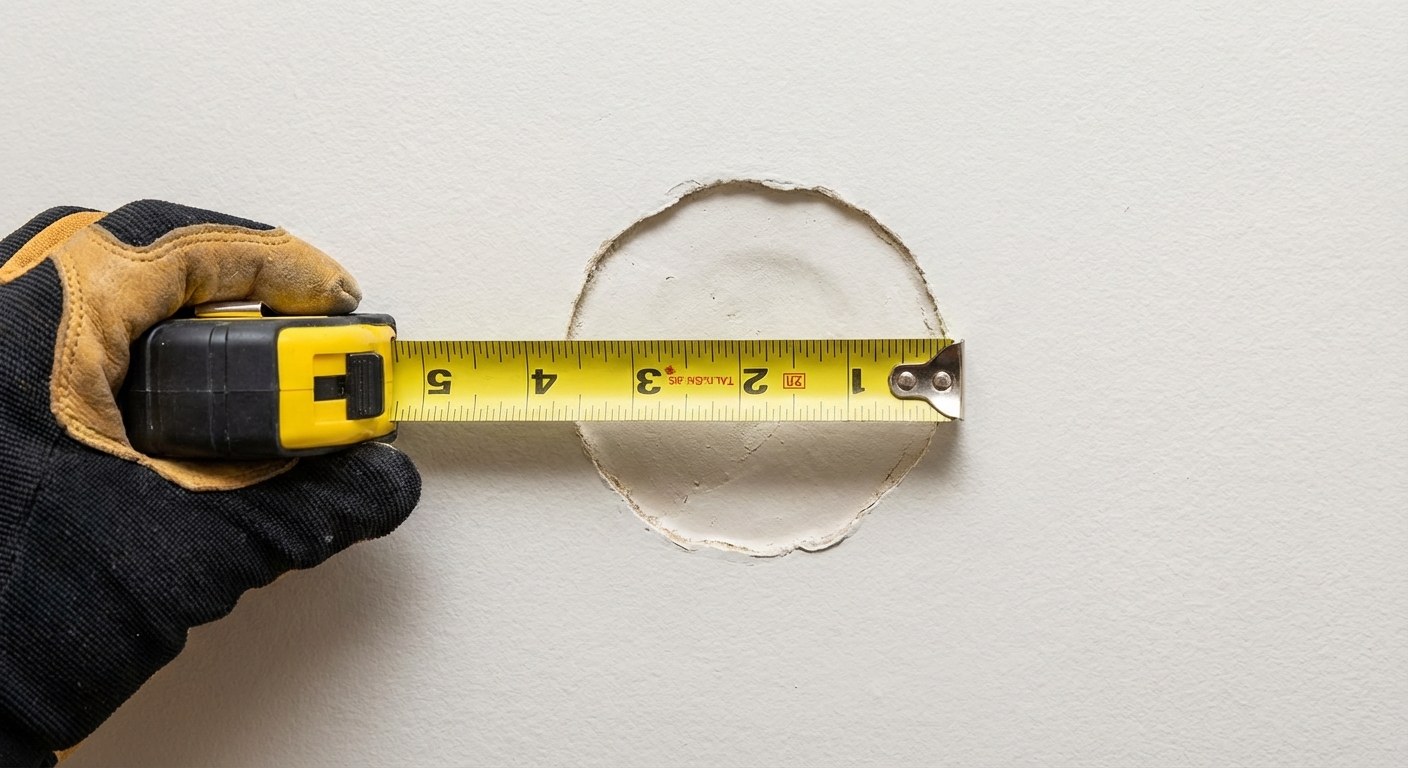
Before you head to the hardware store, you need to know exactly what you are dealing with. Not all dents are created equal, and the size determines the method.
Grab a tape measure and a ruler. Stand about three feet back to inspect the dent under normal lighting, then get up close to measure.
- The Small & Shallow Dent: If the damage is less than 2 inches wide and less than 1/8 inch deep, you are in luck. This is a simple cosmetic fix that takes very little time.
- The Large or Deep Dent: If the hole is wider than 2 inches or deep enough that the drywall paper is torn and the gypsum underneath is crushed or missing, you will need a slightly more robust patch (often called a "California patch" or a mesh patch).
- Location Matters: Is the dent right next to an outlet, light switch, or door trim? If so, the repair requires a little extra prep to protect your electrical fixtures and woodwork.
Safety First
If you are working near an outlet or light switch (within 2 inches), safety is your priority.
- Go to your breaker box and turn off the power to that specific room or wall.
- Remove the cover plate with a screwdriver.
- Use painter's tape to cover the exposed outlet/switch to keep wet compound out of the wiring.
Option 1: Fixing a Small, Shallow Dent
This method is perfect for minor dings from doorknobs or furniture corners.
Time required: 15 minutes of work (plus drying time). Cost: $10–$20 for spackle and tools.
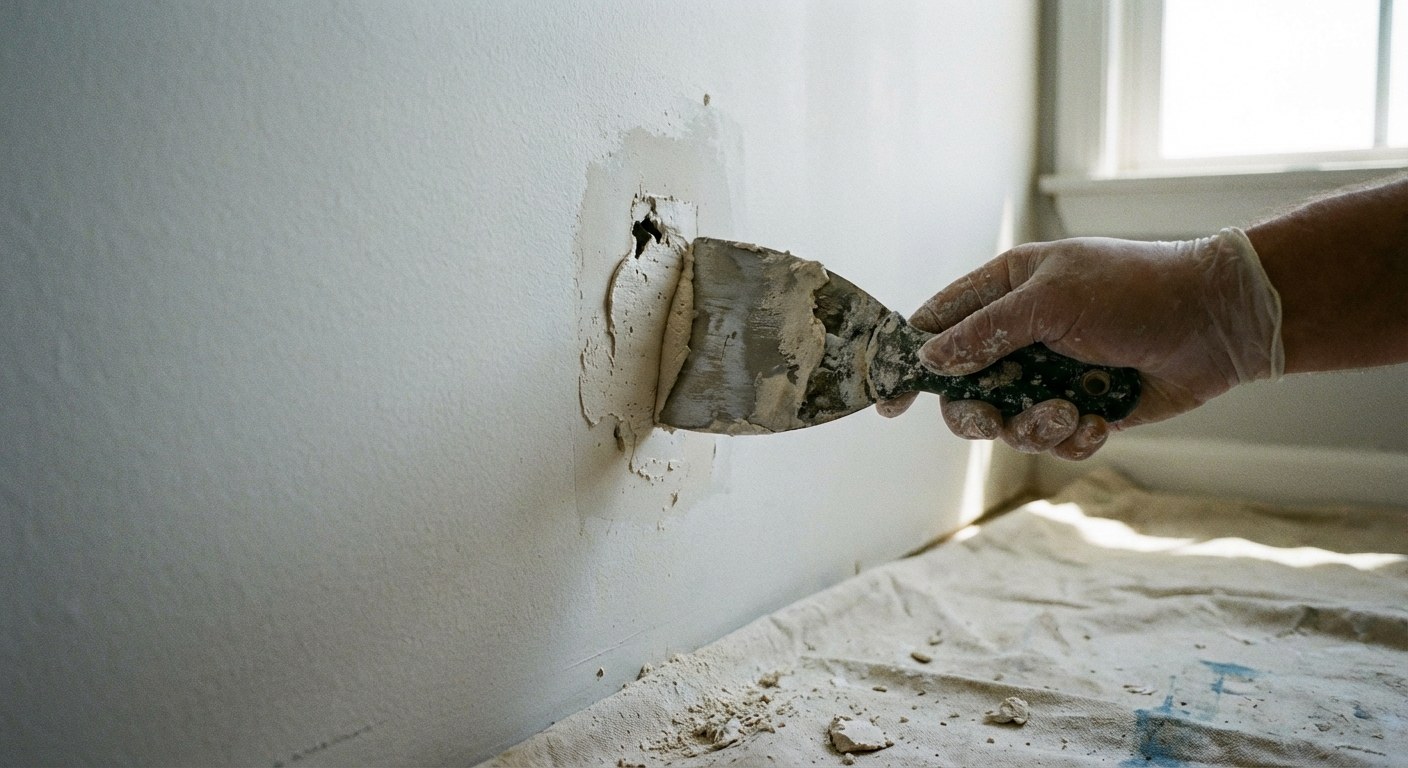
- Clean the area. Use a putty knife to gently scrape away any loose paint or peeling paper around the dent. If the edges are protruding outward, press them in with the handle of your putty knife so nothing sticks out past the wall surface. Wipe it clean with a microfiber cloth.
- Fill the dent. Take a small scoop of lightweight spackle (often pink when wet, turning white when dry) on your putty knife or finger. Press it firmly into the dent. You want to overfill it slightly to ensure no air pockets remain.
- Swipe smooth. With your putty knife, swipe across the patch once to level it off. Don't overwork it; you can always sand it later.
- Dry and sand. Wait about 30 minutes for the spackle to dry. Once it's white and hard, use fine-grit sandpaper to gently smooth the area until it is perfectly flush with the wall.
Option 2: Fixing a Large or Deep Dent
If the structural integrity of the drywall is compromised (the dent is deep or large), spackle alone won't hold. It will crack or sag. You need to create a new backing.
Time required: 90 minutes of work (plus overnight drying). Cost: $30–$50 for a patch kit or drywall scraps.
- Cut it square. It seems counterintuitive, but to fix a jagged dent, you often need to make a clean square hole. Draw a rectangle around the damage and cut it out with a utility knife or drywall saw.
- Add backing. Cut a small piece of wood (like a 1x2 or a paint stirrer) slightly longer than the hole. Insert it into the wall, holding it tight against the back of the drywall, and secure it with screws through the existing wall. This gives your new patch something to grab onto.
- Insert the patch. Cut a piece of fresh drywall to fit your square hole. Screw it into the wood backing you just installed.
- Tape and mud. Apply mesh joint tape over the seams where the new piece meets the old wall. Spread a thin layer of joint compound ("mud") over the tape, feathering the edges out about 2 inches past the seam.
- Dry, sand, and repeat. Let this dry for at least 12 hours. Sand it lightly to knock down high spots. Apply a second, wider coat of compound (feathering out 8–10 inches) to blend the hump into the flat wall. Sand again once dry until it feels perfectly smooth to the touch.
The Final Step: Blending and Finishing
The repair isn't done until it disappears. This is where patience pays off.
- Texture (If needed). If your walls have "orange peel" or "knockdown" texture, a smooth patch will stick out. Use a spray can of wall texture (available at hardware stores). Test it on a piece of cardboard first to match the spray pattern, then apply it lightly to your patch.
- Prime. Never skip primer on fresh spackle or drywall. The porous material will suck up paint and look dull if you don't seal it first. Apply a thin coat of drywall primer and let it dry for an hour.
- Paint. Stir your matching paint well. Using a small roller (rollers blend better than brushes), paint the patched area, feathering the edges out into the surrounding wall. You may need two coats.
When to Call a Professional
While most dents are DIY-friendly, there are times when it’s better to hand it off to a pro. Consider calling a handyman or drywall contractor if:
- The damage is larger than 12 inches across.
- There are signs of water damage (soft, stained, or moldy drywall).
- The wall has a complex finish (like venetian plaster or wallpaper) that is difficult to match.
- You simply don't have the time to wait for multiple coats of compound to dry.
Time and Cost Overview
- DIY Small Patch: $10–$20 | < 1 hour total
- DIY Large Patch: $30–$50 | 2 hours work + overnight drying
- Professional Repair: $150–$300 | Varies by region
Closing Thoughts
Seeing a dent in your wall can be frustrating, but fixing it is a rite of passage for homeowners. It’s a low-risk way to get comfortable with home maintenance tools. Once you paint over that final coat and the mark disappears, you’ll feel a genuine sense of ownership over your space.
Keeping track of paint colors, maintenance history, and project lists is easier when you have a system in place. Download the Casa app to help you stay organized, plan your next project, and find the right professionals if a job gets too big to handle alone.