
Mar 9, 2026
How to Fix an Oven That Does Not Heat to the Correct Temperature
If your oven is cooking unevenly or taking too long to preheat, the temperature might be off. Learn how to test, recalibrate, and diagnose the root cause.
It is incredibly frustrating when you follow a recipe perfectly, only to pull out a meal that is undercooked in the middle or burnt on the edges. If your oven takes too long to preheat, cooks unevenly, or just feels too cool, you are likely dealing with a temperature discrepancy.
Looking for more guidance? Take a look at our Repairs overview.
It is very common for ovens to drift out of calibration over time or for specific heating components to wear down. Fortunately, finding out exactly what is wrong is a straightforward process that you can do safely on your own.
In this guide, we will walk through how to test your oven's true temperature, identify whether the issue is a simple setting adjustment, and determine when it is time to call in a professional.
Step 1: Confirm the Temperature Discrepancy
Before taking anything apart or calling for a repair, you need to prove that the oven is actually missing its target temperature. Built-in oven sensors can be inaccurate, so you will need an independent measurement.
- Place an external oven thermometer on the middle oven rack.
- Close the oven door and set the oven to 350°F (180°C) in standard BAKE mode.
- Wait 20 minutes after the oven chimes or signals that it is pre-heated. Ovens cycle on and off to maintain heat, so giving it extra time ensures the temperature has stabilized.
- Open the oven door quickly, read the thermometer, and close the door.
Compare the thermometer reading to your 350°F setting. If the thermometer is within 25°F (14°C) of the set temperature, your oven is operating within normal manufacturing tolerances. If the temperature is off by more than 25°F, you have a confirmed issue to investigate.
Step 2: Check for Heat Leaks
Sometimes the heating elements are working perfectly, but the oven simply cannot hold the heat inside.
Once the oven is turned off and completely cool, inspect the door gasket—the rubber or fiberglass seal around the oven opening. Look for obvious tears, missing sections, or heavy fraying.
To test the seal, gently close the oven door on a standard strip of paper. Pull the paper out. You should feel slight resistance. If the paper slides out effortlessly, the gasket is likely compromised and letting heat escape. Replacing a door gasket is an inexpensive and manageable repair. You can store your appliance model numbers in the Casa app so you always know exactly which replacement parts to order.
Step 3: Diagnose by Oven Type
If the door seal is tight, the next step depends on whether you have an electric or gas oven.
For Electric Ovens
We need to determine if the entire oven is struggling, or if just one specific mode is failing. Turn your oven to BAKE at 350°F and look through the window. The lower bake element should eventually glow red. Turn the oven off, wait a moment, and switch to BROIL. Check if the upper broil element glows red. If you have convection, listen for the convection fan turning on.
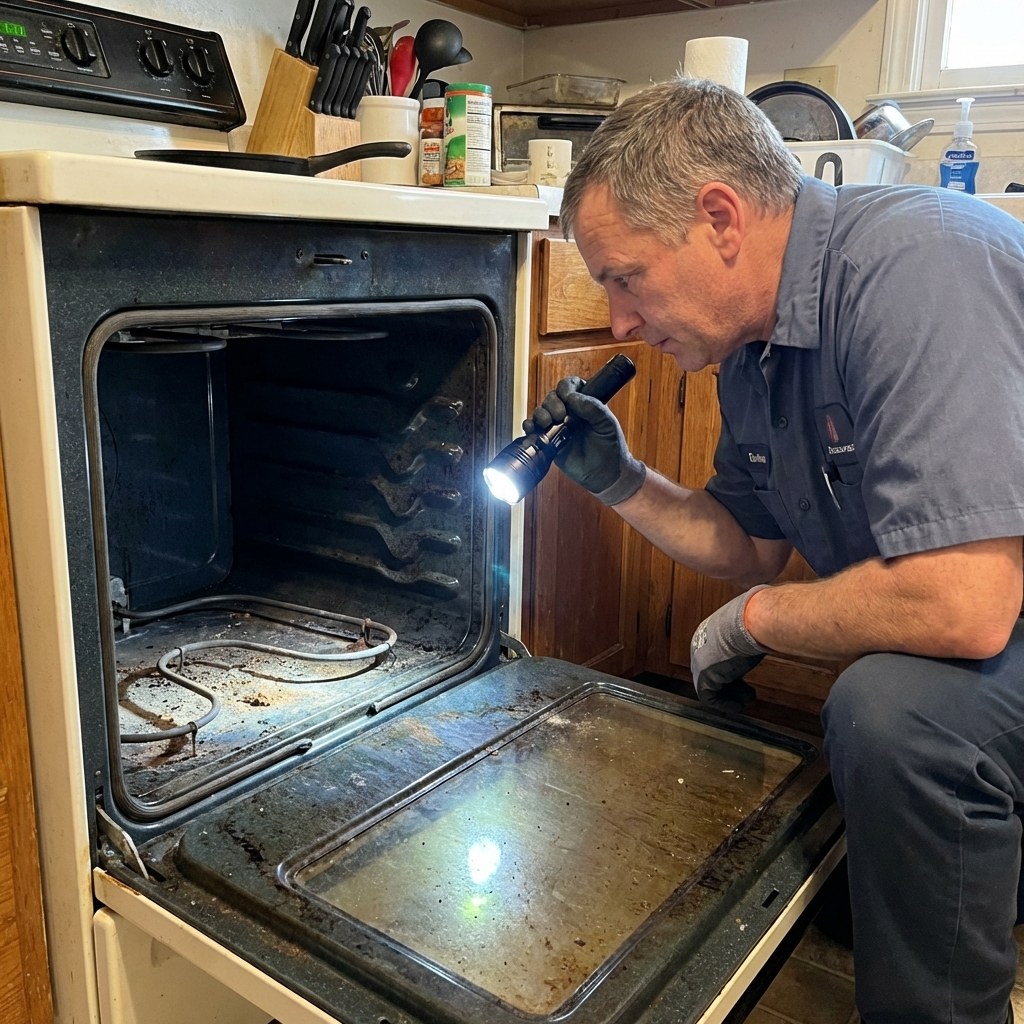
- If only one mode fails (e.g., Bake doesn't glow): You likely have a faulty heating element. Turn off the oven at the control panel and flip its circuit breaker off in your electrical panel. Once the oven is entirely cool, use a flashlight to inspect the failing element for blistering, cracks, or dark spots. Give it a gentle tug to ensure it is firmly attached. If the element is visibly damaged or simply fails to heat, it will need to be replaced.
- If all modes fail to reach temperature equally: Your oven’s temperature sensor likely just needs to be recalibrated (see Step 4).
For Gas Ovens
Similar to electric ovens, observe the BAKE and BROIL functions through the window to see if the problem is isolated.
- If only one mode fails: The issue is often the igniter. Turn the oven off and let it cool. Locate the igniter near the failing burner. Turn the mode back on and use a stopwatch. If the igniter glows but fails to light the burner within 90 seconds, or if it doesn't glow at all, the igniter is likely too weak to open the gas safety valve.
- If all modes fail to reach temperature equally: This usually points to a calibration issue (see Step 4).
Step 4: Recalibrate the Oven Sensor
If your testing shows that the oven is consistently off by the same amount across all cooking modes, recalibrating the internal thermostat is usually the fix. This does not require any tools or part replacements.
- Consult your oven's user manual to locate the calibration function. It is often hidden in a settings menu labeled "Temp Offset" or accessed by holding down two specific buttons simultaneously.
- Enter the calibration menu.
- Use the arrow buttons on your control panel to increase or decrease the temperature offset by the exact amount your oven thermometer was off. For example, if you set the oven to 350°F but the thermometer read 320°F, you will adjust the offset by +30°F.
- Save the new setting and exit.
- Repeat the thermometer test from Step 1 to verify the oven now hits 350°F accurately.
If the oven still misses the target temperature after recalibration, the internal control board or the temperature sensor wand itself is likely failing.
When to Call a Professional
While confirming temperatures, checking door gaskets, and recalibrating the control panel are safe to do yourself, you should stop and call an appliance repair technician if:
- An electric heating element is broken, blistered, or fails to heat.
- A gas igniter takes longer than 90 seconds to light the burner, or fails to glow entirely.
- Recalibration does not fix a whole-oven temperature discrepancy.
For gas ovens in particular, if the igniter is glowing but the gas is not igniting, stop immediately. Call a gas-safe appliance technician to inspect the gas valve and safety systems.
Typical Time and Costs
Troubleshooting your oven takes about an hour, mostly consisting of waiting for the oven to preheat and stabilize.
- Oven thermometer: $5 – $15.
- Door gasket replacement: $30 – $80 for the part, easily done yourself.
- Professional repair: If you need to hire a technician to replace a heating element, igniter, or control board, expect the total cost (parts and labor) to range between $150 and $300, depending on your region and the specific appliance brand.
Summary
An oven that won't heat correctly usually stems from an inaccurate internal sensor, a leaky door gasket, or a single failing heating component. By testing the actual temperature with an external thermometer and observing how the bake and broil modes behave, you can easily figure out whether you just need to adjust a setting or call a technician to replace a part.
Staying on top of appliance maintenance doesn't have to be stressful. For more guidance on managing your home, troubleshooting issues, and keeping your maintenance records organized, download the Casa app today.