
Mar 12, 2026
How to Fix Bubbling Wallpaper
Bubbling wallpaper is a common issue that is usually easy to fix. Learn how to diagnose the cause and smooth out bubbles for both peel-and-stick and traditional wallpaper.
Noticing a bubble in your freshly hung or long-standing wallpaper can be incredibly frustrating. It is easy to assume that the entire wall needs to be stripped and redone, but in most cases, that isn't true.
Looking for more guidance? Take a look at our Repairs overview.
Wallpaper bubbles are a very common part of homeownership. They typically happen when a small pocket of air gets trapped during installation, when temperature changes cause the material to expand, or when the adhesive slightly releases from the wall. Unless the bubble is caused by an active water leak, you can usually repair it yourself in just a few minutes with a few simple tools.
Here is how to figure out what is causing your wallpaper to bubble and the best way to get your wall looking smooth again.
What the Symptoms Mean
Before you grab any tools, take a close look at the affected area. The size, quantity, and surrounding conditions of the bubbles will tell you exactly what you are dealing with:
- Dry, tight bubbles: This is usually trapped air or a localized adhesive failure. It is harmless and easily fixable.
- Stained or discolored bubbles: If the paper looks brown, yellow, or water-stained around the bubble, you likely have a moisture issue behind the wall.
- Widespread peeling and bubbling: If whole strips are falling down, the wall may not have been prepped or primed correctly before installation, or the wallpaper may be nearing the end of its lifespan.
Step 1: Diagnose Your Wallpaper and the Wall
Your repair method depends entirely on the type of wallpaper you have and the condition of the wall underneath.
Identify your wallpaper type Gently lift a loose corner or edge near a seam with a putty knife. If the adhesive is stuck to the back of the paper, it is peel-and-stick. If the adhesive is left behind on the wall, it is traditional paste-applied wallpaper. You can safely log this information in your Casa app so you remember exactly what materials were used in each room for future maintenance.
Check for moisture Feel the wall with the back of your hand. Is it damp, cold, or soft? Do you see any dark spots or mold? If the answer is yes, stop immediately. You need to investigate the nearest plumbing fixtures, pipes, or the roof directly above for leaks. Repairing the wallpaper over a wet wall will trap the moisture and lead to much bigger damage. If you suspect an active leak, it is time to call a contractor or licensed plumber.
If the wall is completely dry, you are ready to fix the bubbles.
Safe Fixes You Can Try Yourself
If you have a few small, dry bubbles (smaller than the palm of your hand), you can easily handle the repair.
Fixing Peel-and-Stick Wallpaper
Peel-and-stick wallpaper is designed to be forgiving. For a single small bubble:
- Wipe the area with a slightly damp cloth to remove dust, and let it dry for a few minutes.
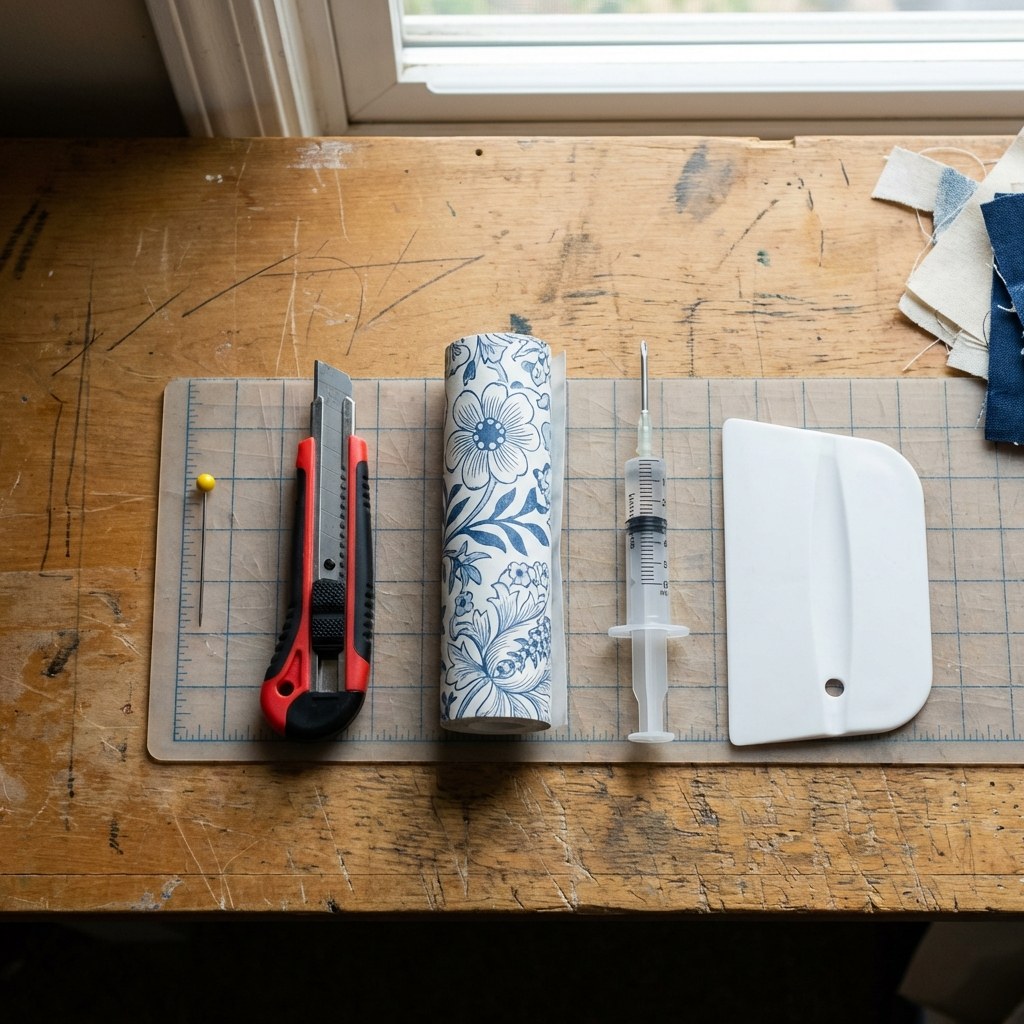
- Poke a tiny hole right in the center of the bubble using a sewing pin.
- Take a plastic smoothing tool and press gently from the outside edges of the bubble toward the pinhole to force the trapped air out.
- Rub the area firmly until the paper lies completely flat against the wall.
Fixing Paste-Applied Wallpaper
Traditional wallpaper requires a little extra adhesive to fix a bubble, as the original paste has likely dried out or detached.
- Place a drop cloth on the floor below your work area to catch any drips.
- Use a utility knife to carefully cut a small "X" directly over the bubble.
- Lift the delicate flaps of the X slightly with the tip of your knife.
- Using a wallpaper repair syringe (available at most hardware stores), squeeze a tiny amount of wallpaper adhesive under the flaps.
- Press the flaps back down and use a smooth-surface paint roller to roll over the spot, pushing out the air and excess glue.
- Wipe away any seeping adhesive immediately with a clean, damp sponge, and let it dry for about 30 minutes.
When to Remove and Reinstall a Section
If your peel-and-stick wallpaper has a large cluster of bubbles, or if it is over three years old and starting to fail, the pinhole trick might not be enough. In this case, you can often gently peel the section back until you are past the outermost bubble, wipe the exposed wall to remove dust, and re-smooth the paper downward using your plastic smoothing tool.
For traditional paste wallpaper, fixing widespread bubbling requires stripping the affected section, scraping the old adhesive, washing and sanding the wall, applying primer, and hanging a new strip. This involves applying fresh paste to the back of the paper and "booking" it (folding the glued ends together for a few minutes to activate the adhesive) before placing it on the wall.
Removing and reinstalling traditional wallpaper is a messy, moderate-to-hard DIY project. If you are not comfortable matching patterns or dealing with messy adhesives, this is a reasonable time to stop.
When to Call a Professional
While small bubbles are a quick DIY fix, you should bring in a professional if:
- You find dampness, water stains, or mold behind the paper.
- The bubbling is widespread across an entire room, indicating a full installation failure.
- You are dealing with delicate, expensive, or vintage wallpaper that might tear easily.
Typical Time and Cost Ranges
Fixing wallpaper bubbles is generally very inexpensive if you do it yourself.
- DIY Cost: $10 to $25 for basic supplies like a smoothing tool, sewing pins, a utility knife, and a wallpaper repair syringe.
- DIY Time: 5 to 10 minutes for a pinhole fix; up to an hour for a syringe adhesive repair (including drying time).
- Professional Cost: Hiring a wallpaper installer or contractor to repair sections or rehang a wall typically ranges from $150 to $400 or more, depending on your location and the complexity of the pattern.
Short Recap
Bubbling wallpaper is rarely a structural emergency. By identifying whether you have peel-and-stick or paste-applied paper, you can quickly address trapped air using a simple pinhole or a small injection of adhesive. As long as the wall underneath is dry, you can smooth things out and get back to enjoying your space in under an hour.
For more practical guides on maintaining your home’s interior, download the Casa app. Casa helps you track your home's materials, organize your maintenance tasks, and provides clear, step-by-step guidance whenever you need it.