
Feb 5, 2026
What to Do When Your Dryer Gets Too Hot
An overheating dryer is a serious fire hazard. Learn to diagnose the issue, from simple lint buildup to faulty thermostats, to keep your home safe.
Discovering your clothes dryer is running much hotter than usual can be unsettling. The top of the machine might be hot to the touch, your clothes may feel scorched, or you might even notice a faint burning smell. This is not something to ignore. An overheating dryer is one of the leading causes of home fires, but the good news is that the most common causes are often straightforward to diagnose and fix.
Looking for more guidance? Take a look at our Repairs overview.
An overly hot dryer is almost always a sign of an airflow problem. When hot, moist air can't escape the dryer drum efficiently, heat builds up to dangerous levels.
This guide will walk you through the process of figuring out what’s wrong, starting with immediate safety checks and moving from the simplest fixes to more complex diagnostics.
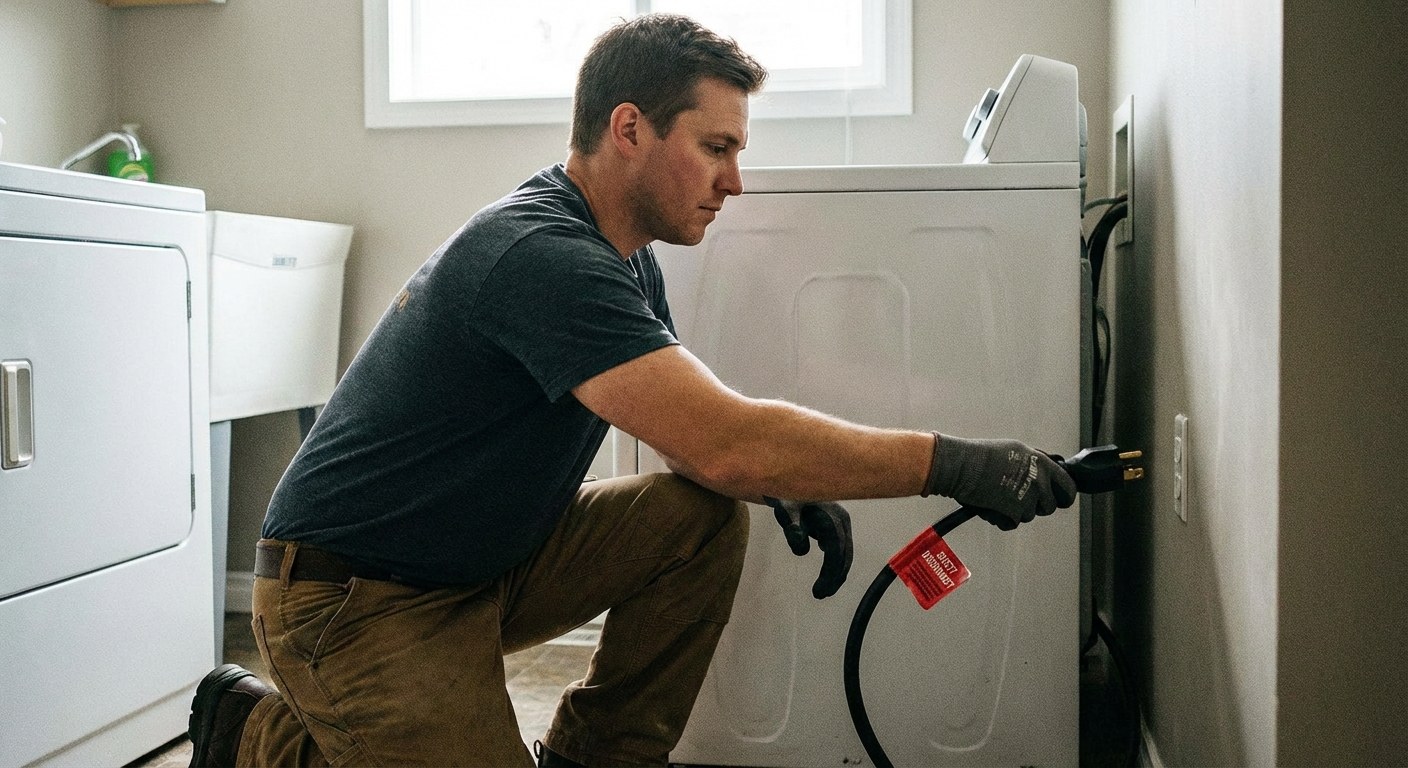 Image Alt: A person's hand safely unplugging a dryer's power cord before starting any maintenance.
Safety First: When to Stop Immediately
Before you do anything else, it's critical to assess the immediate risk. A burning smell, smoke, or loud mechanical noises are signs of a serious problem that needs professional attention.
Perform this quick safety check:
- If the dryer is running, turn the cycle knob to "Off."
- Unplug the dryer from the wall. If you have a gas dryer, turn the nearby gas shut-off valve to the "Off" position.
- Wait a few minutes for the machine to cool down.
- Carefully check for any visible smoke or strong burning odors coming from the drum or the back of the machine. Listen for any lingering scraping or grinding sounds.
If you see smoke, smell something burning (like rubber or plastic, not just hot lint), or hear loud, unusual noises, do not use the dryer again. It's time to stop and call a qualified appliance repair technician.
Step 1: Basic Airflow and Usage Checks
If there are no immediate signs of danger, the most likely culprit is a simple lint clog. This is the first and easiest thing to check.
- Clean the Lint Screen: Pull out the lint screen (usually located just inside the door) and remove all visible lint. But don't stop there. Over time, residue from dryer sheets can create a film on the mesh screen that restricts airflow. Wash the screen with warm, soapy water and a soft brush, rinse it thoroughly, and let it dry completely before putting it back.
- Vacuum the Lint Trap: With the screen removed, use a vacuum with a narrow hose attachment to clean out the slot the screen slides into. You might be surprised how much lint collects down there.
- Check the Exterior Vent: Go outside and find where your dryer vents. This is a small hood, often with a flap or slats. Make sure it isn’t blocked by leaves, snow, or debris. Gently lift the flap and clear away any lint you can see.
- Rethink Your Load Size: Overloading the dryer can also restrict airflow and cause it to overheat. Try running a smaller load.
- Run a Test Cycle: Once everything is clean, reload the dryer with half of a typical load. Run a normal, medium-heat automatic cycle for about five minutes. The top of the dryer should feel warm, but not uncomfortably hot.
If the dryer now seems to be operating at a normal temperature, a clogged lint screen or vent was likely the problem. You can help prevent this by adding "deep clean lint trap" to your regular home maintenance schedule in the Casa app.
Step 2: Inspect the Dryer's Exhaust Duct
If the basic cleaning didn't solve the overheating, the blockage is probably further down the line in the exhaust duct—the flexible tube that connects the back of your dryer to the wall.
- Turn off and unplug the dryer (and shut off the gas, if applicable).
- Carefully pull the dryer away from the wall. You'll need a couple of feet of clearance to work.
- Inspect the duct. Look for any sharp kinks, bends, or sections that have been crushed against the wall. A restricted path is just as bad as a clog.
- Disconnect the duct from the dryer. You may need a screwdriver to loosen the clamp holding it in place.
- Look inside the duct and the dryer outlet. Use a flashlight to check for major lint buildup. Use your vacuum or a special dryer vent cleaning brush to thoroughly clean out the entire length of the duct.
- Reconnect and straighten. Reattach the duct securely to the dryer and the wall vent. As you push the dryer back into place, make sure the duct has a gentle, sweeping path with no tight corners.
- Run another test. Plug the dryer back in and run another five-minute test cycle.
If clearing and straightening the duct solved the problem, you're all set. A clean, straight exhaust duct is essential for dryer safety and efficiency.
 Image Alt: An illustration of a dryer's interior, highlighting the location of the cycling thermostat, high-limit thermostat, and heating element.
Step 3: When to Check Internal Parts or Call a Pro
If you've thoroughly cleaned the entire vent system and the dryer still gets too hot, the issue is likely a failed internal component. The most common culprits are the thermostats that regulate temperature or the heating element itself.
This is a good point to decide on your comfort level. Testing and replacing these parts requires opening the dryer's access panels and using a tool called a multimeter to check electrical continuity. If you're not experienced with appliance repair, this is the time to call a professional.
For those comfortable with proceeding, the goal is to test the following components:
- Cycling Thermostat: This part turns the heat on and off to maintain the correct temperature during a cycle. If it fails, the heat might stay on continuously.
- High-Limit Thermostat: This is a safety device that cuts power to the heating element if the dryer gets dangerously hot. While a failed high-limit thermostat usually results in no heat, it can sometimes be part of the overheating problem.
- Heating Element (Electric Dryers): The element itself can sometimes short out in a way that causes it to produce nonstop, unregulated heat.
Testing these parts involves disconnecting them (with the power off) and using a multimeter to see if they have proper continuity—an unbroken electrical path. A reading of infinity or "OL" (open loop) on the multimeter usually indicates a faulty part that needs replacing.
If you identify a bad component, you can often order a replacement and install it yourself. However, if you test the components and they all seem fine, or if you have a gas dryer, the problem is more complex. At this point, it's best to contact an appliance repair technician for a professional diagnosis.
Time and Cost to Fix an Overheating Dryer
- DIY Cleaning:
- Time: 15-45 minutes.
- Cost: Free, or under $25 if you need to buy a vent cleaning brush kit.
- DIY Part Replacement:
- Time: 45-90 minutes.
- Cost: Replacement thermostats are typically inexpensive, ranging from $10 to $30. A new heating element can cost between $40 and $100.
- Professional Repair:
- Time: 1-2 hours for the service call.
- Cost: Expect to pay between $100 and $250 for a service call, diagnosis, and labor. The final price will depend on the parts needed and labor rates in your area.
A Calm Dryer is a Safe Dryer
An overheating dryer is a clear warning sign from your home, and addressing it promptly is key to keeping things running safely. By working through these steps, you can often solve the problem yourself by simply clearing a blockage that was hurting performance and creating a fire risk.
Remembering to perform regular maintenance is the best way to prevent future issues. The Casa app can help you keep track of all your home's needs, from cleaning dryer vents to checking smoke detectors. Download Casa today to create a simple, stress-free maintenance plan for your home.