

Sep 22, 2026
Bathroom Caulk and Grout Maintenance Guide for Homeowners
Learn how to inspect and maintain bathroom caulk and grout to prevent hidden leaks, mold, and costly subfloor repairs with this simple step by step guide.
When you look at a line of bathroom caulk or the grout between your shower tiles, it is easy to view them as cosmetic details. They fill gaps, make corners look neat, and blend surfaces together.
Looking for more guidance? Take a look at our Maintenance overview.
In reality, caulk and grout are your home's front line of defense against water intrusion. They are not cosmetic busywork; maintaining them is direct protection against structural damage.
Water has a way of finding the smallest path of least resistance. When a seal fails in your tub surround or shower pan, water seeps into drywall, backer boards, and subflooring long before you ever spot a puddle on the floor. Checking and refreshing these seals periodically is one of the lowest-effort, highest-return habits you can establish as a homeowner.
What Typically Goes Wrong If Ignored
Caulk is a flexible sealant, usually silicone or acrylic latex, designed to bridge joints between two different surfaces, such as where an acrylic tub meets a tiled wall. Grout is a cement-like mixture that fills the spaces between tiles on a single plane.
Over time, both materials age. Buildings naturally settle, temperatures shift, and moisture causes subtle movement. Here is what happens when caulk and grout are left unchecked:
- Drying and shrinking: Caulk loses its elasticity over several years. It shrinks, pulls away from surfaces, and leaves microscopic gaps.
- Cracking and crumbling: Grout can crack along stress points or crumble if water penetrates behind the tile.
- Hidden moisture migration: Water that splashes against a cracked seal creeps into the porous materials behind the tile, including gypsum board or plywood subflooring.
- Dry rot and mold: Sustained dampness behind walls invites black mold and wood rot, which weakens the framing and degrades indoor air quality without immediate visual warning.
What This Task Protects
Keeping your bathroom seals intact protects three critical areas of your home:
- Subfloor and framing integrity: A steady trickle of water behind a tub can rot the wood floor joists beneath it. Replacing rotted structural wood is disruptive and expensive.
- Tile and wall lifespan: When the backing behind tile gets wet, tiles loosen, sag, and eventually detach. Sound caulk and grout keep the underlying adhesive dry and intact.
- Indoor air health: Enclosed, warm, damp spaces behind bathroom walls create ideal conditions for mold growth. Preventing water penetration stops mold before it starts.
Step-by-Step Checklist to Inspect and Maintain Bathroom Seals
Inspecting your bathroom takes five to ten minutes. If you find minor issues, addressing them early keeps the job simple.
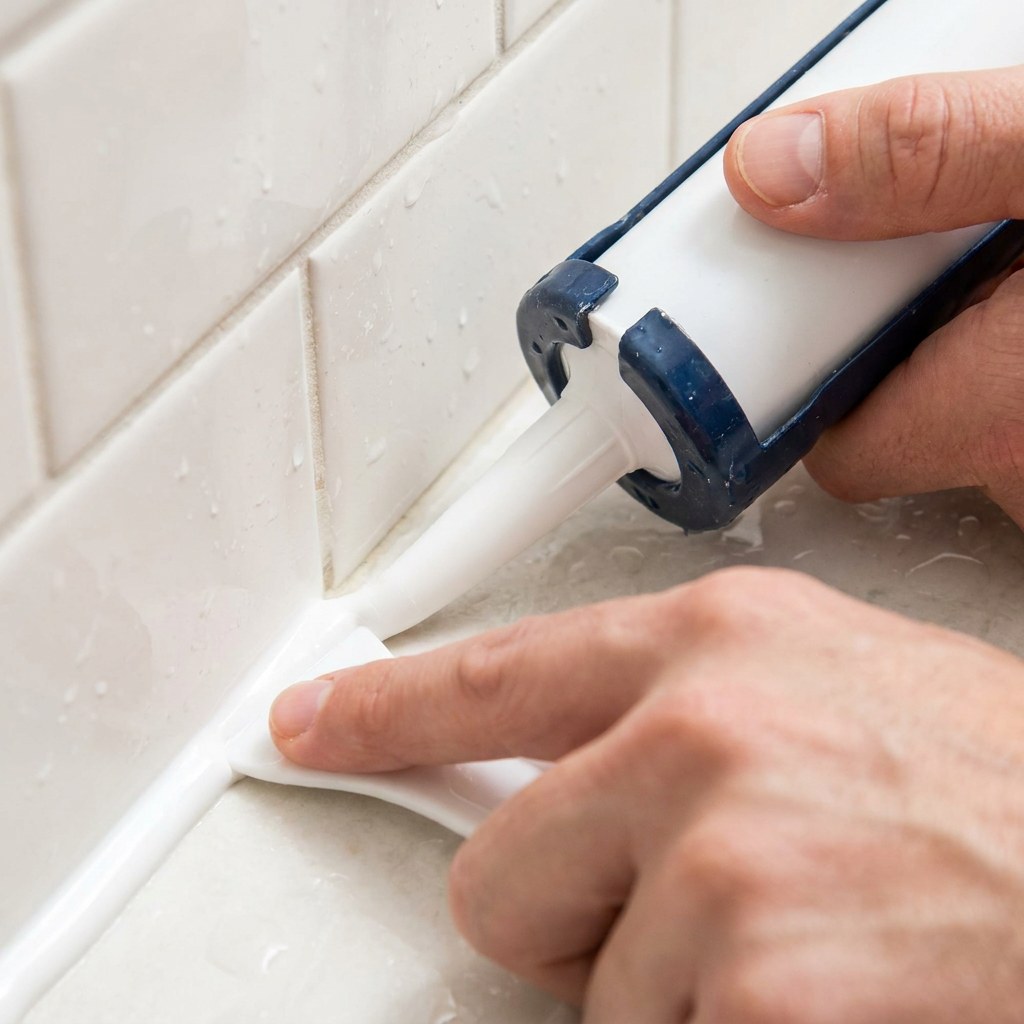
Phase 1: The Visual and Tactile Inspection
Walk into your bathroom with good lighting and check every seam where water flows:
- Check the perimeter of the tub or shower pan: Look where the base meets the wall tile and where the base meets the bathroom floor.
- Inspect vertical corners: Look at the inside corners of the shower walls where tile planes meet. (These should always be caulked, not grouted, because corners shift).
- Press lightly with a fingernail or blunt tool: Fresh caulk should feel slightly pliable and firm. If it feels brittle, chalky, or peels away under light pressure, it has reached the end of its lifespan.
- Scan the grout lines: Look for hairline cracks, missing chunks of grout, or areas where the grout looks persistently dark or discolored even when completely dry.
- Inspect around plumbing fixtures: Check the seal around your faucet escutcheons (the decorative metal plates flush against the wall) and tub spout.
Phase 2: Routine Maintenance and Minor Touch-Ups
If the seals look mostly intact but have small problem spots, you can tackle them with basic tools:
- Clean the surface thoroughly: Use a mild cleaner to remove soap scum, body oils, and surface grime. Allow the area to dry completely for at least 24 hours before applying new sealant.
- Remove failed caulk entirely: Never apply new caulk directly over old, peeling caulk; the new layer cannot adhere properly. Use a plastic caulk-removal tool to gently scrape away old sealant without scratching your tub or tile.
- Wipe down with rubbing alcohol: This clears away residual residue and moisture, leaving a clean bonding surface.
- Apply 100 percent silicone sealant: For wet zones like tubs and showers, pure silicone provides superior flexibility and water resistance compared to standard acrylic caulk.
- Tool the bead smoothly: Smooth the bead using a caulking tool or a gloved finger dipped in a little soapy water to ensure continuous contact with both surfaces.
- Respect the cure time: Most silicone caulk requires 24 to 48 hours to cure fully before exposure to running water. Check the manufacturer label on your specific tube.
How Often It Should Be Done
- Inspect: Every six months. A quick check in spring and fall is usually enough to catch small cracks before they become leaks.
- Reseal caulk: Typically every 3 to 5 years, or sooner if you notice peeling, persistent discoloration, or separation from the surface.
- Seal grout: If you have unglazed or standard cementitious grout, apply a penetrating grout sealer once every 1 to 2 years to repel water and prevent stains.
Signs You Have Waited Too Long
Sometimes a small maintenance issue turns into a deeper problem before you notice it. Watch for these red flags:
- Soft or spongy flooring: If the floor directly outside the tub or shower feels flexible or soft underfoot, water has likely reached the subfloor.
- Loose or hollow-sounding tiles: Tap lightly on wall tiles near the tub edge. If they sound hollow, feel loose, or move slightly, water has compromised the backing board.
- Musty odors that linger: If your bathroom smells earthy or damp even when thoroughly clean, moisture may be trapped inside the wall cavity.
- Stains on the ceiling below: If your bathroom is on an upper level and you notice water staining, peeling paint, or bubbling drywall on the ceiling underneath it, water is already bypassing the seal.
Cost of Neglect vs Cost of Maintenance
The financial contrast here is one of the starkest in home maintenance.
- Cost of maintenance: A tube of high-grade 100 percent silicone bathroom caulk costs between $8 and $15. A simple caulk tool and scraper kit costs around $10. If you also seal your tile grout, a bottle of penetrating sealer costs roughly $15 to $25. Taking care of this yourself generally costs under $50 in materials and a couple of hours of light effort.
- Cost of neglect: If water bypasses failed caulk and rots the subfloor or drywall, repairs escalate quickly. Replacing water-damaged subfloor, repairing framing, treating mold, and rebuilding a tiled shower wall routinely ranges from $2,500 to $8,000 or more depending on the extent of the spread and local labor rates.
Taking thirty minutes to check your seals protects thousands of dollars in home equity.
Safety Boundaries: When to DIY vs When to Call a Pro
Understanding when to handle a job yourself and when to bring in professional support keeps you safe and avoids costly mistakes.
Safe to tackle yourself:
- Removing old surface caulk and applying a fresh bead along tub rims, shower corners, and sink backsplashes.
- Applying liquid penetrating sealer to clean, intact grout lines.
- Scraping out and replacing small sections of surface caulk showing light mildew.
Worth monitoring:
- Minor hairline cracks in grout high up on a wall away from direct spray. Clean and seal them, then monitor them during your next inspection to see if they widen.
Time to stop and call a professional:
- Multiple loose, cracked, or falling tiles in the shower wet zone.
- Any sign of subfloor give, sagging, or bounce near the tub edge.
- Visible black mold that extends deep behind cracked wall tiles or under the shower pan.
- Active water staining on the ceiling directly below the bathroom.
In these situations, applying caulk on top will only trap existing water inside the assembly. A licensed tile contractor or general repair professional can assess whether the backer board needs replacement before the surface is resealed.
How to Build This Into Your Home Maintenance Schedule
Preventive maintenance works best when you do not have to rely on memory alone. Because caulk degrades gradually, it is easy to look past subtle changes during daily routines.
Pair your bathroom seal inspection with another recurring household rhythm, like testing smoke alarms or replacing furnace filters every six months. If you use Casa to organize your seasonal home upkeep, you can log your last caulk inspection date and set an automated reminder for your next review. Tracking it once keeps the task off your mental to-do list until it actually needs your attention.
Recap
Bathroom caulk and grout are small components that carry heavy responsibility. They are designed to wear out over time, and checking them twice a year is one of the simplest ways to avoid expensive structural water damage.
Take a few minutes this week to inspect your tub and shower seams. If you spot peeling or gaps, clear out the old sealant and lay down a fresh bead of silicone. Your subfloors and your budget will thank you.
Want an easier way to stay ahead of home maintenance without the guesswork? Download the Casa app to track your home systems, receive timely maintenance reminders, and get calm, practical advice whenever you need it.