

Aug 4, 2026
How to Change Your HVAC Filter
Learn how to easily change your HVAC air filter. Discover why this simple maintenance task prevents breakdowns, lowers energy bills, and protects your home.
As a homeowner, it is easy to view changing the air filter as just another item on a long list of chores. It is out of sight, which often puts it out of mind. However, taking a few minutes to replace your HVAC (Heating, Ventilation, and Air Conditioning) filter is not busywork. It is one of the most effective ways to prevent expensive, unexpected repairs.
Looking for more guidance? Take a look at our Maintenance overview.
When you change your filter, you are not just cleaning the air. You are actively protecting the most expensive mechanical system in your home.
What happens when you ignore your air filter
Your heating and cooling system works by pulling indoor air in, heating or cooling it, and pushing it back out. The air filter sits right in the middle of this airflow.
When a filter is left in place too long, it becomes clogged with a thick wall of dust, pet hair, and debris. This creates a barrier. To pull the same amount of air through that dirty filter, the system's blower motor has to work much harder. Over time, this constant strain can cause the motor to overheat and fail prematurely.
Additionally, in the summer, restricted airflow can cause your evaporator coils—the indoor copper tubes that get cold to cool your air—to literally freeze into a block of ice. When this happens, your system will blow warm air or shut down completely.
What regular filter changes protect
Staying on top of this simple task safeguards three vital areas of your home:
- System Lifespan: By reducing strain on the blower motor and internal components, you help your system reach its full expected lifespan, which is generally 15 to 20 years.
- Energy Efficiency: A system that can breathe easily uses less electricity. Regular changes help keep your monthly utility bills stable and predictable.
- Indoor Air Quality: A fresh filter traps pollen, dust mites, and pet dander before it circulates back into the rooms where you sleep and live.
Step-by-step checklist: Changing your filter
Replacing your filter is straightforward. You do not need any special tools, just a few minutes of your time.
- Turn off the system: Before you begin, turn your thermostat to the "Off" position. This prevents the unit from turning on while you are working and keeps loose dust from being sucked into the machinery.
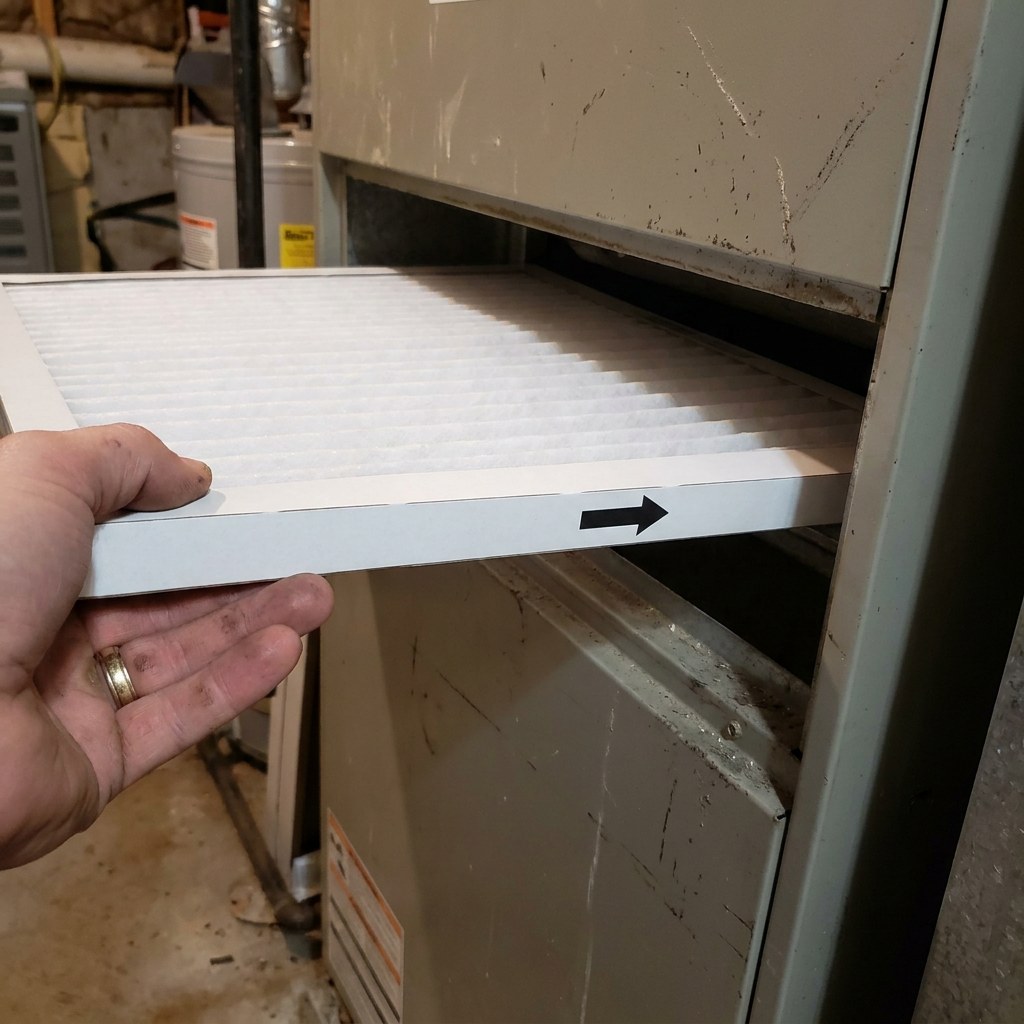
- Locate the filter: Filters are usually located in one of two places: behind a slotted return air grille in your wall or ceiling, or in a slot directly next to the indoor air handler unit (the large metal box often found in a basement, attic, or utility closet).
- Remove the old filter: Slide the old filter out carefully to avoid knocking dust loose.
- Check the size: Look at the cardboard frame of the old filter. You will see three numbers (such as 16x20x1). This is the size you need to buy for your replacement.
- Insert the new filter: Look for the printed arrow on the edge of the new filter. This arrow points in the direction the air is flowing. The arrow should always point toward the equipment (or away from you, if you are putting it into a wall or ceiling grille).
- Turn the system back on: Secure the cover or grille, and turn your thermostat back to your preferred setting.
How often should you change it?
Filter lifespans vary based on the type of filter you use and your household environment.
- Standard 1-inch to 2-inch filters: These generally need to be replaced every 30 to 90 days.
- Thicker 4-inch to 5-inch media filters: These larger filters, usually located right at the main unit, can often last 6 to 12 months.
- Household factors: If you have multiple pets, live in an area with high pollen, or have recently completed dusty renovation work, you will likely need to check and replace your filter more frequently.
Signs you have waited too long
If you lose track of time, your home will usually give you clues that the filter is overdue for a swap. You might notice:
- Unusually long heating or cooling cycles where the system seems to run constantly.
- Weak airflow coming from your room vents.
- A sudden spike in your energy bill during a month with normal weather.
- More dust settling on your furniture than usual.
The cost of neglect vs. the cost of maintenance
The financial case for changing your filter is clear. A standard replacement filter costs roughly $10 to $30.
In contrast, if a clogged filter causes your system to freeze up or overheat, a professional diagnostic service call will generally start around $100 to $200 just to identify the issue. If the strain causes a blower motor to burn out, replacement costs can range broadly from $500 to over $1,200 depending on your specific unit. Spending a few dollars on a filter is a wise, highly predictable investment.
Safety boundaries: When to call a professional
Changing the air filter is completely safe to try yourself and is a standard part of owning a home. However, it is important to know where your maintenance responsibilities end.
Safe to DIY:
- Opening the return grille or the designated filter slot.
- Sliding filters in and out.
- Wiping down the outside of your vent covers with a damp cloth.
Time to call a Pro:
- If you pull the filter out and see that the metal coils inside the unit are encased in ice. (Turn the system off immediately and let it thaw).
- If you hear grinding, squealing, or loud banging noises coming from the unit, even after a fresh filter is installed.
- If you have to unscrew sealed metal panels on the air handler itself to look for the filter. Internal components have high-voltage electrical connections and sharp edges. Leave internal cleanings to an HVAC technician during an annual tune-up.
How to Build This Into Your Home Maintenance Schedule
Because this task only happens every few months, it is incredibly easy to forget. The best way to manage it is to remove the burden of remembering entirely.
When you install a new filter, take a marker and write the date on the cardboard edge. Then, set a simple reminder for yourself. You can rely on the Casa app to help you track regular tasks like this. By logging your HVAC details and your filter size in Casa, you will receive timely, automated reminders when it is time to check your filter again. You won't have to guess when you did it last, and you won't have to search around for the right dimensions when you are standing in the hardware store aisle.
Recap
Replacing your HVAC filter is a quick, inexpensive task that protects your home's most expensive system. By checking your filter every one to three months and paying attention to the airflow arrow during installation, you prevent unnecessary strain on the equipment, lower your utility bills, and avoid disruptive breakdowns.
Ready to get your home maintenance on autopilot? Download the Casa app today to track your filter sizes, log your maintenance history, and receive smart reminders so you never miss a filter change again.