

Nov 17, 2026
How to Clean Refrigerator Coils to Prevent Costly Breakdowns
Cleaning your refrigerator condenser coils keeps your kitchen running efficiently and prevents expensive compressor repairs. Here is how to do it safely in twenty minutes.
When you move into a home, it is easy to view routine appliance care as extra chores on an already full list. But routine maintenance is rarely about keeping things spotless. It is about protecting your budget from sudden, high-dollar disruptions.
Looking for more guidance? Take a look at our Maintenance overview.
Cleaning your refrigerator coils is one of the clearest examples of this trade-off. It takes about twenty minutes and requires no special mechanical skills, yet it directly protects the most expensive component in your kitchen: the compressor.
What Typically Goes Wrong If You Skip This
Your refrigerator cools by extracting heat from the inside and releasing it into the surrounding room. The condenser coils—usually located behind a toe-grille at the base or along the lower back of the unit—are responsible for shedding that heat.
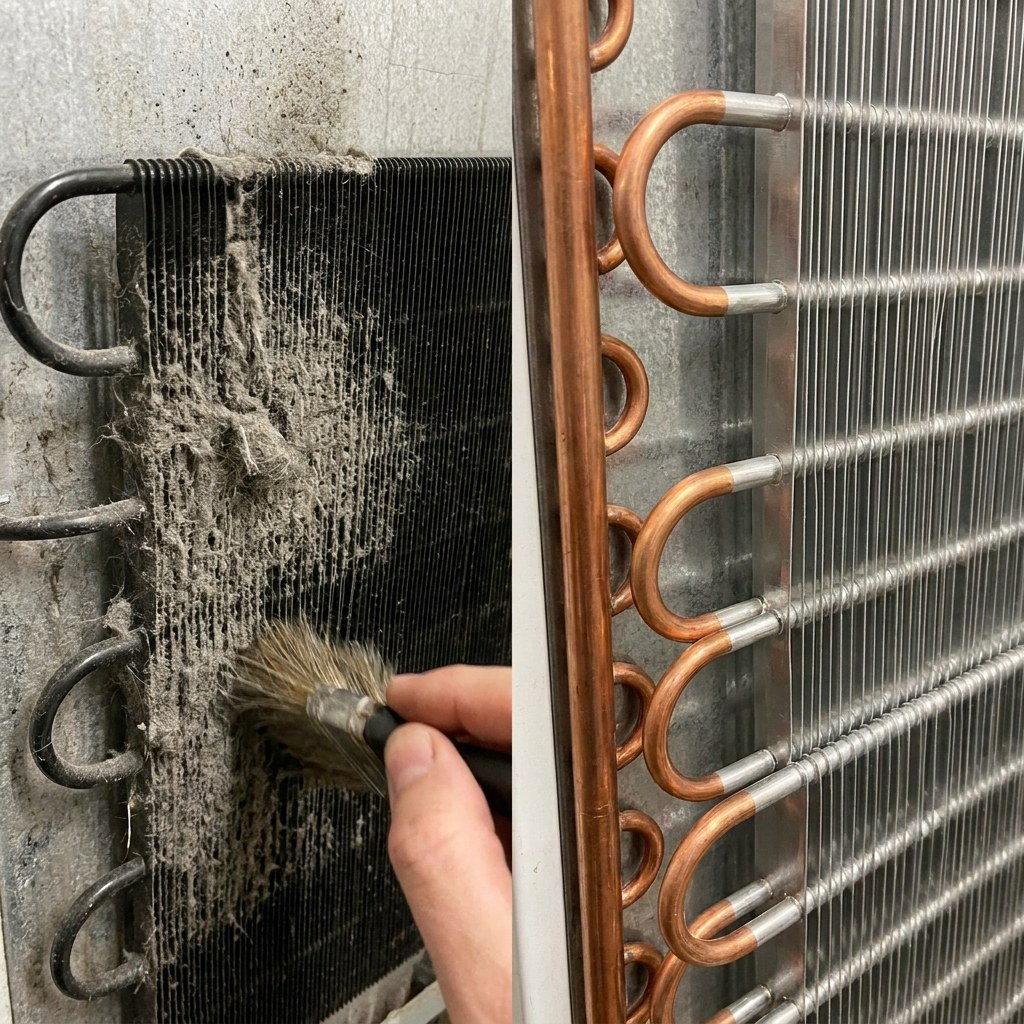
Over time, these coils naturally collect a blanket of household dust, pet hair, and kitchen grease. When coated:
- Heat gets trapped: The metal tubing cannot release heat effectively into the room.
- The compressor runs continuously: The heart of the refrigerator has to work twice as hard to maintain your set temperature.
- Components overheat: Prolonged heat buildup degrades electrical relays, cooling fans, and internal seals.
Eventually, the compressor burns out. When that happens, food spoils, the appliance stops cooling, and you are left facing an emergency repair or an unplanned appliance replacement.
What This Simple Task Protects
Spending a few minutes clearing dust off these coils preserves three critical things:
- System lifespan: A modern refrigerator typically lasts 10 to 14 years. A dust-choked system can easily cut that lifespan down by several years because the motor runs under constant strain.
- Energy efficiency: According to major utility providers and appliance manufacturers, dirty coils can increase refrigerator energy use by 25% to 35%. Because your refrigerator runs 24 hours a day, that inefficiency quietly raises your monthly electric bill.
- Food safety: A strained cooling system struggles to recover after you open the door, creating subtle temperature fluctuations that shorten the shelf life of milk, produce, and leftovers.
Step-by-Step Checklist for Cleaning Refrigerator Coils
You do not need specialized equipment. A household vacuum with a hose attachment, a standard flashlight, and an inexpensive coil brush (a flexible, narrow brush available at any hardware store) are all you need.
1. Disconnect the Power
Safety always comes first. Pull the refrigerator gently forward if necessary and unplug it from the wall outlet. If reaching the outlet is difficult, switch off the dedicated circuit breaker in your electrical panel.
2. Locate the Coils
Depending on your model, the coils will be in one of two places:
- Behind the bottom front grille: Most modern French-door and bottom-freezer units house the coils underneath. You can usually remove this plastic grille by gently pulling it straight off or releasing two small snap clips.
- Along the lower rear panel: Older models or basic top-freezer units often place the coils behind a thin cardboard or metal access panel on the lower back of the fridge. Remove the small screws holding this panel in place.
3. Loosen the Clumped Dust
Use your flexible coil brush to gently scrape and twirl between the winding loops of tubing. Work slowly to avoid bending the thin metal fins or damaging nearby copper lines.
4. Vacuum the Debris
Attach your vacuum's narrow crevice tool. Vacuum up the dust you knocked loose on the floor and gently run the nozzle along the exterior of the coils and surrounding fan blades. Avoid pressing hard against any wires or components.
5. Reassemble and Restore Power
Snap the front grille back into place or screw the rear access panel back on securely. Plug the refrigerator back in or flip the circuit breaker back on. Listen for the smooth hum of the fan restarting.
How Often It Should Be Done
For most homes, cleaning the coils once every six to twelve months is sufficient.
If you have shedding pets, or if your refrigerator sits directly adjacent to a high-traffic entryway where dust settles quickly, plan on checking them every four to six months. Pet fur acts like felt insulation over the warm coils and builds up much faster than normal room dust.
Signs You Have Waited Too Long
If you have never cleaned your coils, your appliance may already be giving you subtle warning signs:
- The sides or top of the refrigerator cabinet feel hot to the touch rather than slightly warm.
- The unit runs almost constantly without cycling off.
- Ice in the freezer develops a slightly frosty, half-melted glaze.
- The kitchen feels noticeably warmer around the base of the fridge.
- You hear clicking noises from the bottom rear, which often indicates the compressor is trying to kick on but shutting down due to thermal overload.
If your refrigerator is already clicking or struggling to stay cold, cleaning the coils is still a sensible first step, but you should monitor the internal temperature closely over the next 12 hours.
Cost of Neglect vs. Cost of Maintenance
The financial arithmetic here is straightforward:
| Approach | Typical Upfront Cost | Potential Outcome | | :--- | :--- | :--- | | Preventive Cleaning | $0 to $15 (for a reusable brush) | 10–14 year lifespan, stable energy usage, reliable cooling | | Neglect | $0 today | $300–$600 for a service call and compressor fan repair, or $1,200–$2,800+ for early refrigerator replacement |
A few minutes of prevention twice a year protects you from taking time off work to wait for a technician or scrambling to save hundreds of dollars in groceries.
Safety Boundaries: When to Call a Professional
While cleaning coils is completely safe for most homeowners, know where the DIY boundary lies:
- Safe for you: Unplugging the unit, removing snap-on grilles, gently brushing coils, and vacuuming loose debris.
- Wait and monitor: If the compressor feels very warm right after cleaning, give it an hour or two with clean airflow before assuming something is broken.
- Call an appliance technician: If you smell burning electrical odor, notice oil residue on or around the coils (which indicates a refrigerant leak), or if the fridge fails to cool properly after cleaning. Never puncture or forcefully bend copper lines.
How to Build This Into Your Home Maintenance Schedule
Preventive care fails when it relies entirely on memory. The most reliable way to stay ahead is to anchor this task to existing household rhythms.
Pair coil cleaning with your twice-yearly smoke detector battery checks, or tackle it during deep seasonal cleaning in spring and fall. If you use Casa to organize your home, you can add your refrigerator model, set an automatic semi-annual reminder, and keep track of when it was last serviced so you never have to wonder.
The Bottom Line
A refrigerator is one of the hardest-working machines in your home. Keeping its coils clear of dust takes very little effort, requires no contractor fees, and pays off directly in lower utility bills and years of reliable service.
To keep track of appliance upkeep without the stress of managing mental checklists, download the Casa app and let your personal home advisor handle the schedule for you.