

Oct 13, 2026
How to Clean Your Bathroom Exhaust Fan to Prevent Moisture and Mold
Learn how cleaning your bathroom exhaust fan protects indoor air quality, stops mold before it starts, and saves money on costly drywall and fan repairs.
When you move into a home, it is easy to view maintenance chores as a never-ending list of weekend errands. Most of us prioritize what is right in front of us: wiping counters, vacuuming floors, and taking out the trash.
Looking for more guidance? Take a look at our Maintenance overview.
A bathroom exhaust fan rarely gets that kind of attention. It sits on the ceiling, hums quietly in the background, and runs for ten or fifteen minutes after a shower. But treating ventilation care as optional chores misses the bigger picture. Routine fan maintenance is not busywork; it is an inexpensive shield that protects your bathroom walls, ceiling paint, and breathing air from slow, hidden water damage.
A quick cleaning once or twice a year keeps moist air moving outside where it belongs, saving you from expensive moisture remediation down the road.
What Typically Goes Wrong If Ignored
Every time you shower, warm, humid air rises toward the ceiling. Your exhaust fan is designed to pull that moisture into ductwork and vent it outside your home.
However, bathroom air is also full of floating dust, lint from towels, hairspray, and settled powder. Over several months, the fan blades and housing collect a thick blanket of sticky grime.
When you leave a fan clogged:
- Airflow drops significantly. Even if the motor is spinning and making noise, the fan cannot pull humid air through choked vent slots.
- Moisture lingers on surfaces. Water droplets stay on your walls, mirrors, and baseboards long after the shower is turned off.
- Mold and mildew take hold. Bathrooms offer ideal conditions for fungal growth. Once mold spores establish themselves behind peeling paint or under caulk, surface scrubbing will not solve the underlying moisture issue.
- The motor overheats. Restricted airflow forces the small electric motor to work against heavy resistance, causing it to run hot and eventually burn out prematurely.
What This Task Protects
Spending twenty minutes cleaning this single fixture protects three vital areas of your home:
- Indoor Air Quality: Removing trapped moisture prevents airborne mold and mildew spores from circulating into nearby bedrooms and hallways.
- Structural Finishes: Drywall, joint compound, and trim are porous. Reliable ventilation keeps moisture from softening sheetrock or lifting ceiling paint.
- Equipment Lifespan: A clean motor operates cooler and draws less power, extending the functional life of the fan assembly by years.
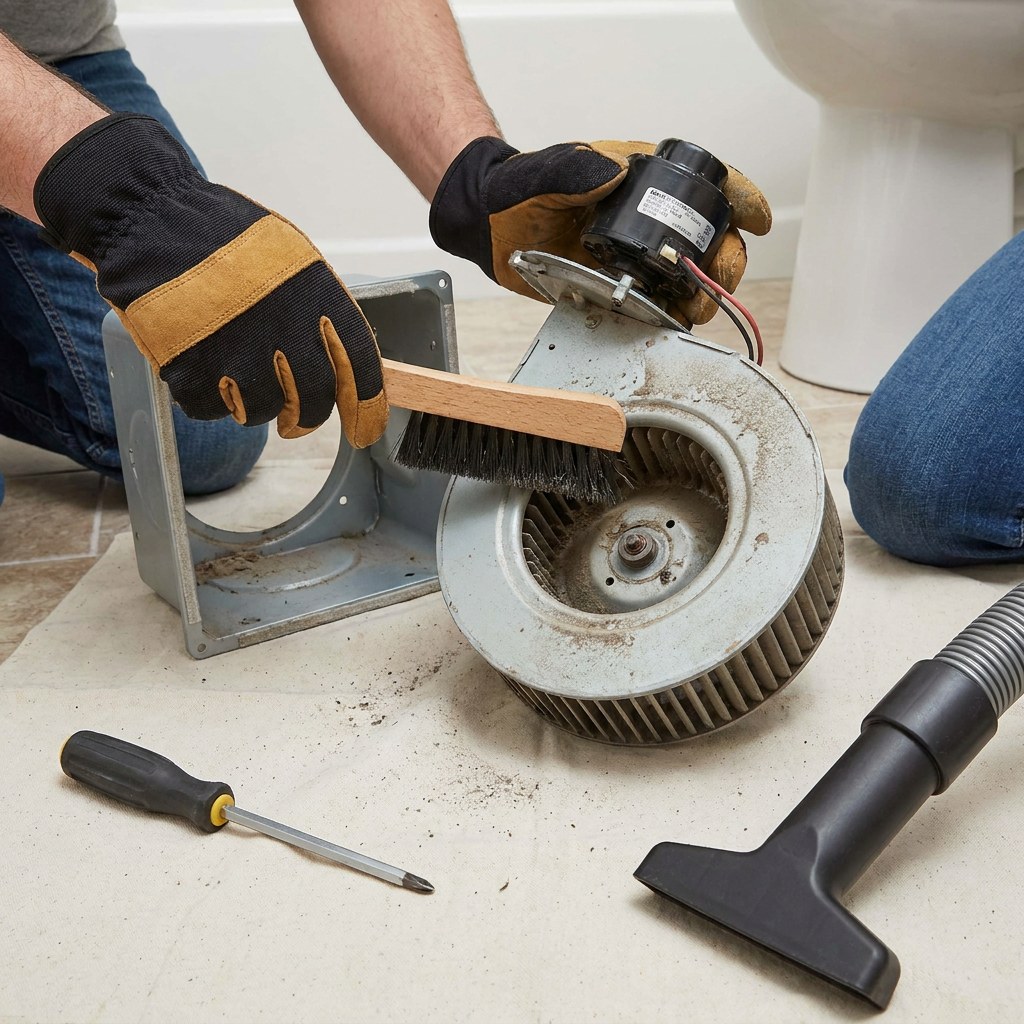
Step by Step Cleaning Checklist
You do not need specialty equipment for this job. A vacuum with a brush attachment, a bucket of warm soapy water, and a microfiber cloth are usually all it takes.
1. Cut the Power
Safety comes first. Turn off the bathroom wall switch. For an extra layer of caution, switch off the corresponding breaker at your main electrical panel so there is no chance the fan turns on while your hands are inside.
2. Remove the Vent Cover (Grille)
Stand securely on a sturdy step stool. Gently pull down on the plastic or metal cover. Most modern covers are held in place by two wire tension clips. Squeeze the metal prongs together on each side to release the cover from the ceiling housing.
3. Soak and Wash the Grille
Take the grille to a sink or tub. Wash it in warm water with a few drops of mild dish soap to break down any sticky residue. Let it air dry completely while you clean the rest of the unit.
4. Vacuum the Housing and Motor
Use your vacuum hose with a soft brush attachment to gently pull loose lint and dust from the fan housing, motor exterior, and visible duct opening. Avoid pushing hard on the fan blades, as thin plastic wheels can crack under pressure.
5. Wipe Down the Fan Blades
Dampen a microfiber cloth with water (do not use a dripping wet rag near electrical components). Gently wipe down each fan blade to remove remaining grime.
6. Test the Fan Movement
Use your fingers to spin the fan wheel gently. It should rotate freely without catching or grinding.
7. Reattach the Cover
Once the plastic grille is dry, squeeze the wire springs, insert them back into the mounting slots inside the ceiling housing, and push the cover flush against the ceiling.
8. Restore Power and Run a Draft Test
Turn the breaker and wall switch back on. Hold a single square of toilet paper against the vent grille while the fan is running. If the suction holds the paper flat against the grille on its own, your fan is moving air properly.
How Often It Should Be Done
For most households, cleaning the fan every six months is the sweet spot.
If your household has multiple people sharing one bathroom, or if you have pets that shed heavily, consider checking the fan every three to four months. In a lightly used guest bathroom, a thorough cleaning once a year is usually sufficient.
Using a home management tool like Casa makes it easy to set recurring reminders so tasks like this happen on an orderly schedule rather than when you notice a problem.
Signs You Have Waited Too Long
It is easy to forget ceiling fixtures until they show obvious symptoms of distress. Inspect your fan right away if you notice any of these signs:
- Mirrors stay fogged for more than twenty minutes after a shower.
- Droplets of water continuously bead or run down your walls.
- Dark specks of mold or mildew appear on the ceiling directly above the shower.
- The fan produces a buzzing, grinding, or rattling sound when running.
- Visible clumps of dust hang from the slots of the grille cover.
Cost of Neglect vs Cost of Maintenance
The contrast between quick maintenance and delayed repair is striking:
- Preventive Cleaning: Roughly $0 in supplies and 20 minutes of your time twice a year.
- Replacing a Burned-Out Fan Motor: Approximately $150 to $350 for a replacement unit and professional installation if you prefer not to wire it yourself.
- Moisture and Mold Remediation: If trapped moisture penetrates the drywall or causes persistent mold colonies behind walls, professional remediation and repainting routinely range from $800 to over $2,500, depending on the severity of the damage.
Regular cleaning keeps your costs confined to a few minutes of weekend care.
Safety Boundaries
Most vent cleaning is well within reach for any homeowner, but know when to pause and bring in a professional:
- Safe to handle yourself: Removing the cover, vacuuming dust, wiping down blades, and replacing a standard grille.
- Worth monitoring: A motor that sounds slightly louder than usual after cleaning. Keep an ear on it over the next month to see if the sound worsens.
- Time to call a professional: If you smell burning plastic, if the fan will not spin even with power on, or if you suspect the duct in your attic has disconnected and is venting moisture into your insulation rather than outside your roof or soffit. In those cases, a licensed electrician or HVAC technician is the safest choice.
How to Build This Into Your Home Maintenance Schedule
Preventive care works best when it is tied to an existing habit rather than remembered at random.
Consider pairing your bathroom exhaust fan cleaning with daylight saving time, the same weekends you test smoke detector batteries. If you follow seasonal maintenance routines, slot this into your spring and fall checklists.
Tracking these dates in Casa keeps a clear record of when each bathroom fan was last serviced. That way, you never have to guess whether a vent was cleaned three months ago or twelve.
The Bottom Line
A bathroom exhaust fan is a quiet workhorse that protects your home's indoor air quality and structural finishes. Taking twenty minutes twice a year to clear out dust keeps air flowing freely, prevents mold growth, and protects your repair budget from avoidable surprises.
Ready to take the guesswork out of home care? Download the Casa app to organize your seasonal maintenance tasks, track home projects, and protect your space with confidence.