
Mar 5, 2026
How to Fix a Rusted Deck: Inspect, Repair, and Maintain
Not all rust on your deck means disaster. Learn how to tell the difference between cosmetic surface rust and structural damage, plus how to clean and protect your deck.
Seeing reddish-brown spots or bubbling paint on your deck can be unsettling. Because decks are weight-bearing structures where we host friends and family, any sign of decay often leads to immediate worry about safety.
Looking for more guidance? Take a look at our Repairs overview.
Here is the good news: Not all rust is a sign of imminent failure. In many cases, what looks like a serious problem is actually just surface corrosion—cosmetic damage that looks worse than it is. However, because metal components hold your deck together, you shouldn't ignore it.
If you catch rust early, you can often fix it yourself with a wire brush and some protective paint. If the corrosion has gone too far, you’ll need to know when to swap out a part or call a professional. This guide will help you determine the severity of the rust and walk you through the repairs.
Why Is My Deck Rusting?
Outdoor metal components—joist hangers, brackets, screws, and railings—are constantly fighting a battle against moisture and oxygen. Even galvanized (treated) metal eventually succumbs to the elements.
Common causes include:
- Age: Protective coatings wear off over time.
- Incompatible materials: Using the wrong type of screws with pressure-treated lumber can cause a chemical reaction that speeds up corrosion.
- Scratches: A simple scratch in the paint of a metal railing provides an entry point for water.
The Safety Check: Cosmetic vs. Structural
Before you start scraping or painting, you need to know what you are dealing with. We need to distinguish between surface rust (orange/red dust that wipes away) and structural rot (deep pitting, holes, or thinning metal).
Is it safe to do this yourself?
- YES: If the rust is on railings, decorative elements, or surface brackets and the metal is still solid.
- NO: If a structural post or beam sounds hollow, crumbles when poked, or has visible holes eaten through it. In this case, stay off the deck and call a pro.
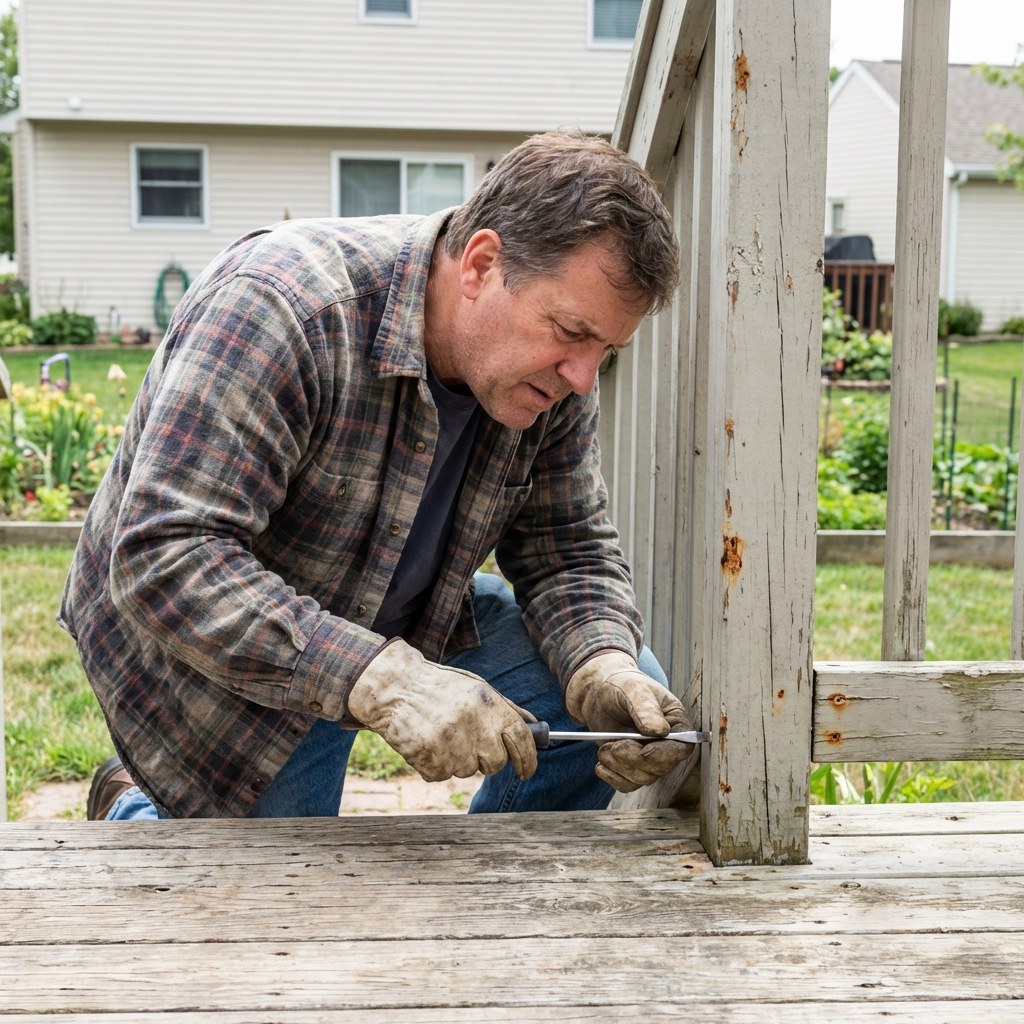
Step 1: Inspect the Deck
Time: 15 minutes Tools: Safety glasses, Phillips screwdriver
Start by taking a close look at the metal components. You are looking for reddish-brown discoloration, bubbling paint, or flaking metal.
- Protect your eyes. Put on safety glasses to keep rust flakes out of your eyes.
- Scan the area. Walk the perimeter and look at metal railings, brackets (where wood meets wood), fasteners (screws/bolts), and metal support posts.
- The "Tap Test." Take the handle of your screwdriver and lightly tap the rusted spots.
- Solid Ring: The metal is likely still dense and intact.
- Dull Thud: The metal may be weakened inside.
Diagnosis:
- Scenario A: The rust is only on non-structural parts (railings, small brackets) or is purely surface-level. Proceed to Step 2.
- Scenario B: You found deep rust on a main support post or beam. Skip to the Structural Assessment section below.
Step 2: Assess and Prep Non-Structural Rust
Time: 15 minutes Tools: Work gloves, flathead screwdriver
If the rust is on railings or fasteners, you need to see how deep it goes.
- Scrape the spot. Wearing gloves, use a flathead screwdriver to scrape away the loose, flaky rust.
- Probe the metal. Press the tip of the screwdriver firmly against the clean metal underneath.
- Result: If the screwdriver punches through or dents the metal easily, the part is compromised and needs replacement (see Step 4).
- Result: If the metal holds firm, it’s just surface rust. You can clean and repaint it (see Step 3).
Step 3: Clean and Repaint (Surface Rust)
Time: 1 hour working, 4 hours total (drying time) Tools: Stiff wire brush, microfiber cloth, rust-inhibiting primer, exterior metal paint, paintbrush
This is the most common fix. You are essentially sealing the metal to stop the oxidation process.
- Scrub it down. Use a stiff wire brush to aggressively scrub the rusted areas until you see bright, bare metal. You want to remove all the "scale" (flaky bits).
- Wipe it clean. Use a damp microfiber cloth to remove the dust. The surface needs to be clean for paint to stick.
- Prime. Shake a can of rust-inhibiting primer for a full minute. Spray or brush a thin coat over the bare metal. Let it dry for about an hour.
- Paint. Stir your exterior metal paint. Apply a smooth coat over the primed area.
- Wait. Let it dry for at least 2 hours before handling the railing or walking near the wet paint.
Casa Tip: Keep track of your paint colors and maintenance dates in the Casa app so you can easily touch up spots next season without guessing which brand you used.
Step 4: Replace Damaged Components
Time: 1 hour Tools: Ratchet wrench, new galvanized hardware, safety glasses
If a bracket or bolt was too rusted to save during your "probe test," it needs to be swapped out.
- Remove the old part. Use a ratchet wrench to remove rusted bolts or screws. If they are stripped or stuck, you may need a specialized extraction tool or lubricant spray.
- Remove the bracket. Pull the old bracket off.
- Install the new part. Position a new galvanized metal bracket. Galvanized steel has a zinc coating that resists rust better than plain steel.
- Secure it. Drive new galvanized lag screws through the bracket into the wood.
- Seal it. Even new parts can benefit from a coat of primer if they are in a wet area.

Step 5: Assessing Structural Metal (The Heavy Duty Check)
Time: 15-20 minutes Tools: Work gloves, flathead screwdriver
If your initial inspection (Step 1) showed rust on the heavy beams or posts that hold the deck up, you need to be very careful.
- Kneel and inspect. Look closely at the base of the posts where they meet the concrete or ground; this is a prime spot for rot.
- The Probe Test (Again). Press your screwdriver into the rusted areas.
- Evaluate.
- Surface only: If the rust scrapes away to reveal solid steel, you can clean and paint it just like the railings (Step 3), but you will need a larger brush and more time.
- Penetration: If you see holes, cracks, or if the metal layers are separating (delaminating) like pages in a book, stop immediately.
When to Call a Professional If structural posts have holes or significant thinning, the structural integrity of your deck is compromised. Do not attempt to patch this with Bondo or paint. You need a licensed deck contractor to install temporary supports and replace the column.
Typical Costs
Fixing rust is usually very affordable if you catch it early.
- DIY Supplies: $30–$60. This covers a wire brush, sandpaper, rust-inhibiting primer (like Rust-Oleum), and exterior paint.
- Hardware Replacement: $5–$20 per bracket or box of screws.
- Professional Structural Repair: $300–$1,000+. If a support post needs replacing, labor costs will be higher because the deck must be shored up during the swap.
Maintaining Your Deck
Rust is a slow-moving enemy. The best way to handle it is to inspect your deck twice a year—once in the spring and once in the fall. Look for small scratches in the paint on your railings and touch them up immediately.
It’s easy to forget these small tasks, but they save you major repairs later. You can use Casa to set reminders for seasonal deck inspections and store the specs of your deck's materials, so you always know what to buy.
Ready to get your home maintenance under control? Download the Casa app today.