The best part? You don't necessarily need to hire a professional. With the right tools and a little guidance, installing a smart doorbell is a very manageable DIY project that you can complete in under an hour.
Whether you've chosen a wired model that connects to your existing doorbell wiring or a flexible battery-powered one, we’re here to walk you through it. Think of us as your expert on the line, guiding you step-by-step to a successful installation. Let’s get started!
Before You Begin: A Quick Prep Checklist
A smooth installation starts with a little bit of prep. Answering these four questions will help you gather the right tools and choose the correct installation path for your home.
1. Wired or Battery-Powered?
Smart doorbells come in two main flavors:
- Wired: These models connect directly to the low-voltage wires from your existing doorbell.
- Pros: Continuous power (no batteries to charge), often more compact, and can usually ring your home's existing mechanical chime.
- Cons: Installation is slightly more involved, and you need to have existing, functional doorbell wiring.
- Battery-Powered: These are powered by a rechargeable battery pack.
- Pros: Extremely easy to install almost anywhere, as they don’t require any wiring.
- Cons: The battery needs to be removed and recharged every few months, depending on usage.
Your choice here will determine the exact installation steps you follow below.
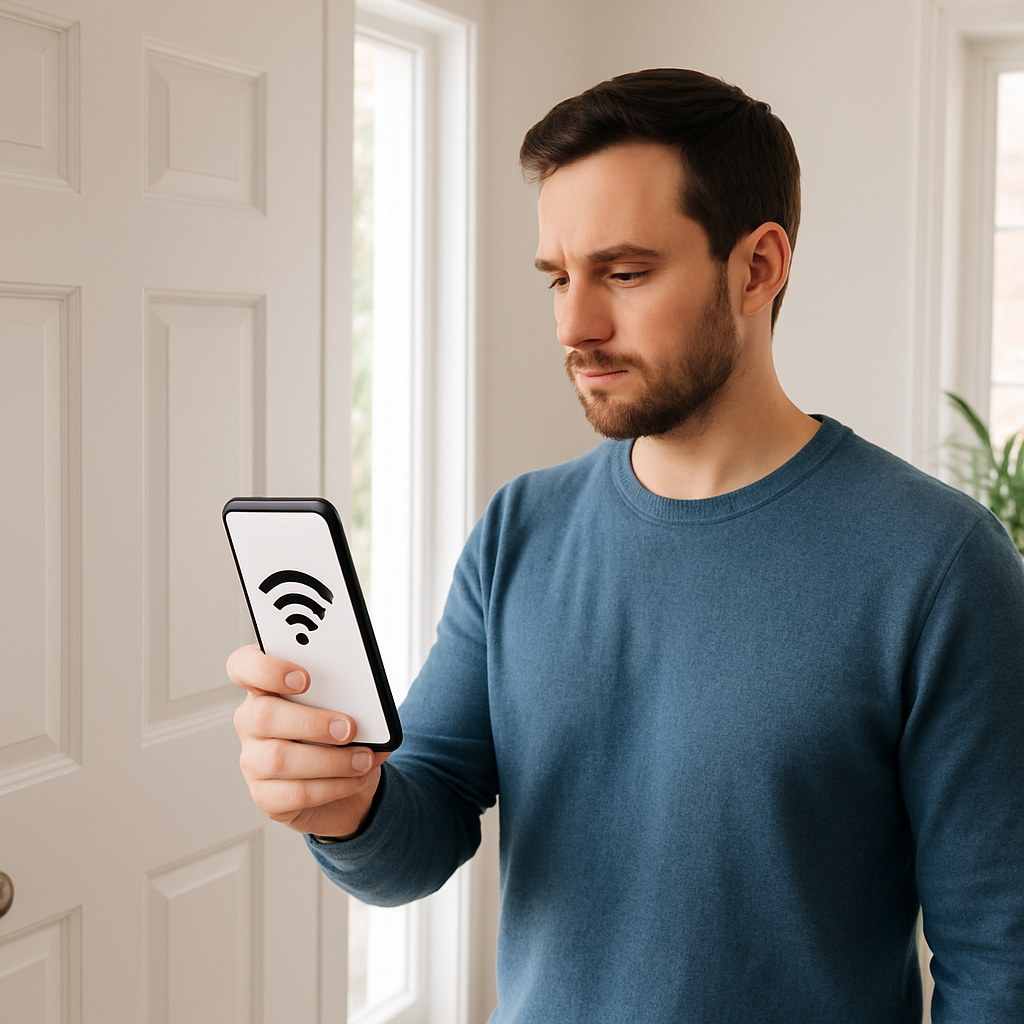
2. How Strong is Your Wi-Fi at the Front Door?
Your smart doorbell needs a stable Wi-Fi connection to send video and alerts to your phone. A weak signal will lead to laggy video and missed notifications. Here’s a simple test:
Stand outside where you plan to install the doorbell and look at the Wi-Fi indicator on your smartphone. You should have at least two, preferably three, bars of signal.
What if the signal is weak? Don't worry. A simple Wi-Fi range extender, plugged into an outlet halfway between your router and the front door, can significantly boost the signal and solve this common issue.
3. What is Your Mounting Surface?
Take a look at the wall where the doorbell will go. Is it wood siding, vinyl, or a harder material like brick, concrete, or stone?
- Wood or Vinyl: You'll just need a standard drill or a Phillips screwdriver.
- Brick, Stucco, or Masonry: You’ll need a more powerful drill (a hammer drill is ideal) and a special masonry drill bit to create the pilot holes.
4. Do You Have an Existing Doorbell?
If you're installing a wired model, having a working, wired doorbell already in place is a huge advantage. It means the necessary wiring and transformer are already set up. If you don't have an existing doorbell and want a wired one, the project becomes more complex and may require calling an electrician to run the necessary wires.
Step-by-Step Guide: How to Install Your Smart Doorbell
Once you’ve done your prep work, it’s time for the main event. We’ve broken down the instructions based on the type of doorbell and your wall surface.
Part 1: Installing a Battery-Powered Smart Doorbell
This is the most straightforward installation, perfect for renters or those without existing wiring.
First, charge the battery! Before you do anything else, take the battery pack and charge it fully using the included USB cable. This can take a few hours.
Mounting on Wood or Vinyl:
- Position the Bracket: Hold the mounting bracket against your door frame or siding at about eye level (48 inches from the ground is standard). Use a small level if you have one to make sure it’s straight.
- Mark the Holes: Use a pencil to mark where the screws will go.
- Attach the Bracket: Use a Phillips screwdriver or a drill to drive the included screws through the bracket and into the wall.
- Attach the Doorbell: Once the battery is charged and inserted, simply snap the smart doorbell unit onto the mounting bracket until it clicks securely into place.
Mounting on Brick, Stucco, or Masonry:
- Position and Mark: Hold the mounting bracket against the wall and mark the screw holes with a pencil.
- Drill the Holes: Put on your safety glasses. Using a hammer drill fitted with a masonry bit (the size specified in your doorbell’s manual, often ¼-inch), drill holes at the spots you marked.
- Insert Anchors: Gently tap the included wall anchors into the holes until they are flush with the wall.
- Attach the Bracket: Align the bracket over the anchors and use a Phillips screwdriver to fasten it securely with the provided screws.
- Attach the Doorbell: Snap the fully charged doorbell onto the bracket.
Part 2: Installing a Wired Smart Doorbell
This process involves working with electrical wiring. While it’s low-voltage and generally safe, the first and most important step is to turn off the power.
Safety First: Turn Off the Power
- Locate your home's electrical panel (breaker box).
- Find the breaker that controls your existing doorbell. It may be labeled "Doorbell," "Foyer," or might be part of a general circuit for that area of your home.
- If you're unsure which breaker it is, it's safest to turn off the main breaker for your whole house.
- Flip the correct breaker to the "OFF" position.
Mounting and Wiring:
The mounting process is the same as for the battery-powered models. Choose the appropriate section above ("Wood or Vinyl" or "Brick or Masonry") to attach the mounting bracket. Once the bracket is on the wall, it's time to wire it up.
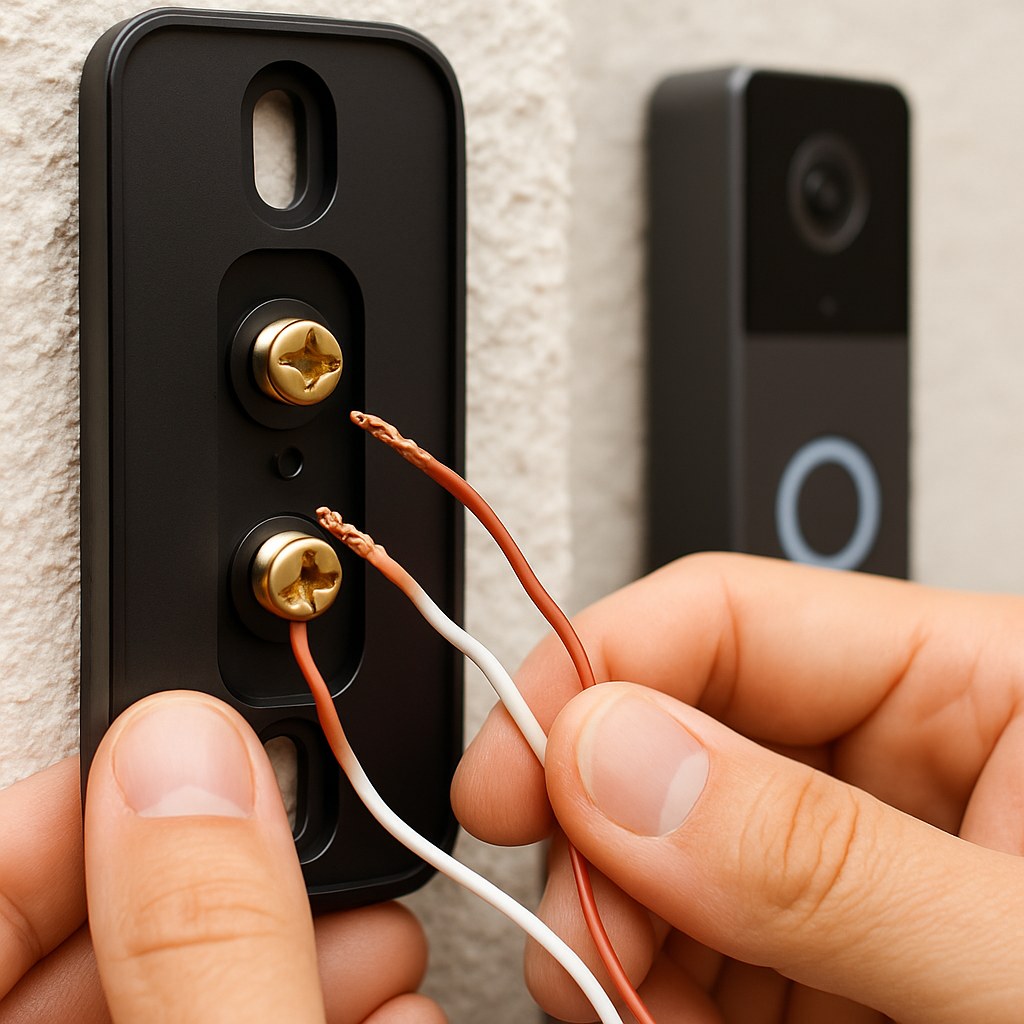
- Remove Your Old Doorbell: Unscrew your old doorbell button from the wall and gently pull it away. You should see two small wires attached to it.
- Disconnect the Wires: Loosen the screws holding the wires and detach them.
- Connect to the New Bracket: Thread the two existing wires through the center hole of your new smart doorbell's mounting bracket.
- Attach the Wires: Loosen the two terminal screws on the back of the bracket. Loop one wire around each screw (it doesn’t matter which wire goes to which screw) and tighten them securely.
- Attach the Doorbell: Neatly tuck the wires back into the wall and snap the smart doorbell unit onto the bracket.
- Restore Power: Go back to your electrical panel and flip the breaker back to the "ON" position. The doorbell should light up to indicate it has power.
Part 3: Connecting to Your Existing Chime (Wired Installs Only)
Most wired smart doorbells come with a small "power kit" or "chime connector." This little piece is essential for ensuring your existing indoor chime works correctly and the doorbell gets consistent power.
Again, make sure the power is off at the breaker before starting this step!
- Locate Your Chime Box: Find your indoor doorbell chime box. It’s usually a plastic or wood box mounted on a wall in a central location like a hallway or kitchen.
- Remove the Cover: Gently pull the cover off.
- Identify the Terminals: Inside, you'll see a few wires connected to screws. Look for the ones labeled "TRANS" (Transformer) and "FRONT" (for the front door).
- Connect the Power Kit: Loosen the "TRANS" and "FRONT" screws. Attach the wires from your new power kit to these same screws, following the specific instructions in your doorbell’s manual.
- Secure and Close: Tighten the screws and replace the chime cover. You can now turn the power back on.
Final Step for All Installations: The App
You’re on the home stretch! The final step is pairing the device with your phone.
- Download the manufacturer’s app for your doorbell (e.g., Ring, Google Home, Eufy).
- Create an account or log in.
- Follow the in-app instructions to add a new device. It will guide you through connecting the doorbell to your Wi-Fi network and customizing your settings for motion detection and notifications.
- Test it out! Press the button and make sure your indoor chime rings (if applicable) and that you get a notification on your phone.
How Much Does It Cost?
- DIY Cost: The main cost is the doorbell itself, which can range from $60 to $250. If you need to buy a masonry bit or rent a hammer drill, that might add another $20-$40.
- Professional Installation: If you're not comfortable with the wiring or drilling into masonry, hiring a pro is a great option. According to HomeGuide, an electrician or handyman typically charges between $100 and $250 to install a smart doorbell.
Your Home, Smarter and Safer
Congratulations! You’ve successfully installed your new smart doorbell and taken a big step in making your home more secure and convenient. You can now enjoy the peace of mind that comes with knowing who's at your door, anytime, anywhere.
Feeling empowered? For more guided DIY projects, home maintenance tips, and instant access to trusted professionals for those jobs you'd rather not handle, download the Casa app today. We’re here to help you manage your home with confidence.


