The truth is, replacing a circuit breaker is a very specific task that is manageable for many homeowners, provided you respect the panel and follow safety protocols strictly. It’s less about complex wiring and more about swapping a worn-out component for a matching new one.
This guide will walk you through the process calmly and clearly, helping you determine if it’s a simple swap or a sign of a larger issue.
Signs Your Circuit Breaker Needs Replacing
Before opening the panel, let’s confirm the breaker is actually the problem. Sometimes a breaker trips because it’s doing its job (protecting you from an overloaded circuit), not because it’s broken.
However, these symptoms usually point to a faulty hardware component:
- Repeated tripping: It trips even when you aren't running high-power appliances (like a vacuum or microwave).
- Physical damage: The breaker feels loose, wobbles when touched, or the handle won't stay in the "ON" position.
- Flickering lights: Power to that specific room is inconsistent.
- Burnt smell or marks: Note: If you see scorch marks or smell burning plastic at the panel, this is an emergency. Stop reading and call a professional immediately.
Safety First: The Golden Rules
Working inside an electrical panel requires focus. The "buss bar" (the metal strip behind the breakers) and the main lugs (where the big wires come in from the street) are live even when individual breakers are off.
- Always turn off the Main Breaker before removing the panel cover.
- Assume it's live until you test it.
- Stand on a dry surface.
- Use one hand when possible to avoid creating a circuit through your body.
If at any point you feel unsure or see melted wires, stop and call a pro.
Phase 1: Buy the Correct Replacement
You cannot simply buy "a 20-amp breaker." You must match the specific brand and type of your panel.
- Open the panel door and look for the manufacturer label (e.g., Square D, Siemens, Eaton/Cutler-Hammer).
- Identify the amperage on the handle of the bad breaker (usually 15, 20, or 30).
- Check the mounting style. Is it a standard "snap-in" or a "bolt-on" (held in by a screw)? Snap-in is most common in homes.
- Check the width. Is it a single switch (single-pole) or a double switch (double-pole)?
- Check for buttons. If the breaker has a "TEST" button, it is a GFCI or AFCI breaker and requires a specific replacement.
Pro Tip: Take a clear photo of the old breaker and the panel label to the hardware store to ensure you get the exact match.
Phase 3: Install the New Breaker
Now, we simply reverse the process.
1. Seat the New Breaker
- Snap-in: Hook the "foot" of the breaker into the mounting rail (the outer edge of the panel). Then, push the breaker firmly onto the center buss bar until you feel a solid click. It should align perfectly with the other breakers.
- Bolt-on: Align the breaker and tighten the mounting screw securely.
2. Connect the Wire
- Insert the bare metal end of the wire you removed earlier into the terminal slot of the new breaker.
- Tighten the terminal screw firmly. Give the wire a gentle tug to ensure it is tight—loose wires cause arcing and fires.
Note for GFCI/AFCI Breakers: These have a coiled white wire (pigtail). Connect this pigtail to the silver/neutral bar where all the other white wires are connected.
3. Close Up and Test
- Replace the panel cover and screw it back in.
- Turn the Main Breaker back ON.
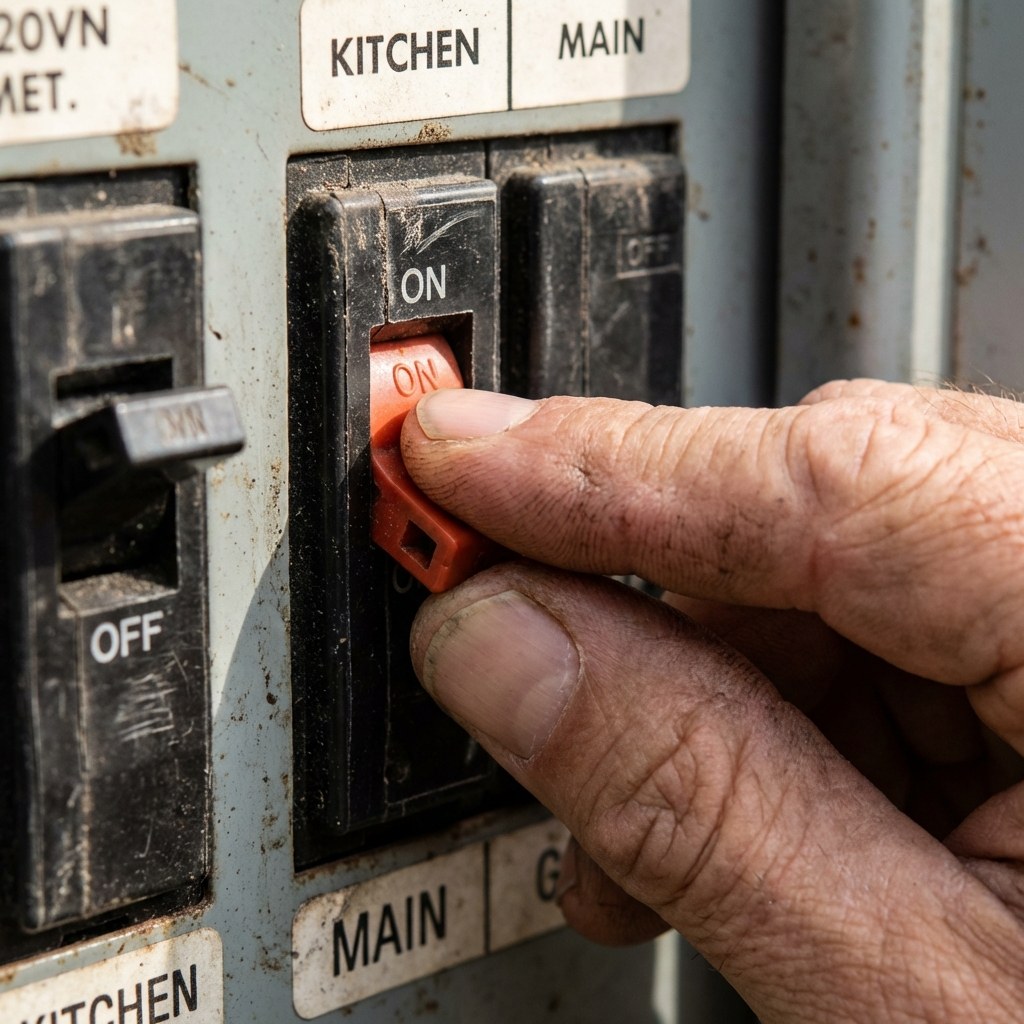
- Flip your new circuit breaker to the ON position.
- Listen: If it buzzes loudly or sparks, turn it off immediately.
- Go to the room controlled by that circuit and test a light or outlet.
When to Call a Professional
While replacing a breaker is a standard repair, electrical work has high stakes. Call a licensed electrician if:
- The buss bar behind the breaker looks pitted or burned.
- The wires are too short to reach the new breaker.
- The new breaker trips immediately after installation (this indicates a short circuit in your walls, not a bad breaker).
- You are uncomfortable working near live service lugs.
Time and Cost
- DIY Cost: $10–$60 for the breaker (AFCI/GFCI breakers are more expensive).
- Professional Cost: $150–$300 for a service call and installation.
- Time: 30–60 minutes.
Replacing a breaker can feel like a major victory for a homeowner. It restores safety and function to your home without a massive bill. Just remember: methodical caution is your best tool.
Keeping track of which breakers control which rooms can save you a headache later. The Casa app is a great place to store photos of your panel legend and notes on your home’s electrical layout, so you’re always prepared for the next project.
Go ahead and get your power back!


