
Mar 6, 2026
Why Is My Wallpaper Shrinking or Bubbling?
Discover why your wallpaper is showing gaps, bubbles, or peeling edges. Learn how to diagnose humidity issues and fix loose seams or wrinkles with this simple guide.
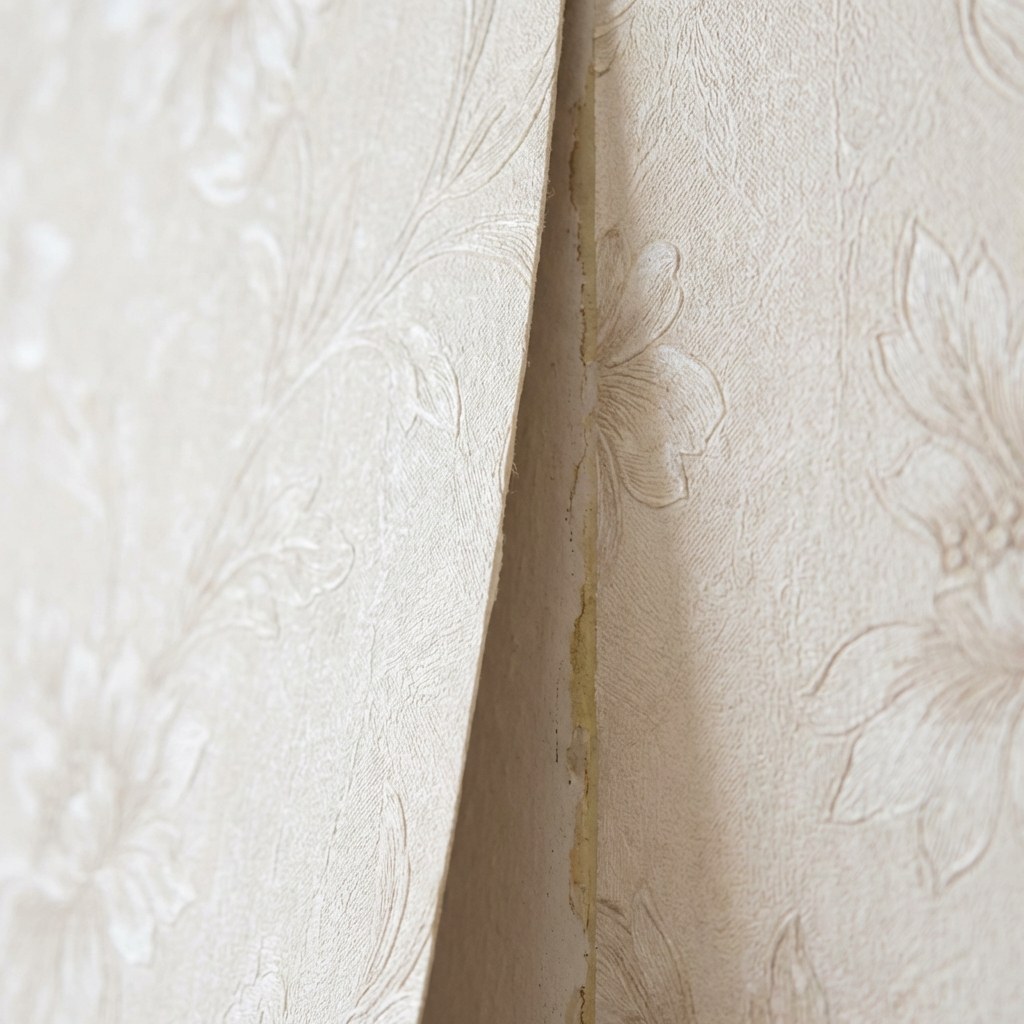
Walking into a room and noticing your wallpaper looking less than perfect can be disheartening. Maybe you see a thin vertical line of drywall peeking through a seam that used to be tight, or perhaps a bubble has appeared in the middle of a smooth panel.
Looking for more guidance? Take a look at our Repairs overview.
First, take a deep breath. Wallpaper isn't just a sticker; it’s a material that reacts to its environment. Like wood floors or door frames, wallpaper expands and contracts based on the temperature and moisture in your home.
It is very common for wallpaper to shift slightly as the seasons change or as a home settles. Most of the time, this isn't a sign of a disaster—it's just a sign that the room's environment needs a little adjustment, or that a specific spot needs a quick touch-up.
In this guide, we will help you figure out if your wallpaper is shrinking (pulling apart) or expanding (bubbling), and how to fix it without having to strip the whole wall.
What These Symptoms Usually Mean
Before you grab any tools, let’s look at what the wall is telling you. Wallpaper issues generally fall into two categories:
- Shrinking (Gaps at seams): This usually happens when the air is too dry, causing the paper to contract and pull away from the edges. It can also happen if the wall wasn't primed perfectly before application.
- Expanding (Bubbles or wrinkles): This often indicates high humidity or trapped moisture. The paper swells and has nowhere to go, so it lifts off the wall.
Watch out for moisture: If you see discolored water stains or smell a musty odor near the peeling wallpaper, stop. This isn't just an adhesive issue; it’s likely a leak or significant condensation problem that needs to be addressed before you worry about the paper.
Step-by-Step Diagnosis
Let’s figure out exactly what is happening so you can choose the right fix.
1. Observe the Wall
Stand back and look at the whole wall, then get up close.
- Check the seams: Are vertical gaps appearing where two sheets meet?
- Check the surface: Are there soft bubbles or wrinkles in the middle of a panel?
- Check the edges: Are the corners peeling up?
2. The Touch Test
- If you see gaps: Touch the seam. Is the paper brittle or very dry? Gently tug the loose edge—does the glue still hold at all, or is it totally dry?
- If you see bubbles: Press on the bubble. Does it feel like air, or is it squishy/damp?
- Smell test: Lean in. A musty, damp smell is a red flag for hidden water damage.
3. Check the Room Conditions
- Is it humid? Does the room feel sticky, or do windows fog up? (Common in bathrooms or basements).
- Is it dry? Is it the middle of winter with the heater blasting?
Once you’ve observed these factors, you can decide on your path forward.
Path A: If Your Wallpaper is Shrinking (Gaps at Seams)
If the seams are pulling apart, the paper has likely dried out and contracted.
Safe to try yourself:
- Stabilize humidity: If the air is very dry, try adding moisture back into the room. Run a humidifier to get the room to about 40-55% relative humidity. Sometimes, re-hydrating the room allows the paper to relax and the seams to close up on their own over a week.
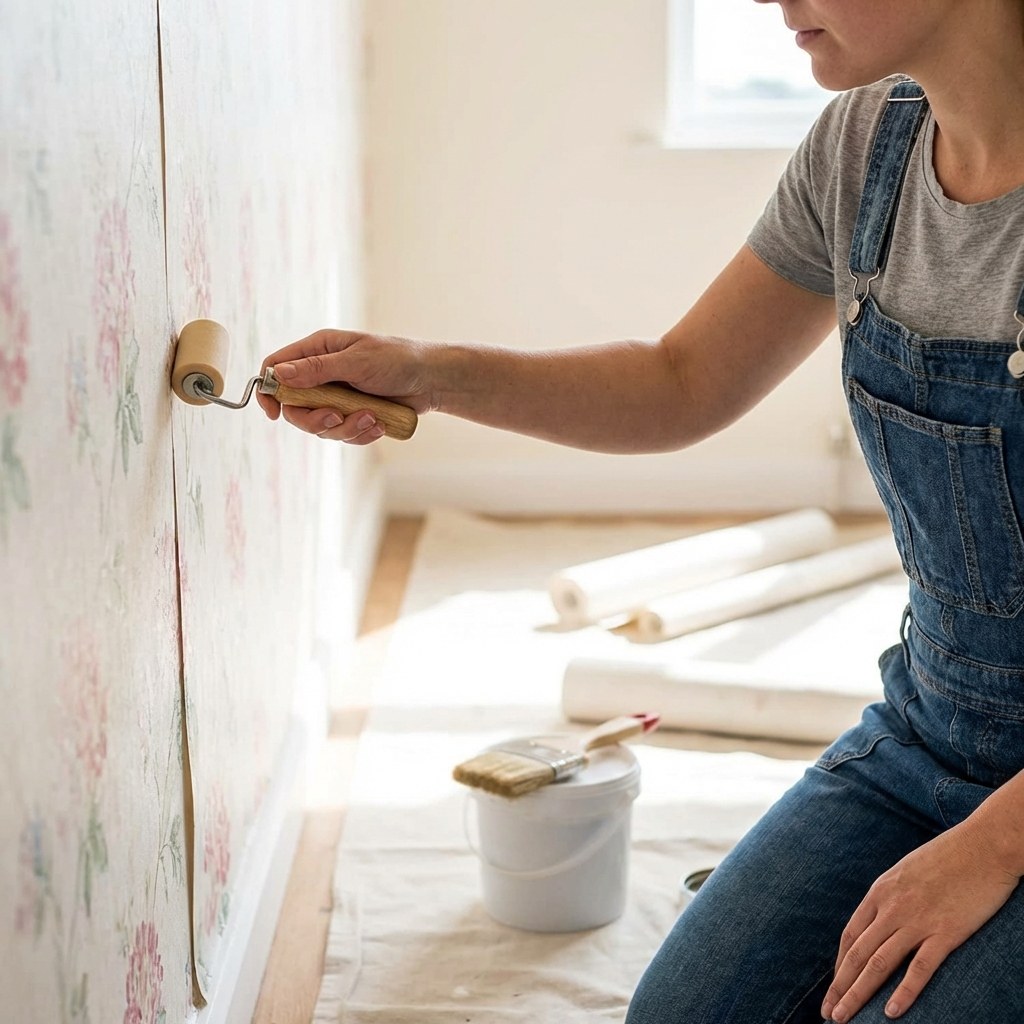
- Re-adhere seams: If the gap is small and stable, you can glue it back down.
- Lift the loose edge gently with a utility knife.
- Use a small artist's brush to apply a thin layer of wallpaper adhesive (repair adhesive specifically for borders or seams works best).
- Press the seam back down firmly.
- Use a seam roller to flatten it and wipe away excess glue with a damp cloth.
When to call a pro: If the gaps are wide (more than 1/16th of an inch) or if the paper is tearing as it shrinks, the adhesive has likely failed completely. A professional may need to remove and re-hang the affected strips.
Path B: If Your Wallpaper is Expanding (Bubbles/Wrinkles)
If the paper is bubbling, it has expanded due to moisture or trapped air.
Safe to try yourself:
- Improve ventilation: If the room is humid, open windows, run exhaust fans, or use a dehumidifier to get humidity below 55%.
- The "Syringe" Method: For stubborn air bubbles that aren't caused by a leak:
- Use a sharp utility knife to make a tiny slit in the center of the bubble.
- Inject a small amount of wallpaper paste using a glue syringe (available at hardware stores).
- Use a roller to push the air out through the slit and flatten the paper.
- Wipe away excess paste.
When to stop: If you find dampness behind the paper, see dark mold spots, or smell mildew, stop immediately. Do not just glue it back down. You need to identify the water source. This is usually a job for a general contractor or a plumber if a pipe is involved.
What to Expect: Time and Cost
Handling minor wallpaper repairs is very low-cost and quick.
- Time:
- Inspection: 10 minutes.
- Seam Repair: 30 minutes of work, plus 24 hours to dry.
- Humidity Adjustment: Active time is minimal, but you may need to monitor the room for a week.
- Cost:
- DIY Supplies: $15–$30 (Seam repair adhesive, small roller, syringe).
- Professional Repair: $150–$300 minimum for a service call, depending on the extent of the damage.
Recap
Wallpaper isn't static; it moves with your home's environment. Small gaps often mean it's too dry, while bubbles usually mean it's too humid. By managing the room's climate and performing small spot repairs, you can keep your walls looking fresh without a full renovation.
Keeping track of when these issues appear can help you prevent them in the future. You can use the Casa app to log when you notice seasonal changes in your home's humidity or to save the specific brand of wallpaper adhesive you used for future touch-ups.
Being proactive about these small changes protects your investment and keeps your home looking its best.
(Download the Casa app today to keep all your home maintenance details in one calm, organized place.)